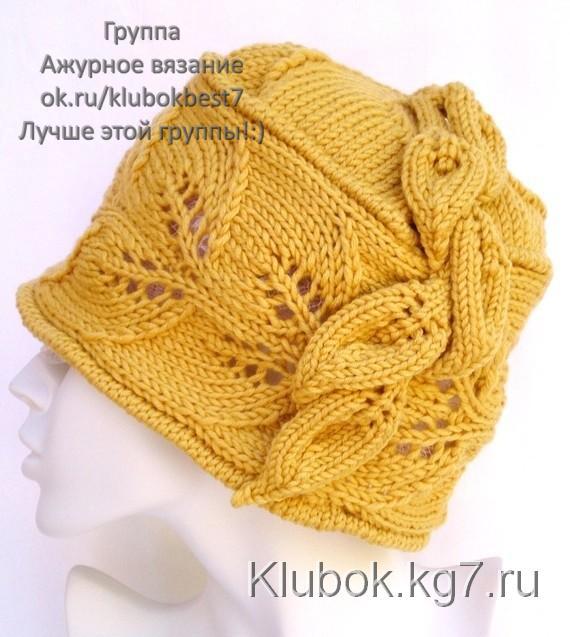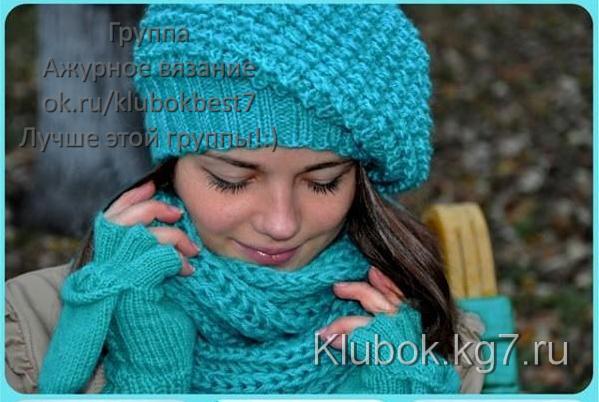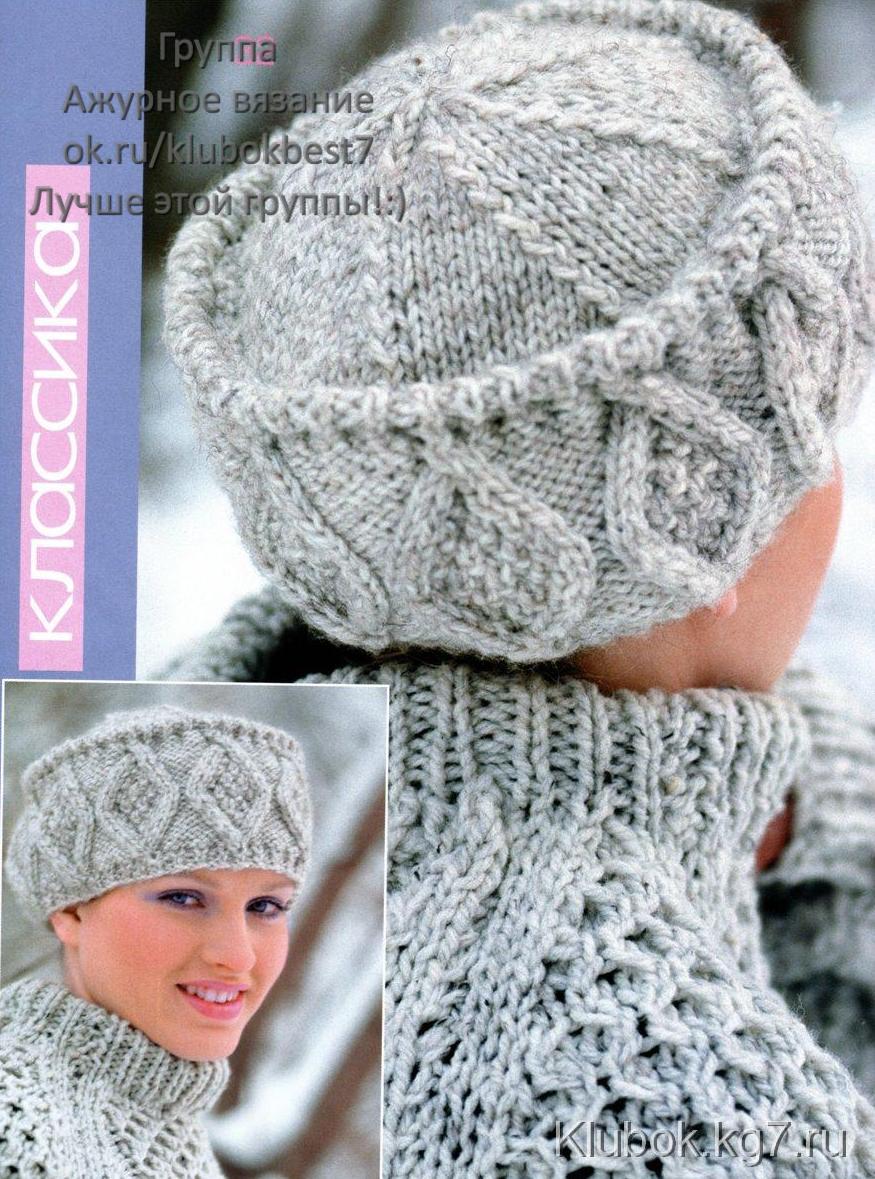




An extraordinarily beautiful hat.
Added: 08.02.2015 в 07:42 Views: 119722
An extraordinarily beautiful hat.Klubokhttp://klubok.work/1/1/5666/Klubokhttps://klubok.work/css/image/top-logo-en.png
No descriptions for this hat were found on the internet, so we present our vision of knitting this item.
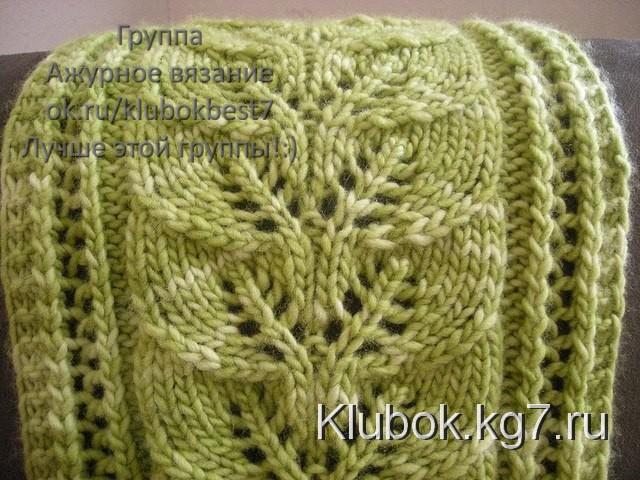
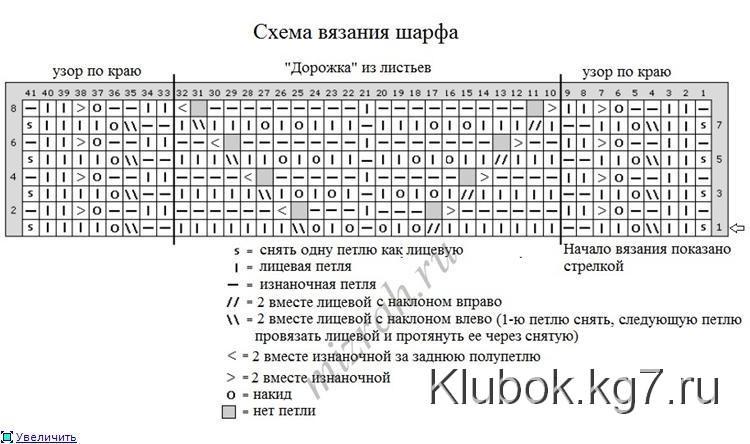
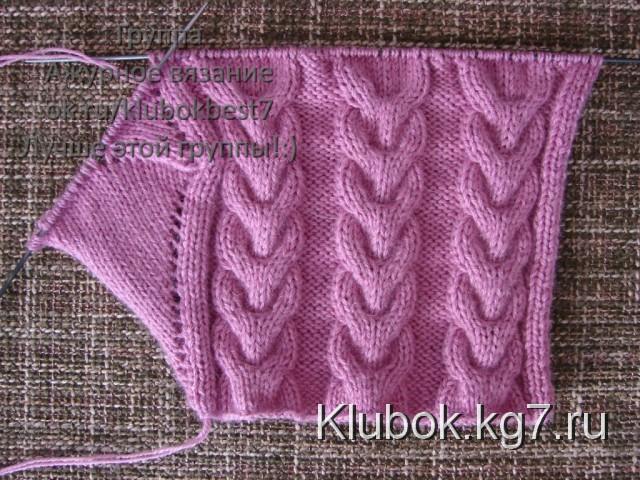
Measuring the width of the head size, we start knitting the main part. For this, we cast on 27 stitches including the edge stitches. Then, according to the pattern.
Legend:
-
1. s- slip one stitch as if to knit
-
2. | knit stitch
-
3. – purl stitch
-
4. // 2 together knit with a right tilt
- 5. 2 together knit with a left tilt
- 6. < 2 together purl through the back loop
- 7. > 2 together purl
-
O - yarn over
After reaching the required width, we close the stitches. Then we cast on stitches across the entire width and knit, alternating rows of knit and purl, until the height of the knitted leaf strip is reached. After that, we fold and sew it up so that the edge is visible. Then we knit the crown.
The idea is this: the beret is knitted clockwise (the seam is assumed to be at the back), while simultaneously increasing one new wedge and decreasing the previous one (of course, for the first wedge, only increasing is done).
The process of performing the wedge is elementary:
1) We form the first wedge. In each knit row, we knit 1 yarn over + the number of knit stitches accumulated from yarn overs in previous rows. That is, in the first row, just 1 yarn over, in the second 1 yarn over + 1 knit, in the third - 1 yarn over + 2 knits, and so on.
2) We knit the subsequent wedges. It is assumed that there will be 6 of them. But I think no one is limited in any way.
To form the next wedge in each knit row, we knit 1 yarn over + the number of knit stitches accumulated from yarn overs in previous rows + 2 together knit and turn the work without finishing the row.
That is, the first row of the new wedge will be 1 yarn over + 2 together knit - turn the work, the second row: 1 yarn over + 1 knit + 2 together knit - turn the work, and so on.
Thus, the previous wedge is decreased, and a new one is formed.
When closing the stitches of the last wedge, I did it this way: I closed the stitch, took a stitch from the yarn over and immediately closed it, closed the main stitch again, took from the yarn over again and closed it, and so on. Maybe there is a more correct way, but this one worked too.
Then we knit the decoration for the hat - the leaves. The leaves are from here.
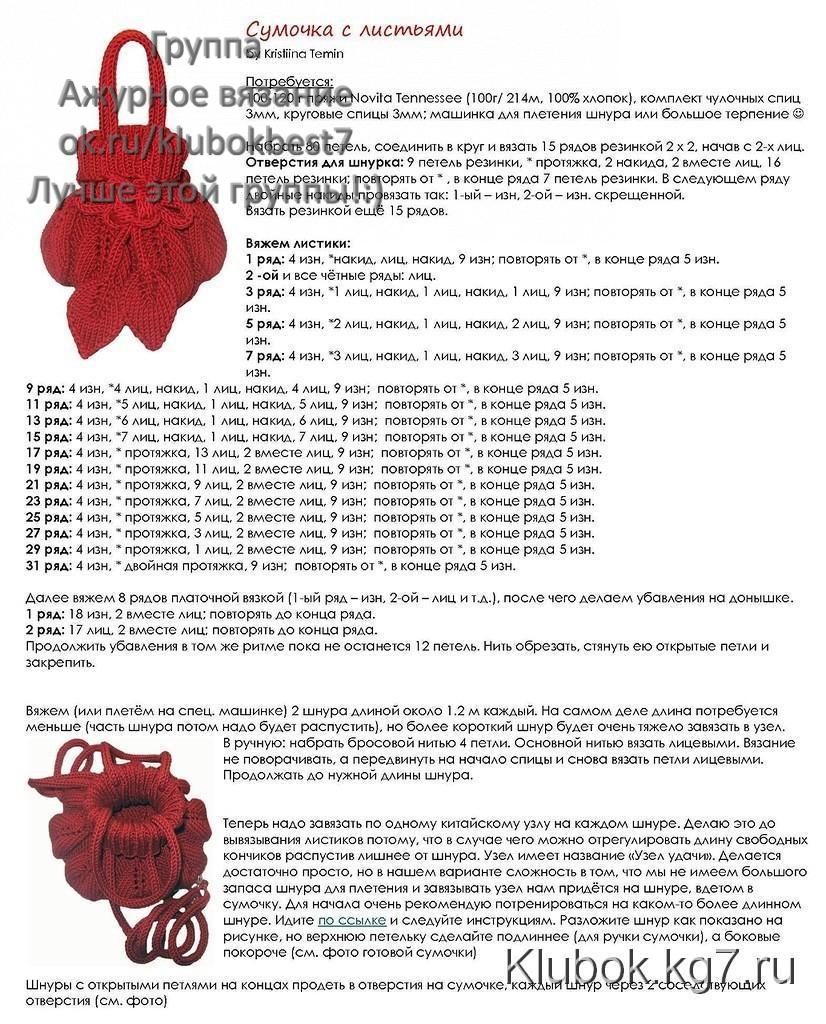
Bag with leaves
By Kristiina Tammis
You will need:
100-120 g of Novita Tennessee yarn (100g/214m, 100% cotton), a set of 3mm double-pointed needles, 3mm circular needles; a cord knitting machine or great patience ☺
Cast on 80 stitches, join in the round and knit 15 rows of ribbing 2 x 2, starting with 2 knits.
Holes for the cord: 9 rib stitches, *yarn over, 2 yarn overs, 2 together knit, 16 rib stitches; repeat from *; at the end of the row 7 rib stitches. In the next row, knit the double yarn overs like this: 1 purl, 2nd purl twisted.
Knit ribbing for another 15 rows.
Knit the leaves:
Row 1: 4 purl, *yarn over, 1 knit, yarn over, 9 purl; repeat from *, at the end of the row 5 purl.
Row 2: knit all stitches as they appear.
Row 3: 4 purl, *1 knit, yarn over, 1 knit, yarn over, 1 knit, 9 purl; repeat from *, at the end of the row 5 purl.
Row 4: knit all stitches as they appear.
Row 5: 4 purl, *2 knit, yarn over, 1 knit, yarn over, 2 knit, 9 purl; repeat from *, at the end of the row 5 purl.
Row 6: knit all stitches as they appear.
Row 7: 4 purl, *3 knit, yarn over, 1 knit, yarn over, 3 knit, 9 purl; repeat from *, at the end of the row 5 purl.
Row 8: knit all stitches as they appear.
Row 9: 4 purl, *4 knit, yarn over, 1 knit, yarn over, 4 knit, 9 purl; repeat from *, at the end of the row 5 purl.
Row 10: knit all stitches as they appear.
Row 11: 4 purl, *5 knit, yarn over, 1 knit, yarn over, 5 knit, 9 purl; repeat from *, at the end of the row 5 purl.
Row 13: 4 purl, *6 knit, yarn over, 1 knit, yarn over, 6 knit, 9 purl; repeat from *, at the end of the row 5 purl.
Row 15: 4 purl, *7 knit, yarn over, 1 knit, yarn over, 7 knit, 9 purl; repeat from *, at the end of the row 5 purl.
Row 17: 4 purl, *8 knit, yarn over, 1 knit, yarn over, 8 knit, 9 purl; repeat from *, at the end of the row 5 purl.
Row 19: 4 purl, *9 knit, yarn over, 1 knit, yarn over, 9 knit, 9 purl; repeat from *, at the end of the row 5 purl.
Row 21: 4 purl, *yarn over, 9 knit, 2 together knit, 9 purl; repeat from *, at the end of the row 5 purl.
Row 23: 4 purl, *yarn over, 7 knit, 2 together knit, 9 purl; repeat from *, at the end of the row 5 purl.
Row 25: 4 purl, *yarn over, 5 knit, 2 together knit, 9 purl; repeat from *, at the end of the row 5 purl.
Row 27: 4 purl, *yarn over, 3 knit, 2 together knit, 9 purl; repeat from *, at the end of the row 5 purl.
Row 29: 4 purl, *yarn over, 1 knit, 2 together knit, 9 purl; repeat from *, at the end of the row 5 purl.
Row 31: 4 purl, *2 together knit, 9 purl; repeat from *, at the end of the row 5 purl.
Next, we knit 8 rows of garter stitch (1st row – purl, 2nd – knit, etc.), after which we make decreases at the bottom.
Row 1: 18 knit, 2 together knit; repeat to the end of the row.
Row 2: 17 knit, 2 together knit; repeat to the end of the row.
Continue decreasing in the same rhythm until 12 stitches remain. Cut the yarn, pull it through the remaining stitches and secure it.
Knit (or braid on a special machine) 2 cords about 1.2 m long each. In fact, fewer cords will be needed (part of the cord will later need to be unraveled), but a shorter cord will be very difficult to tie into a knot.
By hand: cast on 4 stitches with a waste yarn. Knit with the main yarn, do not turn the work, but twist it back to the beginning of the needle and knit the stitches knitwise again. Continue until the desired length of the cord is reached.
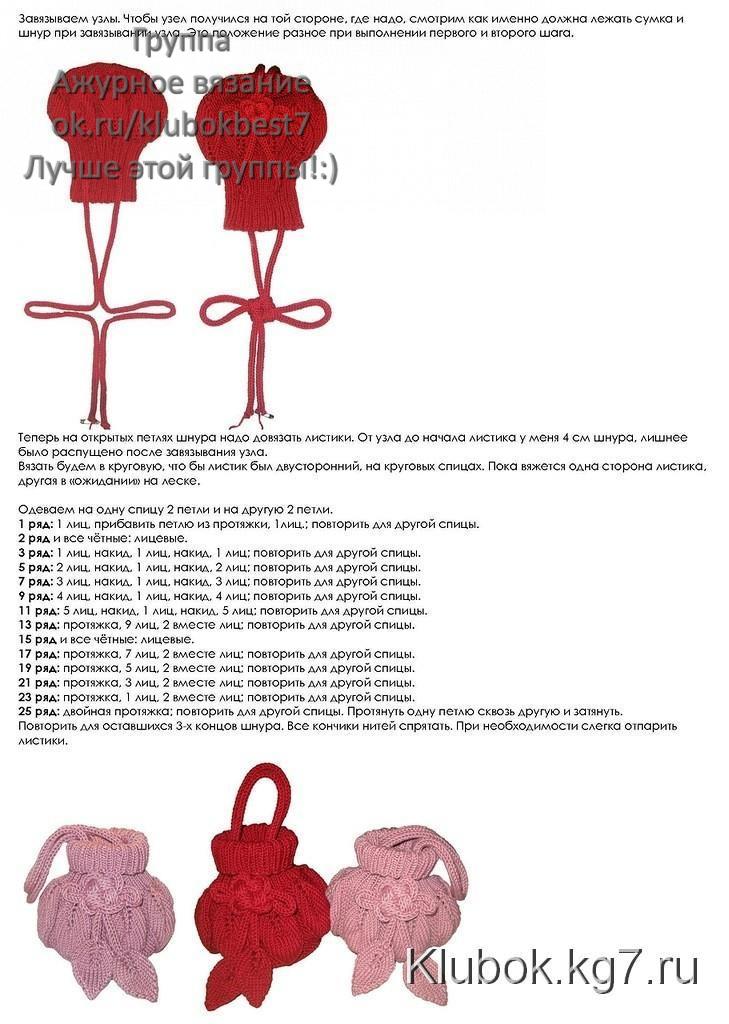
At the ends of the cords, tie one Chinese knot on each cord. I do this before knitting the leaves because if you tie the knot later, you can adjust the length of the free ends to tie the cord on the bag. The knot can also be tied later ☺. The knot is made like this:
take the end of the cord in your left hand, in your right hand – a pencil, wrap the cord around the pencil counterclockwise 2 times, while the end of the cord (its tip) should be facing you. Then pass the end of the cord inside these loops on the pencil. Remove the loops from the pencil, form the knot and tighten. Adjust the knot if necessary. For the bag handle, knit or braid a cord about 70 cm long and sew it to the bag. Go to the link (the link is clickable in the pdf file) to see how to braid the cord.
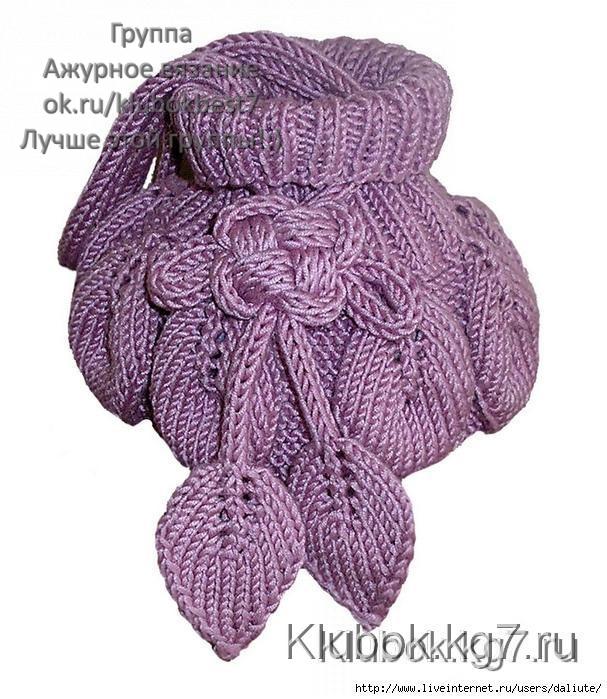
Pass the cords with open stitches at the ends through the holes on the bag, each cord through 2 adjacent holes (see photo).


Beautifully arrange the leaves, sew them on. Put on the hat... Oh! It suits you! You’re beautiful!