Neckline binding
Added: 03.02.2016 в 01:24 Views: 38405
Neckline bindingKlubokhttp://klubok.work/1/203/6160/Klubokhttps://klubok.work/css/image/top-logo-en.png
Start the set of bias stitches from the right shoulder edge: along the vertical side seams — based on 3 stitches for each section of 4 rows, along the horizontal bottom edges — from each closed stitch, 1 stitch (or from each open stitch if you do not close the stitches while knitting, but leave them on a holder).
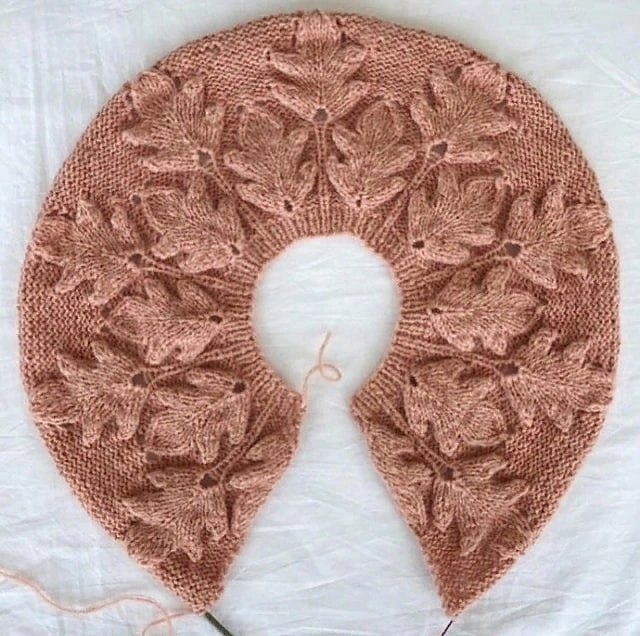
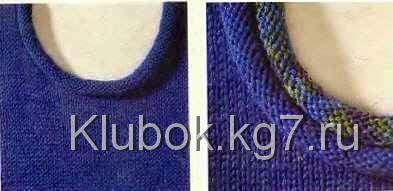
Knit 1 round of knit stitches and mark the corner stitches. Then knit alternately 1 knit and 1 purl, so that the corner stitches are knit stitches (if necessary, add 1 stitch, correspondingly decrease). In each row of ribbing (for thick yarn in every 2nd row), slip the corner and previous stitches together, as when knitting knit stitches, knit the next stitch knit and pull the slipped stitches through it (see the corner fragment in the small photo). Having knitted the bias to the desired width, close the stitches, performing the corner decreases as well while securing the stitches.
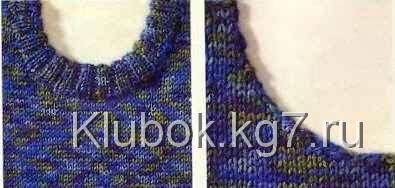
When knitting the neckline, it is important that the rounding line is smooth (see the neckline fragment in the photo on the right).
After processing the knitted parts and making the seams, cast on stitches along the edge of the neckline on the appropriate circular needles. The simplest way: divide the edge into sections of 10 cm and on each cast on stitches based on — the number of stitches according to the calculated knitting density, plus 3-4 stitches.
For knitting bias tape in 2x2 ribbing (alternating 2 knit, 2 purl), the number of stitches must be a multiple of 4, and for 1x1 ribbing (alternating 1 knit, 1 purl) — a multiple of 2. Having knitted the bias tape double width, close the stitches loosely. Cut the yarn, leaving an end equal to three times the length of the neckline edge. Fold the bias tape in half, turning it inside, and pin it. Sew the closed edge of the bias tape to the edge of the neckline with a slip stitch.
Bias Tape with Italian Edge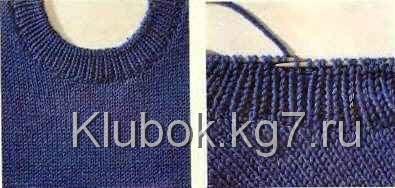
Start as a double bias tape, but for the ribbing knit alternately 1 knit and 1 purl. For the last 4 rows, use needles one size smaller. When knitting in the round in the 1st of the last 4 rows, slip each knit stitch as when knitting knit stitches, pulling the yarn behind the stitch (see photo on the right), knit the purl stitches as purls. In the next row, slip each purl stitch as when knitting purl stitches, pulling the yarn in front of the stitch, knit the knit stitches as knits. Repeat these 2 rows once more. When knitting in both directions in the last 4 rows, slip the purl stitches as when knitting purl stitches and pull the yarn in front of the stitch, knit the knit stitches as knits. Then secure the stitches of the last row with a needle.
Cast on stitches along the edge of the neckline — see Double Bias Tape.
For bias tape that is knitted in the round, work about 5 cm in knit stitches and close the stitches loosely. The bias tape twists to the right side.
For bias tape that is knitted back and forth, the same number of centimeters is worked in stockinette stitch. Photo on the right: double rolled bias tape. Along the cast-on row of the first rolled bias tape, cast on stitches, but on each section of 10 cm — about 3 stitches less. After completing the 2nd rolled bias tape, the neckline will be reduced. Knit the 2nd rolled bias tape with a width of 6-6.5 cm and close the stitches.
Bias Tape with Corner Knit Stitch
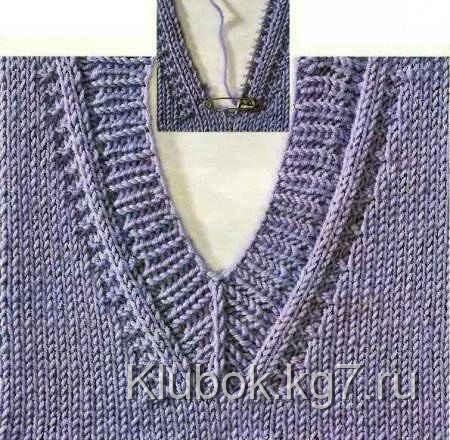
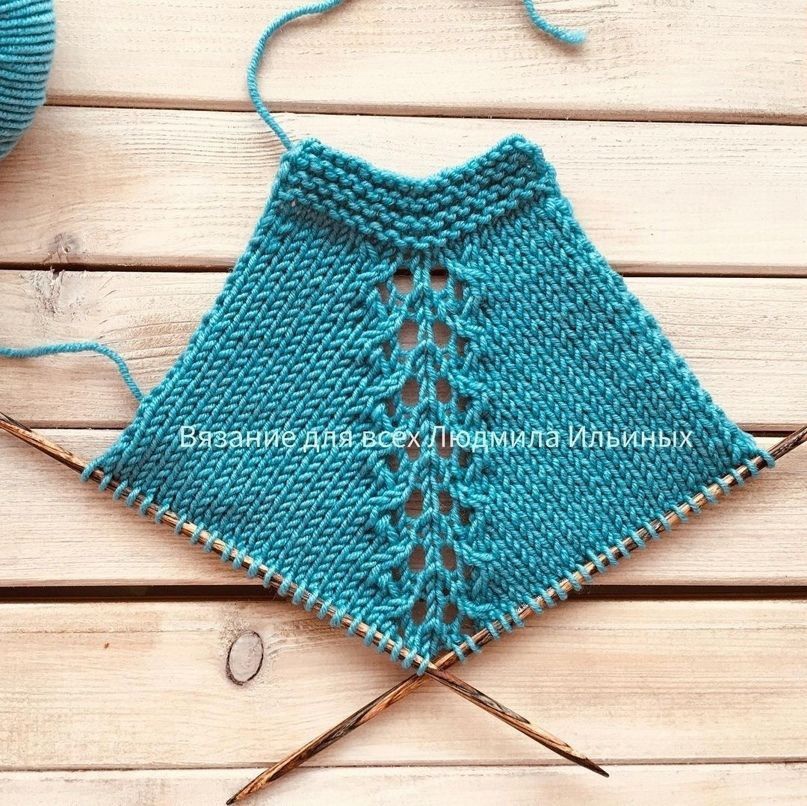
The number of stitches for the front must be odd. To form a U-shaped neckline, transfer the middle stitch of the front to a stitch holder and first finish the left side. For the slope, knit the 6th and 5th stitches before the center stitch as purls, knit the next stitch as a purl, and knit 3 stitches before the center stitch as knits. In the purl rows, knit all stitches as purls. Repeat these decreases for this neckline design in every subsequent 4th row. In the knit rows without decreases, knit the purl stitches above the purls (= 2 stitches) as purls. Finish the right side symmetrically.
After processing the knitted parts and making the seams, cast on stitches for the bias tape on circular needles (start from the shoulder seam, see the neckline fragment in the small photo) and join the stitch from the stitch holder = the number of stitches a multiple of 2. Knit 1 round of knit stitches. Then knit alternately 1 knit and 1 purl, so that there is 1 knit stitch on the middle stitch. In the 1st row of ribbing, slip the middle and previous stitches together as when knitting knit stitches, knit the next stitch as a knit and pull both slipped stitches through it. Perform this decrease in every row (including when securing the stitches of the last row).
Bias Tape with Two Corner Knit Stitches
The number of stitches for the front must be even. To form a /-shaped neckline, transfer both middle stitches of the front to a stitch holder and first finish the left side. For the slope, knit the 3rd and 2nd stitches before the middle stitches together as purls, knit the next stitch as a purl. In the purl rows, knit the stitches according to the pattern. Repeat this decrease in every subsequent 4th row. In the knit rows without decreases, knit the last 2 stitches as purls. Finish the right side symmetrically. After processing the knitted parts and making the seams, cast on stitches for the bias tape on circular needles (start from the shoulder seam). The number of stitches should be a multiple of 4. Knit 1 round of knit stitches, then knit alternately 2 knits and 2 purls, with the middle 2 stitches being 2 knit stitches. In the 1st row of ribbing, knit the 1st middle stitch and the previous stitch together as a knit, the 2nd middle stitch and the next stitch together with a left-leaning decrease = slip the 2nd middle stitch as when knitting knit stitches, knit the next stitch as a knit and pull the slipped stitch through it. Perform these decreases in every row (including when securing the stitches of the last row).
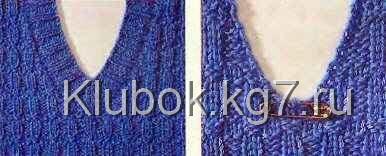
Bias Tape with Crossed Ends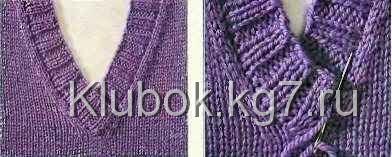
The number of stitches for the front must be even. Divide the stitches in the middle and first finish the left side. To create the slope, knit the 4th and 3rd stitches from the inside together as knits. Repeat this decrease in every subsequent 4th row. Finish the right side symmetrically, that is, for the decreases, knit the 3rd and 4th stitches from the inside together in the same rhythm, but with a left-leaning decrease (slip the 3rd stitch as when knitting knit stitches, knit the 4th stitch as a knit and pull the slipped stitch through it).
After processing the knitted parts and making the seams, cast on stitches for the bias tape on circular needles (start from the tip of the corner). The number of stitches should be a multiple of 4 + 2 stitches. Knit in both directions. First, perform 1 purl row with purl stitches, then knit alternately 2 knits and 2 purls. In the purl rows, knit the stitches according to the pattern. Having knitted the bias tape to the desired width, close the stitches. Cross the ends of the bias tape, placing the right end over the left. Sew the upper end with a vertical (mattress) bind-off stitch (see photo on the right), and the lower end with a slip stitch along the edge of the neckline.
Bias Tape, Knitted as One Piece with the Front Bias tape is made in a seed stitch pattern: knit alternately 1 knit and 1 purl, shifting the pattern by 1 stitch in every 2nd row.
The number of stitches for the front must be even. Mark the middle 8 stitches. Before the marked stitches, divide the work and finish the left side first. To create the neckline slope, knit 2 stitches on the left side before the marked stitches together with a left-leaning decrease, and then cast on 8 stitches for the bias tape. Knit the first 7 stitches of the bias tape in seed stitch, the last stitch is the edge stitch. Repeat the decreases for the slope in every subsequent 4th row.
Finish the right side symmetrically. The 1st marked stitch is the edge stitch, on the next 7 stitches (= the bias tape stitches) knit in seed stitch. For the slope, knit the next 2 stitches together as knits. Sew the inner end of the bias tape along the cast-on edge with a slip stitch (see photo on the right). The one-piece knitted bias tape for the front can be continued and knitted for the back bias tape.