KNITTING A SLEEVE WITH NEEDLES. HOW TO CLOSE AND DECREASE STITCHES WHEN SHAPING THE ARMHOLE.
Added: 09.02.2016 в 05:32 Views: 38879
KNITTING A SLEEVE WITH NEEDLES. HOW TO CLOSE AND DECREASE STITCHES WHEN SHAPING THE ARMHOLE.Klubokhttp://klubok.work/1/203/6187/Klubokhttps://klubok.work/css/image/top-logo-en.png
KNITTING THE SLEEVE WITH NEEDLES. HOW TO CLOSE AND DECREASE STITCHES WHEN SHAPING THE ARMHOLE
When shaping the armhole, it is necessary to close and decrease a certain number of stitches (read here how to calculate the number of decreased stitches). Close stitches at the beginning of the row, performing decreases that shape the armhole either within the row or at the edges. This creates a decorative effect (e.g., a border directed to the left or right). How to close stitches at the beginning of the armhole On the right side of the work, close the first stitches (the number of stitches is indicated in the work description). Slip 1 stitch without knitting, knit the next one according to the pattern and pull it through the slipped stitch. Continue knitting according to the pattern, finishing the row, turn the work. On the wrong side, close the stitches in the same way. (Fig 1.)

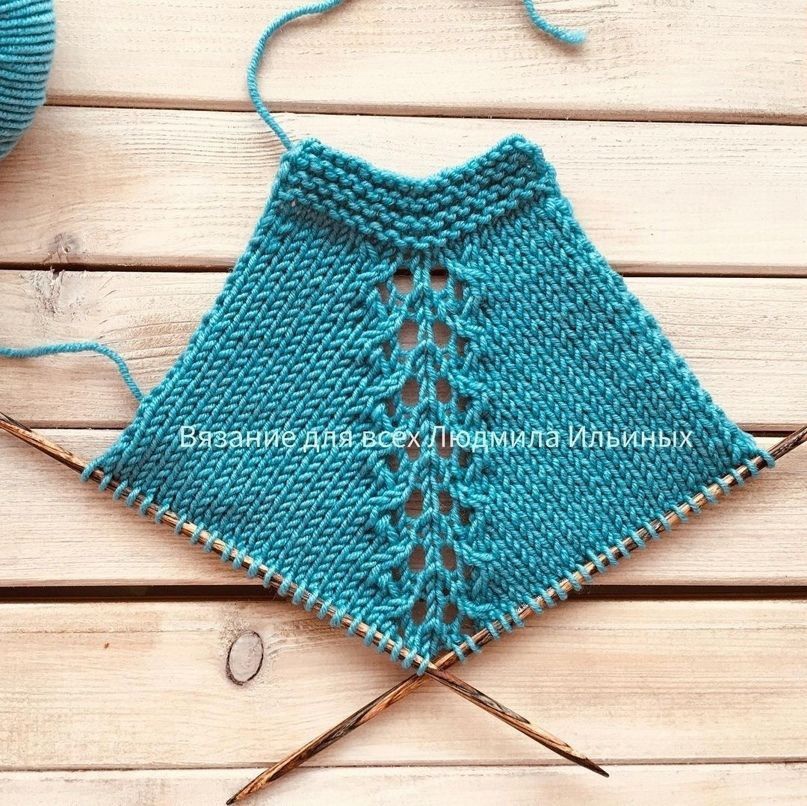
Decreasing stitches with needles within the row on the right To finish the armhole, decrease 1 - 2 stitches after 2 or 3 edge stitches of the row. On the right side of the work (at the beginning of the row), knit 2 - 3 stitches according to the pattern and then 2 - 3 stitches together with a left slant. To do this, slip the stitch as for knitting the front without knitting, knit 1 front, pull the front through the slipped stitch. (Fig 2.)

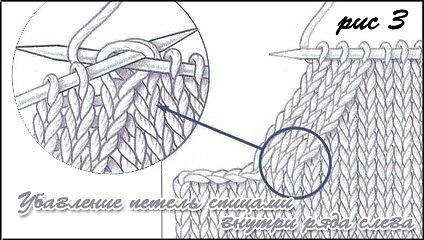
Decreasing stitches with needles within the row on the left On the right side of the work (at the end of the row), knit according to the pattern until 4 - 5 last stitches. Then knit 2 - 3 stitches together as front stitches, then knit the last 2 - 3 stitches according to the pattern. (Fig 3.)
Now you know how to close and decrease stitches when shaping the armhole. In the next knitting lesson, we will cover increasing and decreasing stitches with needles within the fabric and at the edges.

Decreasing stitches with needles within the row on the right To finish the armhole, decrease 1 - 2 stitches after 2 or 3 edge stitches of the row. On the right side of the work (at the beginning of the row), knit 2 - 3 stitches according to the pattern and then 2 - 3 stitches together with a left slant. To do this, slip the stitch as for knitting the front without knitting, knit 1 front, pull the front through the slipped stitch. (Fig 2.)

Decreasing stitches with needles within the row on the left On the right side of the work (at the end of the row), knit according to the pattern until 4 - 5 last stitches. Then knit 2 - 3 stitches together as front stitches, then knit the last 2 - 3 stitches according to the pattern. (Fig 3.)

Now you know how to close and decrease stitches when shaping the armhole. In the next knitting lesson, we will cover increasing and decreasing stitches with needles within the fabric and at the edges.
Category: Useful tips