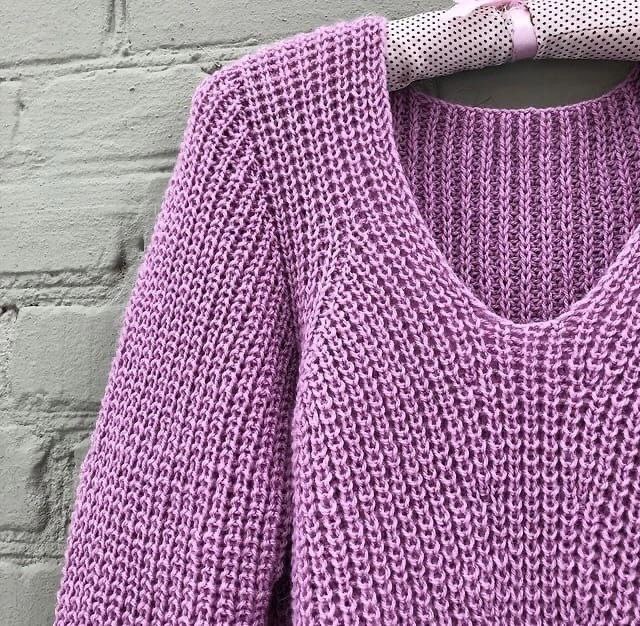
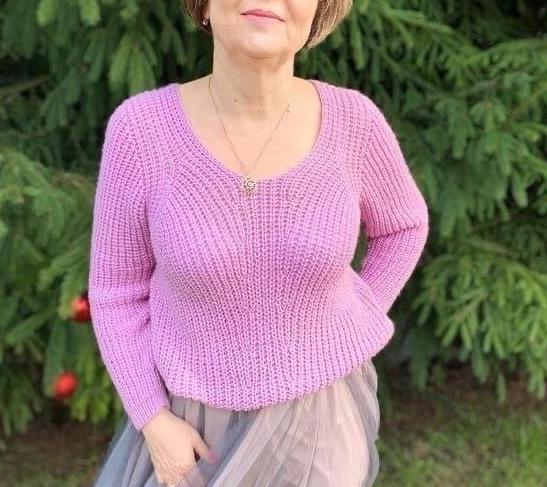
Half-braid stitch sweater
Added: 17.07.2025 в 15:32 Views: 282
Half-braid stitch sweaterKlubokhttp://klubok.work/1/3/8905/Klubokhttps://klubok.work/css/image/top-logo-en.png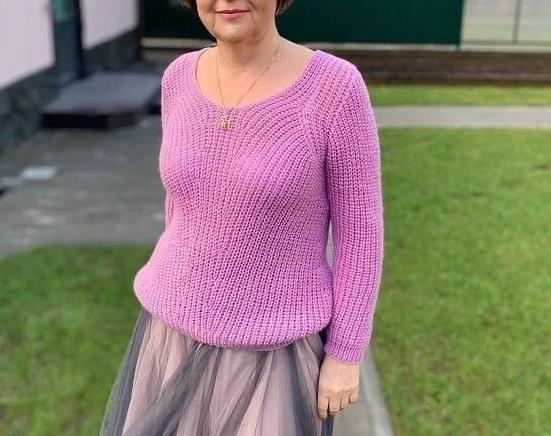
Size: 48
Category: Sweaters and pullovers
Yarn and Tools
-
Yarn: Semyonovskaya "Olga" (half-wool, 50% wool / 50% acrylic), 392 m / 100 g
-
Consumption: ~350 g
-
Needles: No. 4
Yarn with acrylic is not my favorite, but in this model it performed well. The only nuance is that the item stretched about one size, consider this in your calculations.
Construction
The sweater is knitted in the round, from bottom to top, without seams, using half-patent ribbing. First the body, then separately the front and back, followed by the sleeves.
Body
-
Cast on 210 stitches: 105 for the front, 105 for the back.
-
Knit 1x1 ribbing for about 5 cm.
-
In the last row of ribbing, place markers:
-
1st marker — beginning of the round, the round starts with a purl stitch
-
2nd — after 49 stitches
-
3rd — after 7 stitches (center)
-
4th — another 49 stitches later
-
The last stitch before the 4th marker is also a purl (total of 105 stitches for the back)
-
Transition to Half-Patent Ribbing
-
Continue knitting with half-patent ribbing.
-
Increases — around the central 7 stitches (in the purl stitch).
-
Decreases — at the edges of the front (in the purl), so that the knit stitch transitions neatly into the purl stitch.
-
Frequency: increases and decreases — every 16 rows.
Knit in the round until the armholes, then divide the knitting into front and back.
For underarms on both sides, decrease 5 stitches each. After the edge stitch, a purl stitch should follow.
Front
-
Transfer the front stitches to a separate needle and start shaping the sleeve cap and neckline.
-
In the 7 central stitches, find the purl stitch, knit 2 from it, turn, close 2 stitches.
-
Do not decrease the neckline anymore!
-
For the sleeve cap, leave 7 stitches and in the last knit stitch, make decreases every other row until 21 stitches remain.
Back
-
Formed similarly to the front.
-
Sleeve cap — decreases 3 times.
-
Neckline — shallow. Start closing 4-6 rows before the end:
-
First 49 stitches,
-
then 2 stitches twice from each side.
-
In total — 21 stitches on each shoulder.
Assembly
-
Shoulder stitches are joined using the three-needle bind-off method.
-
Sleeve cap — imitation of a set-in sleeve (can be watched on YouTube).
-
Lift the stitches along the sleeve cap immediately onto additional needles — this is convenient for counting.
-
Make decreases along the sleeve cap near the two central stitches to the desired width of the sleeve.
-
I ended up with 46 stitches on the cuff.
Photos and Recommendations
Tip: pay attention to symmetry — make the front and back the same height so that when casting on the sleeve, the number of stitches matches
.