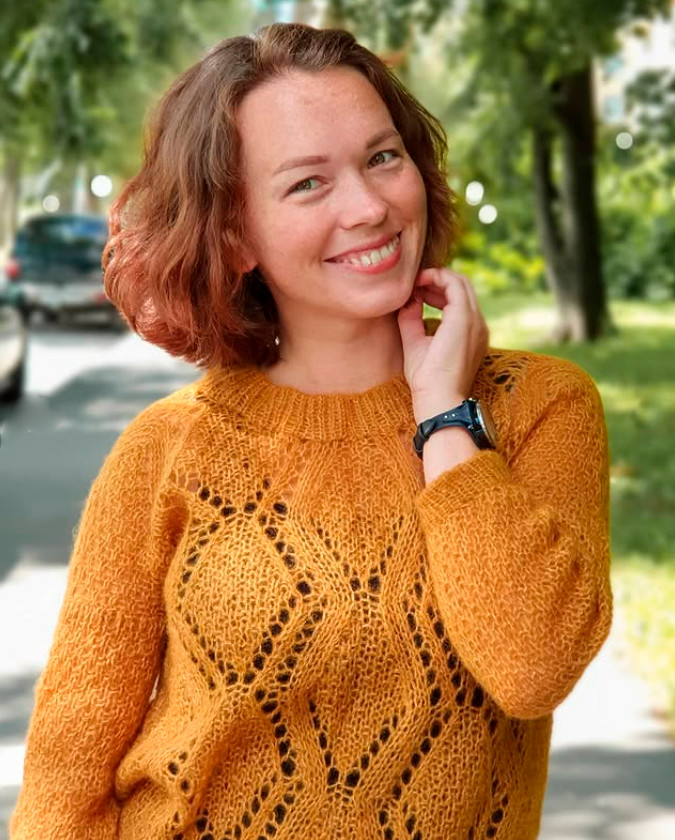
Knitted sweater
Added: 15.09.2025 в 19:01 Views: 325
Knitted sweaterKlubokhttp://klubok.work/1/3/9080/Klubokhttps://klubok.work/css/image/top-logo-en.png
Yarn Viking Alpaca Sport: 30% – alpaca, 40% – merino wool, 30% – nylon (polyamide), 50 g = 100 m
Regarding the needles – for yarn with a meterage of 50 g = 100 m, I use size 4 needles (by the way, I just discovered on the yarn packaging that the recommended needles are size 3.5). As for the amount of yarn – I hope that 450-500 g (9-10 skeins) will be enough (more yarn is used for cables than for “smooth” patterns).

1. I cast on 80 stitches and knitted 25 rows in a 1x1 ribbing (the collar will be double-layered, i.e., I will fold it inward later and sew it on the wrong side):

2. Then I divided the stitches as follows: 24 stitches for the front and back, 12 stitches for the sleeves, and 8 stitches for the raglan lines (for convenience, I marked all parts with gray threads – see the photo above). My raglan lines consist of 2 stitches, and in every second row, I make a crossover of these stitches – it creates a thin braid, as shown in the photo below between the Cable and Chain patterns:

I increase the stitches in every second row, to the right and left of the raglan line from the crossed yarn overs.
On the 24 stitches of the front and back, I will place the following patterns: 4 stitches of the Honeycomb pattern (stitches 3-6 on the chart), 16 stitches of the Cable pattern, 4 stitches of the Honeycomb pattern (stitches 1-4 on the chart). On the 12 stitches of the sleeve, there are 12 stitches of the Cable pattern (stitches 3-14 on the chart). Then, as I increase stitches at the raglan lines, I knit them according to the chart. However, on the sleeves, I skipped the Honeycomb pattern and immediately switched to the Chain pattern – so in my case, the Chain pattern fits better (it appears simultaneously on the sleeves and front/back – see the lower photo in this post).
Knitting chart:

To subsequently shape the neckline of the front, I made the following calculation and conditional division: – I divided 24 stitches of the front into 3 parts: 8+8+8 stitches. – I divided both side parts of the front (8 stitches each) into several parts as follows: 2+2+1+1+1+1 (you can also use the division 3+2+1+1+1). Then I transferred all 24 stitches of the front to a spare needle, and the remaining stitches (sleeve, back, and raglan line stitches 12+12+24+8=56) – to the circular needles. Then I switched from circular knitting to partial knitting with knit and purl rows, knitting all the stitches on the circular needle each time and adding (knitting) stitches from the spare needle in the specified sequence: 2+2+1+1+1+1.

3. When there were 8 stitches left on the spare needle (the central stitches of the front), I closed the knitting into a circle, knitting these stitches from the spare needle onto the circular needle (the row in which the stitches are closed into a circle must be knit). Then I continued knitting in the round. Here’s what I have knitted so far:


I knitted 62 rows from the neckline and made increases in the raglan lines 31 times (a total of 31*8=248 stitches added). Thus, I now have 86 stitches in the front/back, 74 stitches in the sleeves, plus 8 stitches in the raglan lines. In total, 328 stitches in work.
I plan to knit one more increase row and then I will separate the knitting into front-back and sleeves.
I made one more increase. In total, from the neckline, I have 32 increases (a total of 32*8=256 stitches added). In work: 80+256=336 stitches, of which 88 stitches go to the front (back), 76 stitches to the sleeves, and 8 stitches to the raglan lines (88+88+76+76+8=336)
It’s time to separate the knitting into front-back and sleeves. I transferred the sleeve stitches (excluding the raglan lines) to a spare thread, and closed the stitches of the back, front, and raglan lines into a circle, adding 1 stitch (it can be more, but it must be an odd number) in the area of the sleeves (at the points of joining the front and back). These stitches are needed to maintain the “Pearl ribbing” pattern that runs along the sides.

Thus, the number of stitches in the “body” of my sweater is 88+88+8+2=186 stitches.
Here’s what the opening for the future sleeve and the place of joining the front and back looks like (usually a seam goes here – remember the terrible tightening seam in the original model?):

To ensure that there are enough sleeve stitches, I decided to start knitting one sleeve in parallel. To the existing 76 stitches from the joining point of the front and back (previous photo), I cast on 7 more stitches (this number must be odd to maintain the pearl pattern). Thus, I got 76+7=85 stitches in work. I’m knitting on double-pointed needles from the second skein:

For the sleeve slope, I am trying to make 2 decreases every 4 rows. It’s best to do them in the row when all the stitches of the pearl ribbing are knitted as purl stitches – this way the decreases are completely inconspicuous.
First, we connect the front and back and knit at least a few rows of the “body” of the sweater. Then we transfer the sleeve stitches on the spare thread to the needles and proceed to knit the sleeve directly: we take the yarn from the new skein and from the stitches of the “body” in the underarm area, we cast on several additional stitches (it’s easiest to cast on the stitches with a hook. I try to cast on 1 stitch from each stitch of the “body” – this way the transition from the “body” to the sleeve looks the most neat and inconspicuous).
Here, to make it clear, I have shown in the photo where to cast on additional stitches (I got 7 additional stitches in this place in my sweater):

Once the stitches are cast on, we knit the stitches from the needle and continue to knit in the round (since there are not many stitches in work, it’s convenient to use double-pointed needles). After a certain number of rows, we make decreases by knitting 2 stitches together twice.

By the way, regarding yarn consumption, I have already used just over 200 g of yarn (4 skeins).
And this is what the place looks like where the “body” of the sweater joins the sleeve. The raglan lines are visible here, as well as the 7 additional stitches that I cast on in 1 row when transitioning to knitting the sleeve):

Here you can also see how the decreases in the slope of the sleeve lie – it seems to be turning out neatly.

I am currently knitting in three directions at once: the “body” and both sleeves. At the bottom, I plan to knit another 5-7 cm and then I will switch to ribbing. I started knitting the second sleeve with decreases every 6 rows, as with decreases every 4 rows, as I started in the first sleeve, the slope turns out to be very steep (the sleeve itself is quite narrow, so with such frequent decreases, it may end up being too tight). Here’s what the slope line of the second sleeve looks like:

I mark the rows with decreases with gray thread.

I completely knitted the front and back: knitted to the desired length, then knitted 18 rows in a 1x1 ribbing and closed all the stitches elastically. Now I am working on the sleeves and searching for the right slope for the sleeves: initially, I was decreasing stitches every 4th row, but I realized that this is too frequent and the slope turns out to be very steep. Then I tried to decrease every 6th row, but I still felt that the sleeve was narrowing too much (see the left sleeve in the photo). Therefore, I unraveled the first sleeve and re-knitted it with decreases every 8th row (the right sleeve in the photo). Currently, the sleeves are knitted to about elbow level. As a result, I decided to wet and dry the sweater to understand its true dimensions.
- this is what the sleeve looks like from the inside and the outside:


With gray thread, I marked the rows with decreases that I made every 8th row, closing 2 stitches to the right and left of the central (“axial”) stitch from the inside of the sleeve (this central stitch is marked with gray thread). In total, I knitted 14 rows with decreases, thus reducing 14*2=28 stitches. After separating the knitting into parts, each sleeve had 85 stitches, and after all decreases, 57 stitches remained. When transitioning to knitting ribbing, I knitted every 5th and 6th stitch together. In total, I ended up with 46 stitches in the cuff, on which I knitted ribbing 1x1.
17 rows, and then closed.
- and this is what the cuff and the line of closing stitches from the inside of the sleeve looks like:

I really liked that due to the pearl pattern, the knitted stitches together are practically invisible, and also that in the end the pearl pattern has almost faded away (in the last row before the cuff, there are only 5 stitches of this pattern left), meaning that other patterns were not affected by the decreases. Additionally, the sleeve turned out to be not wide, but well-fitting to the arm.
Category: Sweaters, pullovers, jumpers