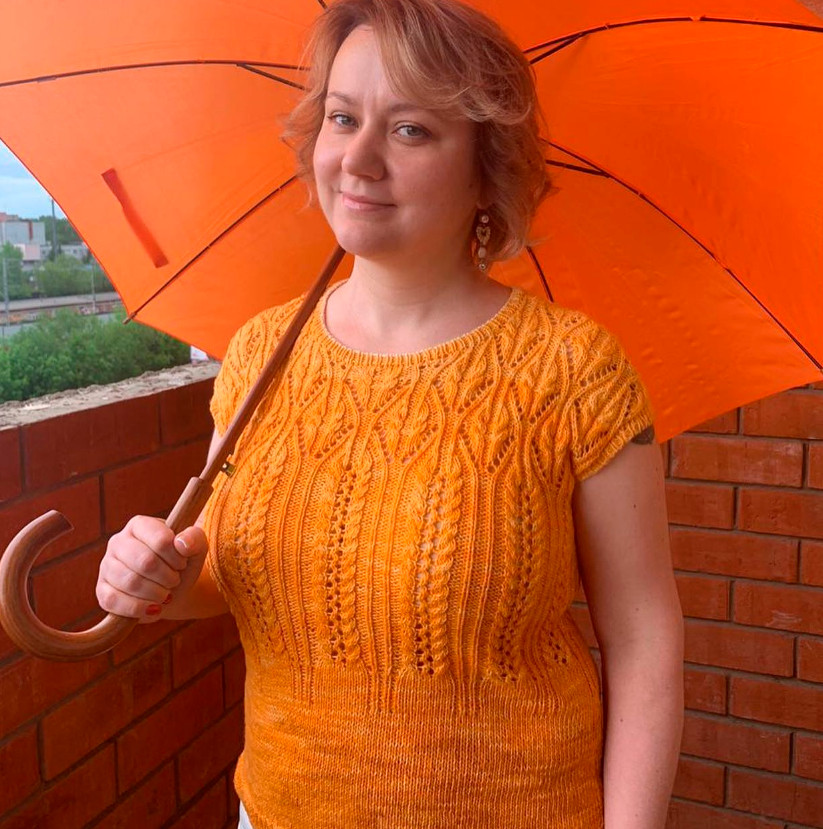
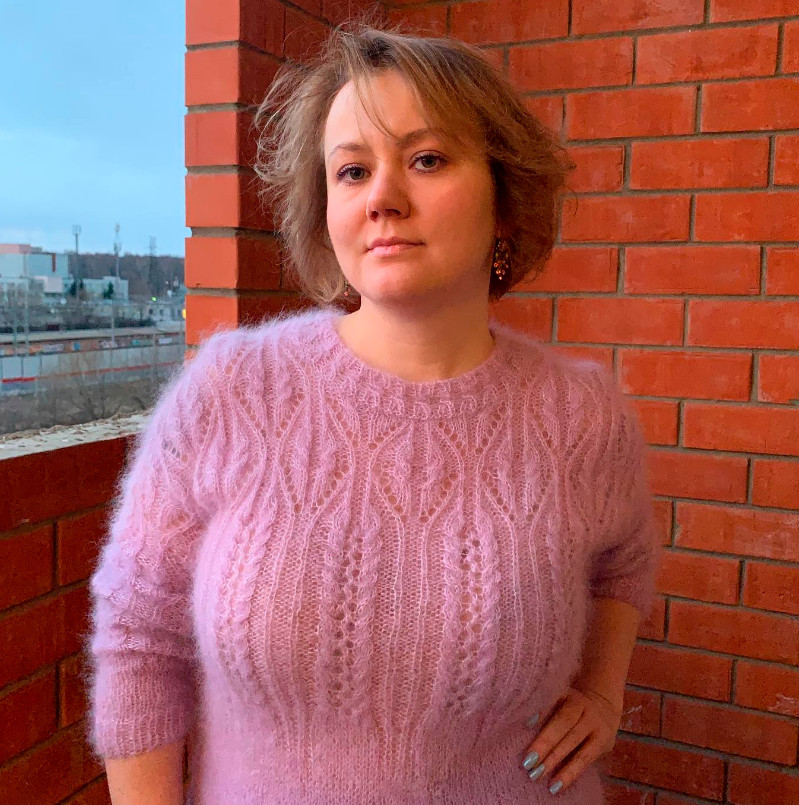
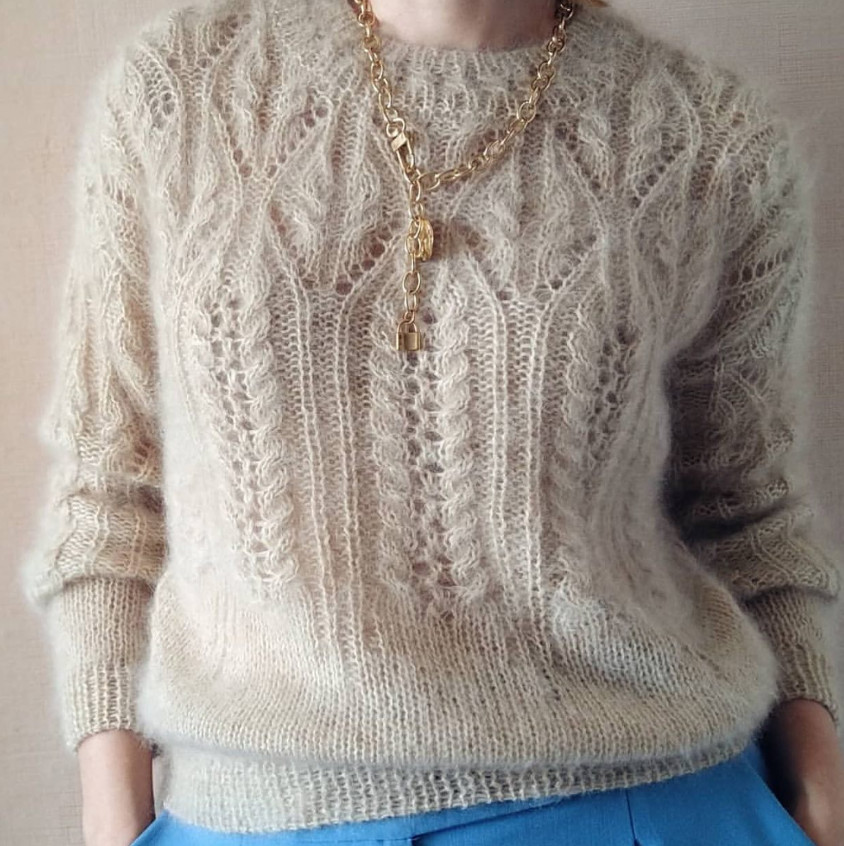
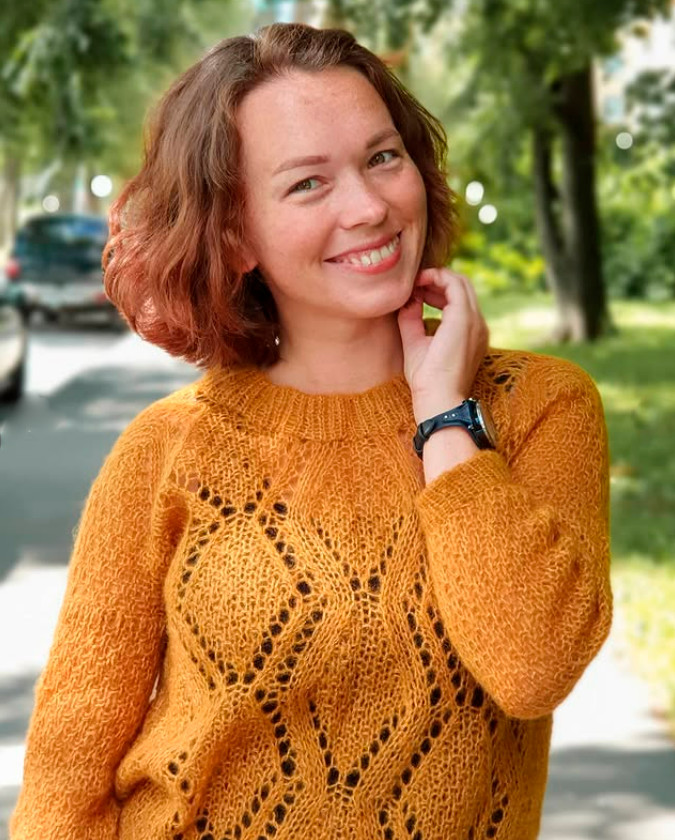
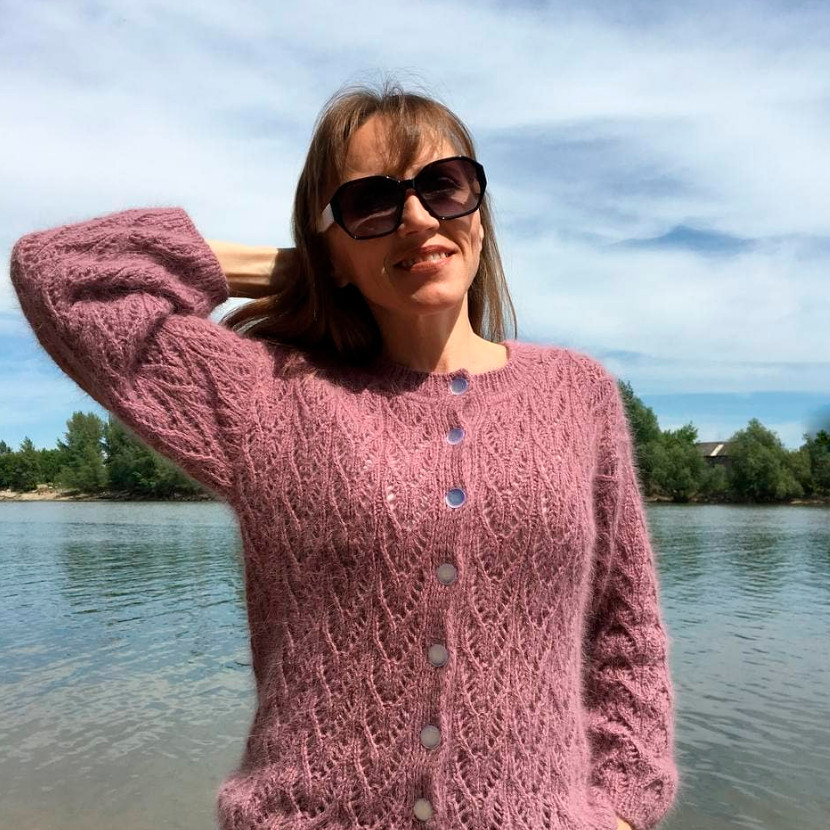
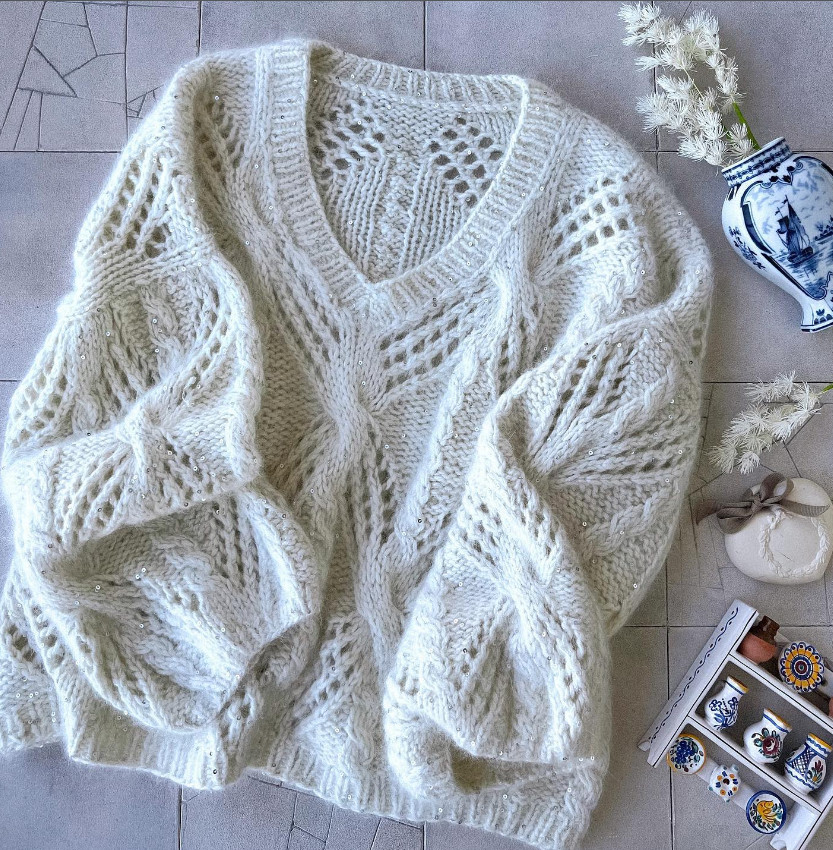
Knitted sweater
Added: 17.09.2025 в 17:36 Views: 2987
Knitted sweaterKlubokhttp://klubok.work/1/3/9105/Klubokhttps://klubok.work/css/image/top-logo-en.png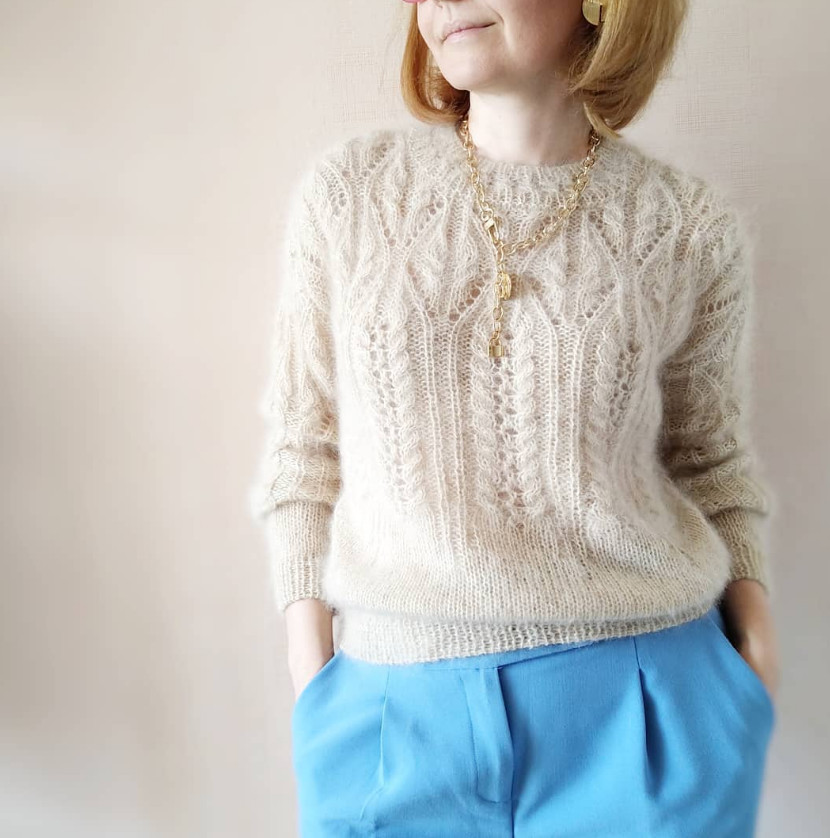
Yarn and tools:
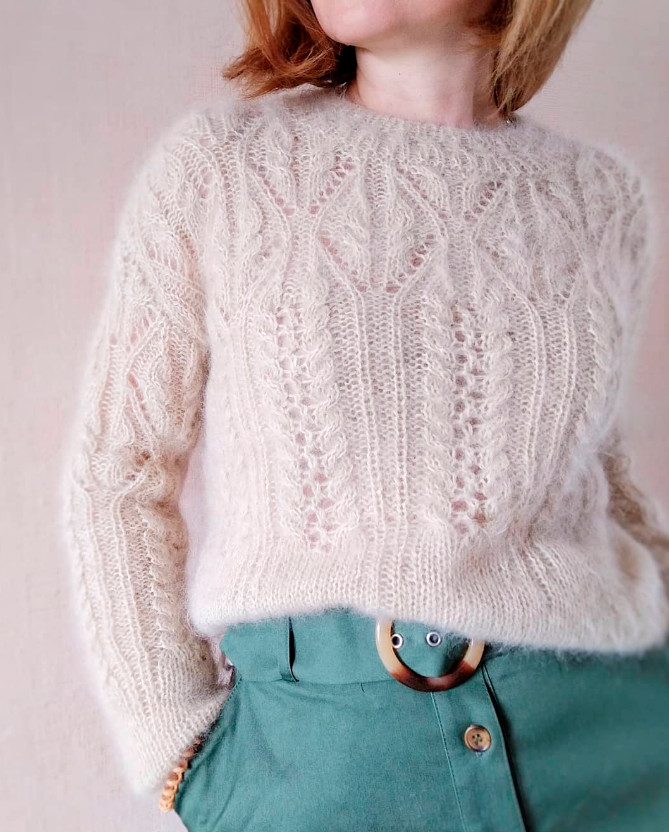
Kidmohair Missoni 1500m/100g – 4 plies, consumption 610 meters of each ply, that is 4*610 = 2440 meters or 2440/1500 = 163 g of kid mohair.
Cone merino 1200m/100g in one ply, consumption 610 meters or 610/1200 = 51g.
Needles No.3.5.
Tapestry needle, stitch markers, measuring tape.
Can be used:
• Any kid mohair with a non-fluffy companion (BBB Soft Dream, Lana Gatto Silkhair, cone mohair on silk or polyamide).
• A blend of kid mohair (on silk or PA) with cashmere / merino.
• Any yarn without nap (merino, cotton, etc.).
• Kid mohair in several plies
Recommendations for yarn thickness – within 200-350m/100g.
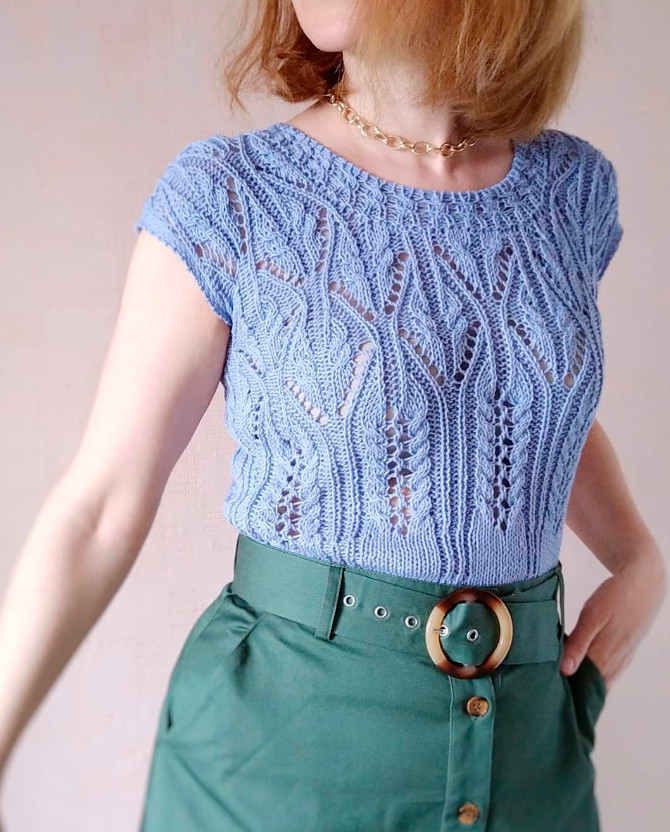
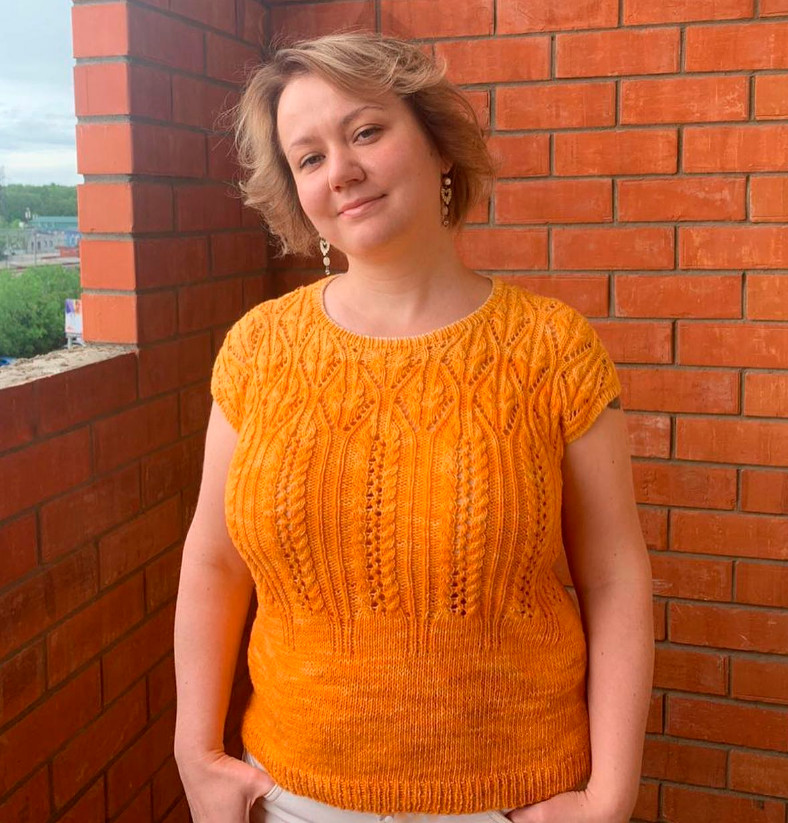
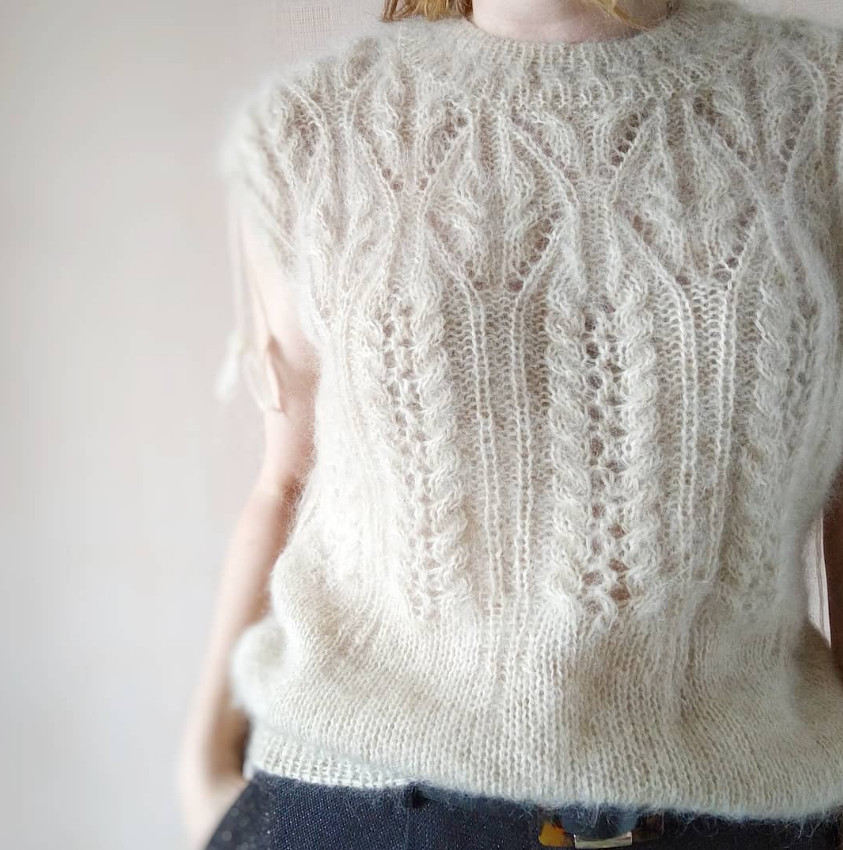
The top is knitted from Drops Safran (100% cotton, 160m/50g), consumption – 3 balls, needles No. 3.
Differences between the top and the jumper: (see Jumper Parameters)
Width - 45cm (without increases to bust circumference)
Length – 53cm ,p>Height of ribbing at the bottom – 2.5cm
Depth of the front neckline (without ribbing) – 19cm
Depth of the back neckline (without ribbing) – 10cm ,p>Height of the armhole – 13.5cm (without increases to forearm circumference).
Pattern distribution by the front and back pieces: 11cm – pattern0, 11cm – pattern1, 28.5cm – pattern2.
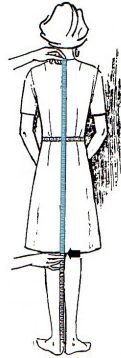
Taking measurements.
To draft the pattern we need the following measurements:
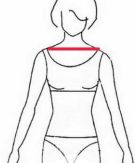
1. Neck width – measure along the shoulder line, 20cm.
2. Bust circumference – at the most protruding points of the bust. Place the measuring tape horizontally across the shoulder blades so that its upper edge touches the rear corners of the underarms, and do not pull too tight, 90cm.
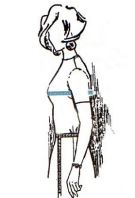
3. Forearm circumference – at the level of the armpit, at the fullest part of the forearm. The arm should be hanging freely, 27cm.
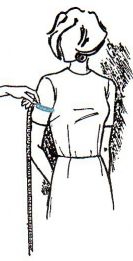
4. Length of the garment – from the back center from the nape of the neck to the desired length, 55cm.
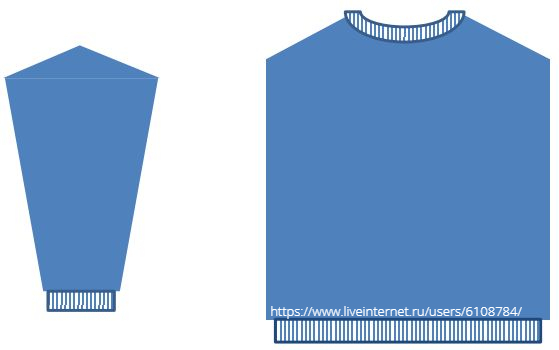
Model sketch.
We need the sketch to visually represent our model and calculate the number of stitches, rows and decreases / increases of stitches in different sections.
All calculations are done according to mathematical rules! If the calculations involve addition/subtraction and multiplication/division, FIRST multiply/divide and only then add/subtract.
This jumper model has a straight silhouette.
For better ergonomics, including for those with sloping shoulders, it is recommended to perform on the front and back pieces A SHOULDER SLOPE. The height of the slope for adults is from 5 to 10 cm. The shoulder slope is achieved by even decreases at the edges of the garment, every row. When performing the shoulder slope, it is also recommended to knit the sleeve with a small cap. The cap height should be as close as possible to the height of the shoulder slope.
Expansion of the sleeve occurs through gradual addition of stitches in pattern0 WITHOUT additional increases at the edges.
All pieces are knitted separately, then sewn together using a vertical / horizontal knitted seam.
Pattern:
The main fabric consists of 3 parts – pattern0 (stockinette with gradual addition of purl stitches), pattern 1 and pattern 2. If desired, any pattern can be used; in this case all calculations are done according to the chosen pattern.
The bottom edge and cuffs are finished with ribbing 1x1, the neckline – ribbing 1x1 with a crossing in the middle.
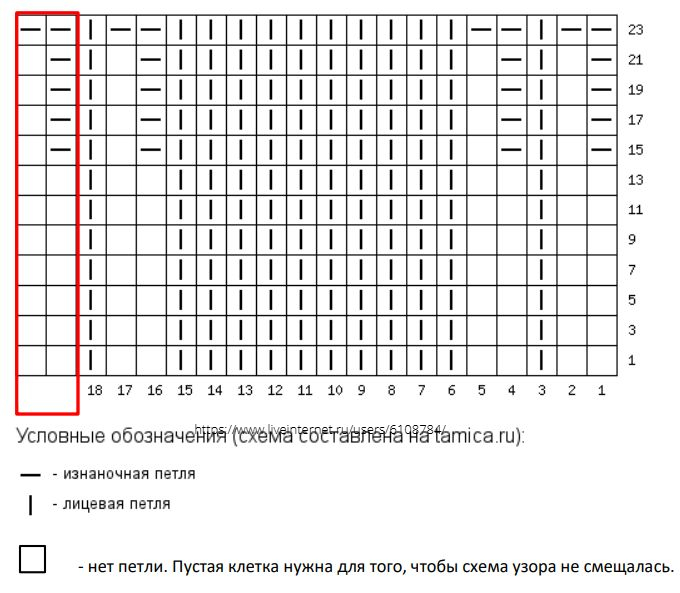
SCHEME of pattern 0. Stockinette stitch; in the last 10 rows we knit purl columns and in the last knit row we add 3 purl stitches per repeat (I usually knit a new stitch from the carried thread of the previous row, see the figure below). The repeat is 15 stitches wide at the start of knitting, later it expands to 18 stitches. In height we knit as many rows of this pattern as needed (for the sample a few rows are enough). The stitches in the red frame (see diagram) are added ONLY ONCE at the end of the right-side row of the piece for pattern symmetry. Purl rows are knitted as per the chart.
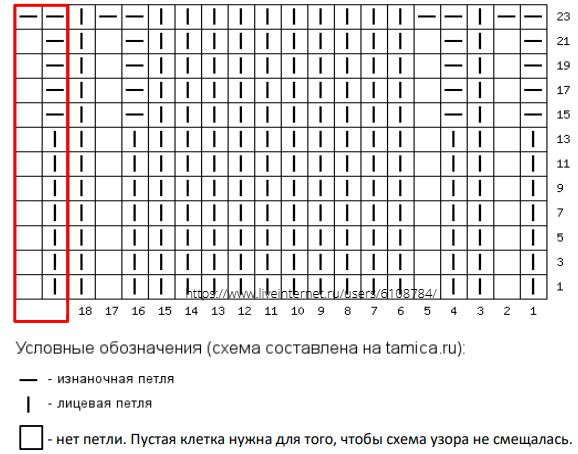
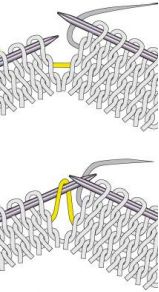
Adding a stitch (see the figure on the right) using a slip stitch from the previous row. Lift the previous row's float onto the left needle so that the left wall of the stitch is in front, and knit a purl stitch behind this wall. In this case we obtain a crossed purl stitch, with no hole at the lift.
Pattern 1 schematic.
Pattern repeat – 18 stitches and 4 rows. The last 2 stitches (in the red frame on the diagram) are knitted the same as pattern0 at the end of the right-side row of the piece for symmetry of the pattern. Purl rows: knit according to the chart, yarn-overs are purled.
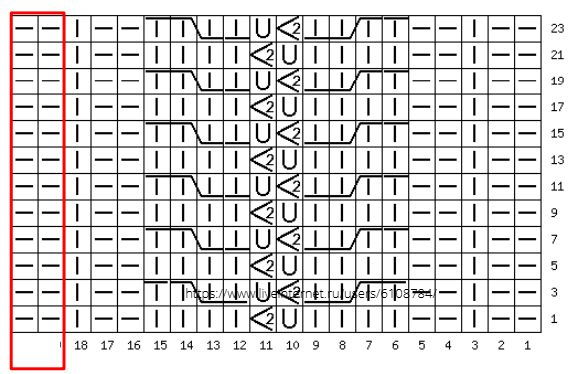
Legend (the chart is composed on tamika. ru):
![]() - purl stitch
- purl stitch
![]() - knit stitch
- knit stitch
![]() - 1 yarn over
- 1 yarn over
![]()
- 2 stitches knitted together with a left-leaning decrease
![]() - perform a cross to the right: 2 stitches on an extra needle behind the work, 2 knit, 2 knit with the extra needle.
- perform a cross to the right: 2 stitches on an extra needle behind the work, 2 knit, 2 knit with the extra needle.
![]() - perform a cross to the left: 2 stitches on an extra needle in front of the work, 2 knit, 2 knit with the extra needle
- perform a cross to the left: 2 stitches on an extra needle in front of the work, 2 knit, 2 knit with the extra needle
Pattern 2 schematic.
Pattern repeat – 18 stitches and 32 rows. The last 2 stitches (in the red frame on the diagram) are knitted the same as pattern0 and pattern1 at the end of the right-side row of the piece for symmetry of the pattern.
Purl rows: knit according to the chart, yarn-overs are purled.
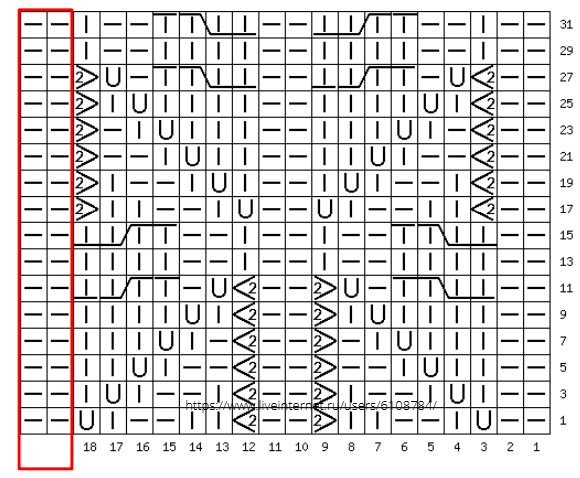
Legend (the chart is composed on tamika. ru):
![]() - purl stitch
- purl stitch
![]() - knit stitch
- knit stitch
![]() -2 stitches knitted together with a right-leaning decrease, see video -
-2 stitches knitted together with a right-leaning decrease, see video -
![]() - 1 yarn over
- 1 yarn over
![]()
- 2 stitches knitted together with a left-leaning decrease
![]() - perform a cross to the right: 2 stitches on an extra needle behind the work, 2 knit, 2 knit with the extra needle.
- perform a cross to the right: 2 stitches on an extra needle behind the work, 2 knit, 2 knit with the extra needle.
![]() - perform a left cross: 2 stitches on the extra needle in front of the work, 2 knit stitches, 2 knit stitches on the extra needle
- perform a left cross: 2 stitches on the extra needle in front of the work, 2 knit stitches, 2 knit stitches on the extra needle
A convenient way to perform crossings without using an extra needle in the video (first a right cross is shown, then – left) -
Knitting a swatch.
The fabric density depends on the tension of the working yarn and the needle size. Each knitter has her own tension. Therefore, BEFORE starting work, knit several swatches of pattern0, pattern1 and pattern2 with needles of different sizes to select the fabric density that will suit us in the finished garment. It is most convenient to knit swatches of patterns in one piece, as this allows you to practice and understand how one pattern transitions into another.
WE MUST perform the same wet-heat treatment for the swatch as for the finished garment! This is especially true for cone yarn, since the fabric often changes size after washing.
Measure the swatch: either with a special template or with a ruler we measure the width of the repeat and the number of rows in 10cm.
Repeat parameters - 18 stitches*28 rows = 10*10cm.
We measure specifically the WIDTH of the repeat, not the number of stitches in 10cm, because all parts of the sweater are a certain number of repeats. The exact number will be counted below.
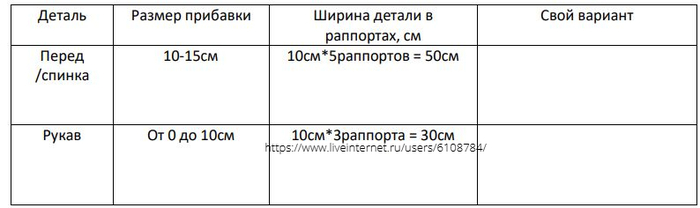
Ease allowance
So, the width of the sweater, like the width of the sleeve - this is a definite WHOLE number of repeats. Depending on the width of the repeat and the desired width of the sweater, the number of repeats (and, accordingly, stitches) may differ.
Table of increases
Sweater parameters.
Back neckline depth (without ribbing) – 5cm
Front neckline depth (without ribbing) – 10cm
Neckline rib height – 5cm
Neckline width – 20cm
Shoulder slope height – 5cm
Hem rib height – 4cm
Armhole depth – 18cm
Sleeve cuff height – 4cm
Sleeve length along the inside from the armhole – 50cm
Sleeve cap height – 5cm (this value should be equal to the height of the shoulder slope)
Pattern distribution for the front and back: 14cm – pattern0, 17cm – pattern1, 20cm – pattern2.
Pattern distribution for the sleeves: 10cm – pattern0, 16cm – pattern1, 20cm + sleeve cap – pattern2.
Your measurements may differ depending on your measurements, as well as your preferences for neckline depth, cuff height, pattern distribution, etc.
Back, Front.
Cast on stitches in any convenient way.
So, before starting to knit, we will perform some simple calculations.
Back / front
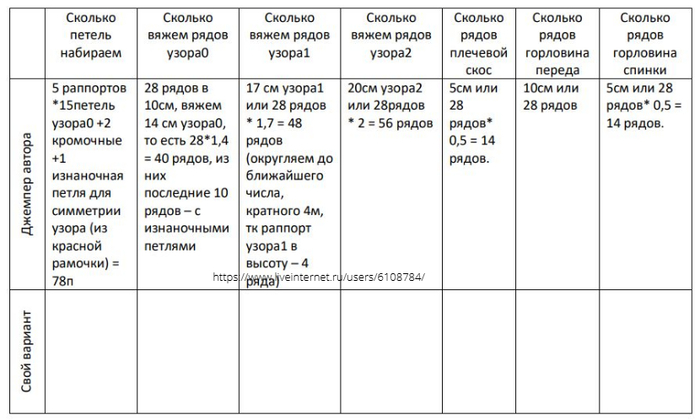
Cast on 78 stitches, knit rib, switch to pattern0. 10 rows before its end, begin knitting purl ridges, in the last knit row add 3 purl stitches in the repeat, including adding one more purl stitch at the end of the row for pattern symmetry. That is, by the time of switching to pattern1 there should be 18*5+2 selvage stitches + 2 additional purl stitches from the red frame = 94 stitches.
Knit the required number of rows of pattern1, switch to pattern2.
BACK.
On the back, the height of the shoulder slope and the depth of the neckline are the same, 14 rows each.
That is, we begin binding off stitches for the neckline and shoulder slope simultaneously, after 56-14=42 rows of pattern2, on the 43rd row.
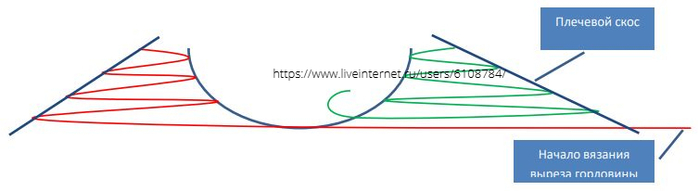
We perform the slope and neckline in this way: start the 43rd row (on the diagram – Beginning of knitting the neckline), bind off the central stitches, reach the end of the row, turn the work and bind off the stitches for the neck slope. Then knit only the LEFT part of the back (on the diagram – red line), binding off the neckline and slope stitches in turn.
Then attach the working yarn from the neckline side (on the diagram – green yarn) and knit the right part of the back similarly.
For knitting, we need to know how many stitches to bind off for the shoulder slope and the neckline. Let’s do the calculations.
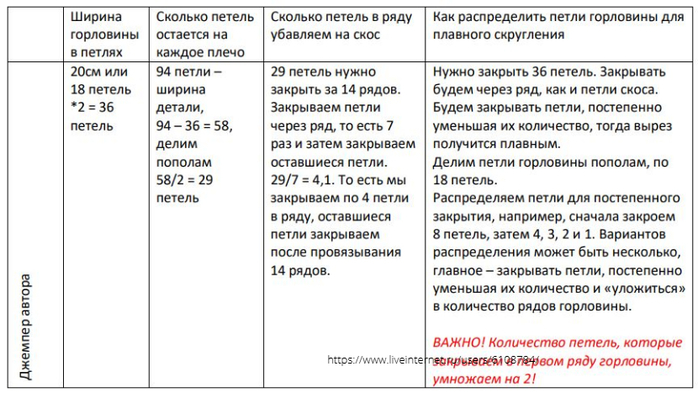
After knitting the neckline, any remaining rows (if any) are knitted straight, without decreases from the neckline side.
Thus, on the 43rd row of pattern2 we close the central 8*2 = 16 stitches, and knit 14 rows of the left part, closing the stitches of the slope and neckline. Similarly, knit the right part.
FRONT.
The front piece is knitted similarly to the back piece with one difference – the neckline begins 5 cm or 14 rows earlier, on the 29th row of pattern2. The neckline stitches on the front are closed similarly (the stitch distribution is the same, the remaining rows are knitted without decreases from the neckline).
Neckline.
Back and front are ready, sewing the shoulder seams.
To shape the neckline, pick up stitches along the edge of the neckline, the first row is knitted in purl stitches
The number of stitches should be a multiple of 4, so in the first purl row if necessary evenly reduce the extra stitches. Then knit 2 cm in 1x1 rib. Perform a 4-stitch cross; this and the following rows up to the second cross are knitted in knit stitches.
![]() - perform a left cross: 2 stitches on the extra needle in front of the work, 2 knit stitches, 2 knit stitches with the extra needle
- perform a left cross: 2 stitches on the extra needle in front of the work, 2 knit stitches, 2 knit stitches with the extra needle
Knit 2 rows in knit stitches.
Perform a left cross.
Knit the next row in 1x1 rib in this way: the first stitch from the cross is knitted, the next 2 stitches are knitted together, the last stitch of the cross is knitted. In other words, the 4-stitch cross is reduced to 3 stitches. To align the rib pattern at the end of the row, we can skip one decrease, or conversely decrease one more stitch.
Knit 2 cm in 1x1 rib. You can use needles half a size smaller.
Bind off the neckline stitches with a needle
SLEEVES.
The sleeves have the shape of an inverted trapezoid, with a small cap. The expansion of the sleeve occurs through the gradual addition of stitches in pattern0 WITHOUT additional increases at the edges.
Pattern0 scheme - Stockinette stitch, in the last 10 rows we add ridges of purl stitches and in the last knit row add another 3 purl stitches per repeat. The repeat is 12 stitches wide at the start of knitting, in the future it expands to 18 stitches. In height, knit as many rows of this pattern as necessary (for the sample, a few rows are enough). The stitches in the red frame (see the diagram) are added ONLY ONCE at the end of the knit row of the piece for pattern symmetry. Purl rows are knitted according to the pattern.
Schemata of patterns 1 and 2 are the same as for the front and back.
Before starting to knit, let's do some simple calculations.
Sleeve width of 3 repeats
Pattern distribution for the sleeves: 10cm – pattern0, 16cm – pattern1, 20cm + 5cm for cap – pattern2.
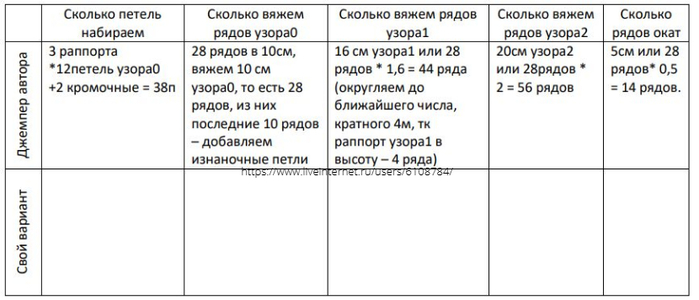
So, cast on 38 stitches, knit the cuff in 1x1 rib height 4 cm, then 28 rows of pattern0, 44 rows of pattern1 and 56 rows of pattern2. At this moment we have on the needles 3 repeats of 18 stitches each + 2 extra stitches + 2 selvage edges, i.e., 3*18+4 = 58 stitches.
Next we should knit 14 rows, gradually binding off stitches from the edge toward the center of the sleeve, similarly to how we knitted the shoulder slope.
For this, count how many stitches need to be decreased from each edge.
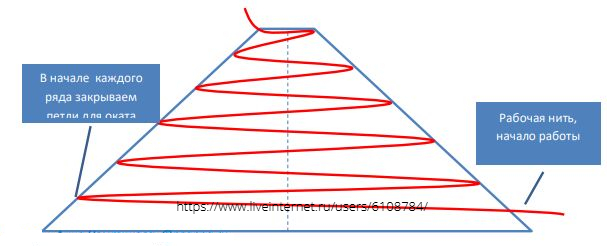
Divide the total number of stitches by the number of rounds of the sleeve cap: 58/14 = 4.14. Take the integer part before the decimal point — 4 sts; these will be bound off at the beginning of each round. In the last, the 14th round, bind off all remaining stitches (see the sleeve cap diagram).
Sleeve cap diagram
ASSEMBLY.
At this stage, the shoulder seams are already sewn and the neckline is finished.
Mark the lower edges of the armholes on the front and back pieces with a marker.
If necessary, baste the sleeve to the armhole with English pins, and sew the seam. I usually sew first one half of the sleeve from the center toward the armhole edge, then the other. In the example, a knitted vertical seam was used.
In this model, it is convenient to sew the seam from bottom to top on the right side using the yarn with which the front and back pieces were knitted, or a finer yarn that matches in color. A well-made seam is almost invisible — the edge stitches disappear to the wrong side, and the stitches of the pieces join together.
Insert the needle from yourself under two loops in the middle of the stitch next to the edge on the left piece. Then, moving 'toward yourself', insert it under two loops in the middle of the stitch next to the edge on the right piece. Thus we catch two loops onto the needle alternately on one, then the other piece until we reach the start of the armhole. By the way, performing the seam from bottom to top makes fittings easier and helps determine the size of the armhole.
SECOND.
Washing
- Knitwear should be washed by hand or in a machine (only if you have tested machine washing and are confident in the result!).
- Water temperature 30 degrees. At higher temperatures knitted items may shrink significantly (especially tweed, gilonge).
- Wash with a mild detergent. Use special detergents designed for washing woolen items, or shampoo.
- When washing the knitted item should not be subjected to rough mechanical action: rubbing, pulling, wringing — the item may stretch and lose its shape.
- When washing, gently squeeze the item; best done through a towel.
S drying
Dry the items laid out flat on a smooth horizontal surface. They can be placed on a warm floor. And under no circumstances — in a hanging form (on a line or hangers), otherwise they will stretch.
Ironing
Textured patterns should not be steamed with an iron — they will stretch or become flat. Therefore, when pressing, it is better to treat the garment with steam, not touching it with the iron's soleplate.