Source:
Knitting together for dogs. Master class on knitting a jumpsuit from Marusya
Added: 13.12.2014 в 11:02 Views: 146037
Knitting together for dogs. Master class on knitting a jumpsuit from MarusyaKlubokhttp://klubok.work/1/37/5541/Klubokhttps://klubok.work/css/image/top-logo-en.png


My sizes: back length 26-28cm, chest circumference 38-40cm, length from collar to waist 16-18cm. Knitting density 2 stitches per 1cm, needles No. 2.5mm.
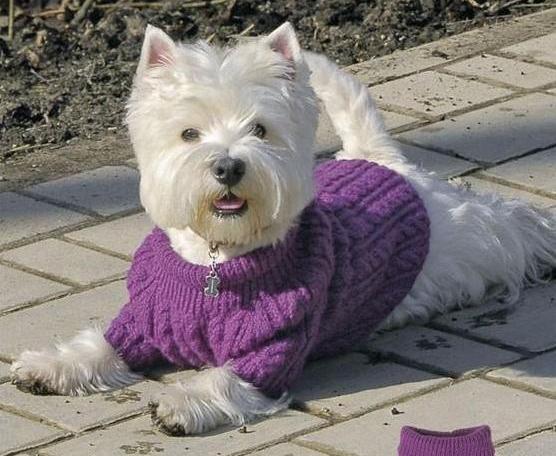
Yarn - snow-white fluff with lurex, which gives the overall outfit a special charm! When knitting with fluff, a thin white children's yarn from Pekhorka was added. It turns out that fluff withstands washing very well!!!!!

There is a lot of interest in this overall “Snowflake”.
I have wanted to knit a snowflake pattern for a long time. I went through many patterns, and in the end, I show more combinations of snowflake patterns. I knitted my pattern on this overall in an unusual way, starting from the center of the back down instead of from the collar. This way, I knitted the two upper side parts of the overall down to the waist.
When knitting the overall in this way, it is important to strictly follow the pattern and accurately calculate the number of stitches.
To build the pattern, see a separate tutorial: 1.I have the following measurements of a small Yorkie:

And we will step by step build the pattern based on these measurements and points on the picture: 
1. Line AK = 23 cm
2. Mark point B (AB=4cm)
3. Mark point Z (BZ=VL=13cm)
4. From point B down 11 cm – mark point V
4.1 From point V, measure 8 cm to the left and mark point D. This will be the distance of the widest part of the front leg. The slope of line VD depends on the configuration of your dog. For Yorkies, Toys, and other small breeds, there will be a very slight slope.
5. From point Z down 10 cm – mark point L. For a looser fit, add another 1 cm down
6. Connect points V and L (approximately also will be =13 cm)
7. Build the bottom line of the side: from point V forward measure (8+1) cm, mark point D and from point (L+1) to the back measure 10 cm and mark point L2
8. From point D approximately at a 60-degree angle measure up 4 cm and mark point D1
9. Smoothly round all points and draw the lines of the front and back sleeves.
This will be the side pattern. Check the distance between points DL2 on the dog and the pattern – it is very important. The dog should be able to move freely. If the sleeves are too wide at the top – reduce the width of the top of the sleeves by adjusting the distance between the legs.
Over time, the pattern will be refined and will fit your dog exactly.
Construction of the bottom.
1. Draw a line in the center = 35 cm.
2. Divide it into parts (from the collar) from point D1 = 4cm, there will be a cross line DO = 6cm.
3. At 9 cm there will be a cross line VV = 7cm
4. At 11cm there will be a cross line LL = 6cm
5. 11 cm remain until the end. 
This is a separate sleeve pattern.
I recommend sewing a trial version of the pattern. For this sleeve, cut it, leaving only the sides and bottom, and baste them. Fit everything tightly on your dog. Knitting is quite flexible and stretches well. Then transfer everything back to paper - this will be your pattern for knitting.
If something is unclear, ask. I will help you understand and build your pattern.
P.S. My dog has very thin paws, and the pattern provided above is for such dogs. These are Toys, Yorkies, and others.
For dogs with thicker paws, it is necessary to make an additional cut at the bottom of the armhole according to the thickness of the paw at its upper part. Approximately, on the pattern, it will look like this (see the red lines):


The pattern is created on a computer in Excel according to the number of stitches to the waist. I have 39 stitches from the collar to the waist. My pattern on the overall consists of three snowflakes, each with 13 stitches.
I apologize for the quality of the photos, as I took them from the computer screen.
This is the diagram for knitting one snowflake:


1. To knit the side, we cast on 40 stitches and knit strictly according to the pattern, taking into account increases and decreases, so that there are slopes at the collar, shoulder slope, and a slight slope at the front sleeve armhole, as shown in the pattern. The slope is made by increasing and decreasing stitches. Usually, I make the increase at the end of the row by knitting two stitches from one stitch: through the top and bottom leg. If you make the increase with a yarn over, it must be knitted to avoid holes. For this, you need to cross the yarn over when knitting. When decreasing, I knit the 2nd and 3rd stitches together. And along the edge, I keep a smooth elongated edge, so that it is easy to pick up stitches for the next knitting. We knit two pieces of the upper side with the pattern.
2. Then separately knit the bottom strip from the collar to the waist (up to the ribbing) with the front armhole knitted according to your dog's measurements. I noted in the tutorial that it is essential to consider the thickness of your dog's paws and make the necessary cut in the armhole from 2 to 6 cm.
Here is a rough diagram of such a bottom:

P.S. I often knit the collar immediately into my overalls and knit it in a turned-out way. I don’t like a collar with ribbing and try to make it beautiful. Therefore, I first sew only one shoulder, knit the chosen collar pattern, and then sew the collar and the second shoulder, and then move on to knitting the bottom and sleeves.
We sew the sleeves and upper sides to the bottom to the waist with a hook.
We knit a solid ribbing at the waist. Next, we move on to knitting the side parts of the pants.
Decorate as you wish. To create such protruding hoops at the sleeves, you need to knit the first row with white yarn on the right side and then all right rows should be purl. Rows with blue yarn on the right side are all knit. That is, stockinette knitting alternates with rows. This looks very beautiful. And I often use it in my other works.

The author of this master class is Nina Lazareva (Marusa)