Top with needles
Added: 04.07.2025 в 20:09 Views: 158
Top with needlesKlubokhttp://klubok.work/1/82/8876/Klubokhttps://klubok.work/css/image/top-logo-en.png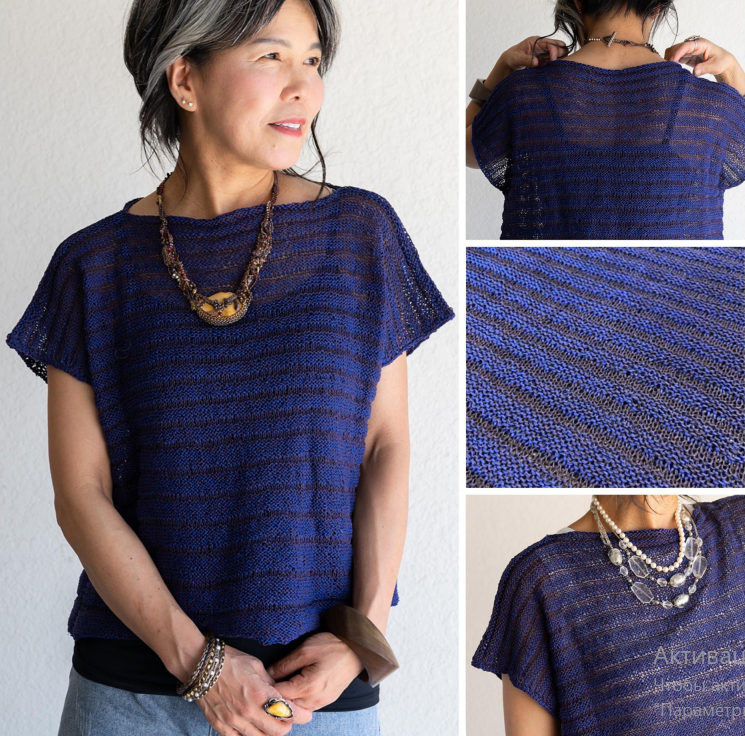
SIZES: 1 [2, 3, 4]
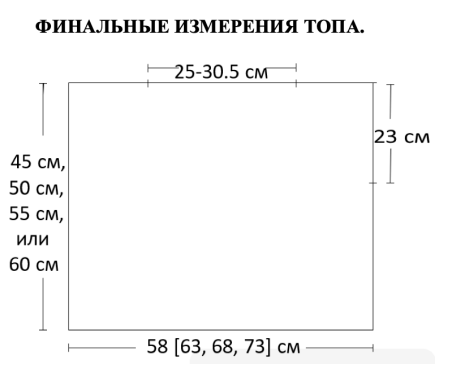
Final circumference of the top at the bust line: 115 [125, 135, 145] cm.
Length of the top, to choose from: 45 cm, 50 cm, 55 cm or 60 cm.
Choose the size based on the final circumference of the garment at the bust line and how loose you would like this top to be.
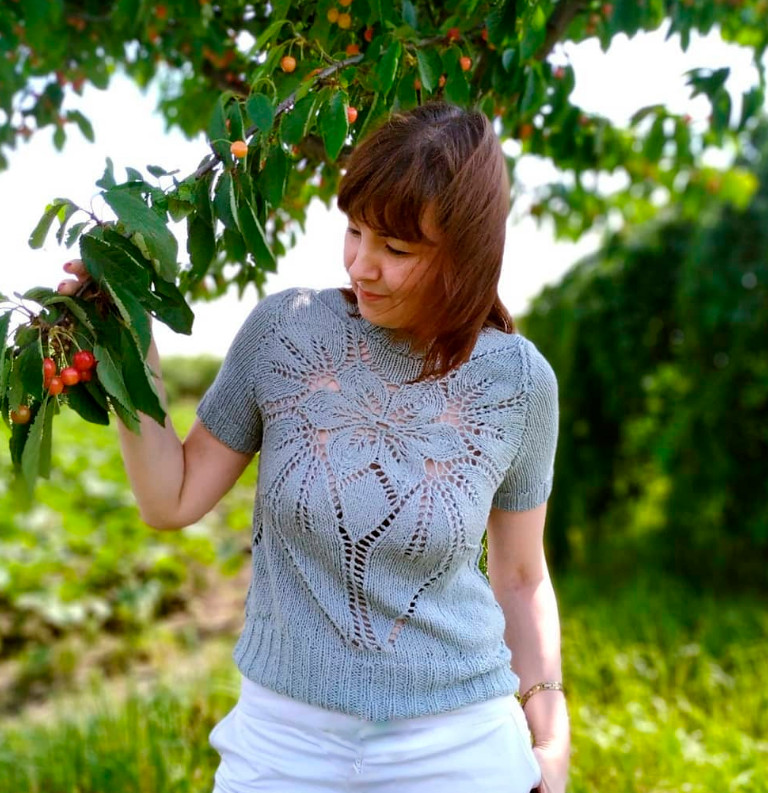
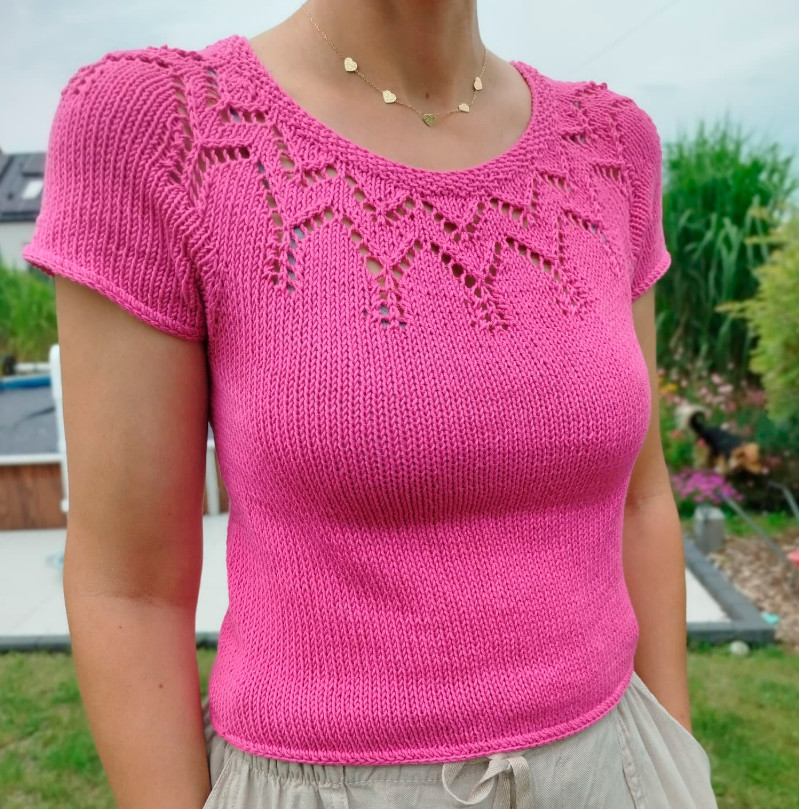
The top in the main photo (the blue top) is knitted in Size 1, with a length of 50 cm (measured with the garment laid flat on a horizontal surface). The red top is knitted in Size 2, with a length of 46 cm. The tops are shown on a model with a bust circumference of 84 cm and a height of 163 cm.
YARN
(100% cotton; 398 m in 50 g),
Approximate yarn consumption:
For a length of 45 cm:
OC — 2 [2, 2, 2] skeins / 593 [630, 697, 748] m
KC — 2 skeins for all sizes / 440 [479, 518, 553] m
For a length of 50 cm:
OC — 2 [2, 2, 3] skeins / 656 [713, 770, 828] m
KC — 2 skeins for all sizes / 485 [527, 570, 612] m
GENERAL INFORMATION
The front and back are knitted separately from the bottom up. Then shoulder and side seams are done. If desired, you can finish the armhole to give it a more finished look and create a more stable edge.
The instructions are written for four sizes. If there is only one number, it applies to all sizes.
Choose the size of the top based on how loose a silhouette you would like to achieve.
The instructions provide guidance on knitting according to the length options of the top. Instructions are also given on how to change the depth of the armholes. Read the entire instruction before starting to take into account some points related to the selected options and anticipate changes in yarn consumption if necessary.
If you are knitting with the recommended yarn, work the yarn from the outside of the skein. If you knit with the yarn coming from the inside of the skein, it may twist significantly.
TEXTURED PATTERN C
Rows 1 (RS) – 2 (WS): (OC + KC) knit stitches
Rows 3–6: (OC + KC) purl stitches
Rows 7–8: (1 strand OC) purl stitches
Next, work TEXTURED PATTERN D:
For a length of 45 cm: complete Rows 1–6 once.
For a length of 50 cm: complete Rows 1–6 twice.
For a length of 55 cm: complete Rows 1–6 three times.
For a length of 60 cm: complete Rows 1–6 four times.
TEXTURED PATTERN D
Rows 1 (RS) – 2 (WS): (OC + KC) knit stitches
Rows 3–4: (OC + KC) purl stitches
Rows 7–8: (1 strand OC) purl stitches
How to change the length of the top:
If you want to knit the top shorter or longer than the suggested lengths, you need to perform fewer or more repetitions of TEXTURED PATTERN D. Keep in mind that one repeat of TEXTURED PATTERN D is approximately ~2 cm in height. About 27 [30, 33, 35] m of OC yarn and 18 [20, 21, 24] m of KC yarn will be consumed for this.
Place removable markers on the first and last stitches of the just knitted row to indicate the boundaries of the armholes.
Next, knit the upper part of the piece as follows: complete Rows 1–6 of TEXTURED PATTERN D 10 times, then complete Rows 1–4 one more time.
Bind off the stitches with two strands (OC + KC).
Cut the yarn, leaving a tail of about 61 (71, 81, 91) cm (you will use this yarn for the shoulder seam).
Knit the second piece in the same way.
Block the front and back to the final measurements. For best results, wet blocking with blocking tools is recommended.
Note:
The textured patterns used in the project create horizontal stripes that will even out after blocking. Due to the characteristics of cotton yarn, the top will stretch a bit in length during wear, and the stripes will become flatter.
Complete the shoulder seams using the yarn ends left after binding off the stitches. Leave 25–30.5 cm for the neckline. Try on the top. If you want to make the neckline narrower or wider, adjust its width to your preferences.
Important:
When working the shoulder seams, make sure the pieces are positioned correctly — the purl side should be on the front side of the work!
Proceed to FINISHING THE WORK or perform ARMHOLE FINISHING to give the edge a neater appearance and stability.
ARMHOLE FINISHING
From the front side, with two strands (OC + KC), starting from the removable marker and moving towards the shoulder seam, lift and knit 42 stitches, then 1 stitch from the shoulder seam, then 42 stitches from the shoulder seam to the removable marker. = 85 stitches.
Note:
Armhole depth ~22.5–23 cm.
How to adjust the depth of the armhole:
To change the armhole depth by 2 cm (to make it smaller or larger), move the removable markers up or down by 6 rows. When lifting the stitches, you need to lift 4 stitches fewer or more on each side (a total of 8 stitches fewer or more).
Complete 1 round of purl stitches.
Repeat for the other armhole.
FINISHING THE WORK
If you did not perform armhole finishing, you can adjust the armhole depth by moving the markers up or down.
With two strands (OC + KC), perform the side seams (from the bottom edge to the removable marker).
Weave in the yarn ends.