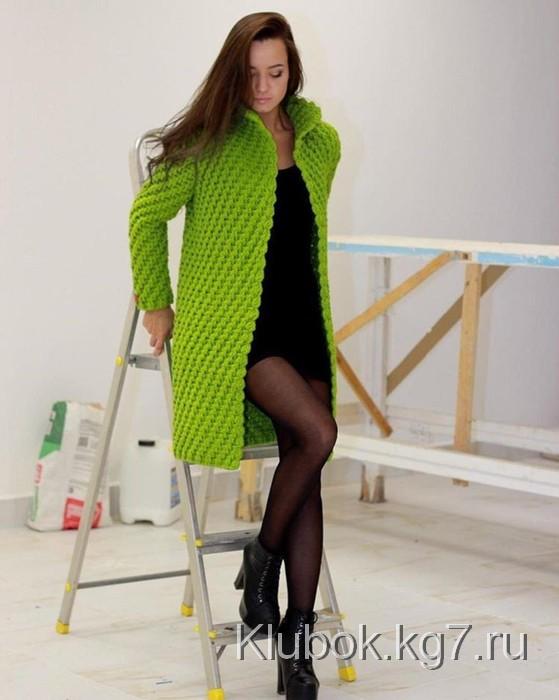
Palto. Master Polina Krainova
Added: 17.07.2016 в 11:48 Views: 290759
Palto. Master Polina KrainovaKlubokhttp://klubok.work/2/126/6485/Klubokhttps://klubok.work/css/image/top-logo-en.png
📘 Decoding Symbols:
| Symbol | Meaning |
|---|---|
| ○ | Air loop (in the initial chain) |
| ├ or ┤ (bent left/right column) | Relief post with yarn over: |
| – bent to the right — front relief st. with yarn over | |
| – bent to the left — back relief st. with yarn over |
📏 Characteristics of the Pattern:
-
Repeating pattern rapport: 4 stitches wide
-
Height of the rapport: 2 rows
-
Crochet in rows (the pattern specifies even and odd rows)
🔁 Crochet Principle:
-
Start with a chain of air stitches (the number is a multiple of 4 + 2 for symmetry).
-
Then alternate:
-
2 front relief sts. with yarn over (insert hook behind the front wall of the previous row's post),
-
2 back relief sts. with yarn over (insert hook behind the back wall of the post).
-
-
This creates vertical stripes with a "ribbing" effect.
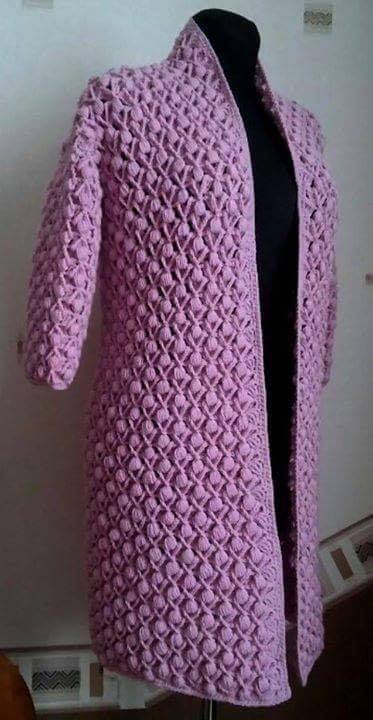
📸 Photo on the right:
-
Top photo — front side (clear relief stripes)
-
Bottom photo — back side (also neat)
🔹 What are relief stitches with yarn over?
These are voluminous posts that wrap around the leg of the previous row's post, not the top braid as usual.
✳️ Types of Relief Stitches:
| Name | Symbol on the Pattern | How to Crochet |
|---|---|---|
| Front Relief Stitch with Yarn Over | bent to the right (├) | Insert the hook from front to back and again forward under the leg of the previous row's post — from front to back and back again. |
| Back Relief Stitch with Yarn Over | bent to the left (┤) | Insert the hook from back to front and back — wrap the leg of the post from behind. |
🧶 How to Crochet Relief Stitches Step by Step:
🔸 1. Front Relief Stitch with Yarn Over:
-
Make a yarn over.
-
Insert the hook from front to back and again forward, wrapping around the "leg" of the previous row's post.
-
Pull through the working yarn (3 stitches on the hook).
-
Yarn over and pull through 2 stitches twice, like a regular yarn over stitch.
📌 It looks as if the post "comes" forward.
🔸 2. Back Relief Stitch with Yarn Over:
-
Make a yarn over.
-
Insert the hook from back to front and back — wrap around the post's leg from behind.
-
Pull through the working yarn (3 stitches on the hook).
-
Yarn over and pull through 2 stitches twice.
📌 This post "goes" into the depth of the crochet.
🔁 How to Alternate:
In your pattern:
-
2 front relief sts. with yarn over
-
2 back relief sts. with yarn over
-
Repeat until the end of the row.
📌 In the next row crochet according to the pattern: front over front, back over back.
✋ Tips:
-
It’s better to use a hook half a size larger than for regular yarn — the pattern is dense.
-
The yarn should not be fluffy — then the relief will be clearly visible.
-
Practice on 20 stitches (for example, 2 front, 2 back × 5 times + 2 air for rise).