Sweater knitted with knitting needles
Added: 07.01.2026 в 21:50 Views: 253
Sweater knitted with knitting needlesKlubokhttp://klubok.work/2/41/9342/Klubokhttps://klubok.work/css/image/top-logo-en.png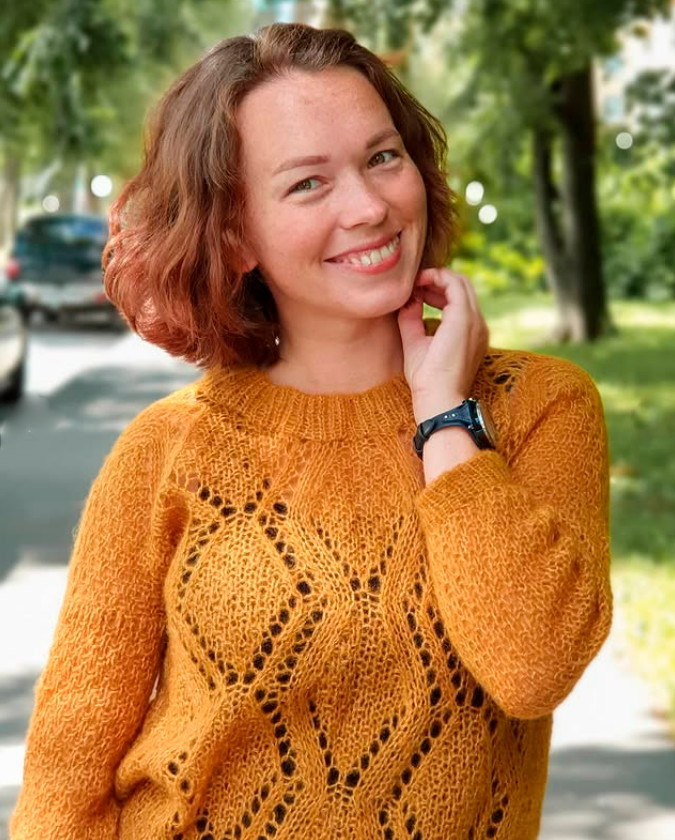
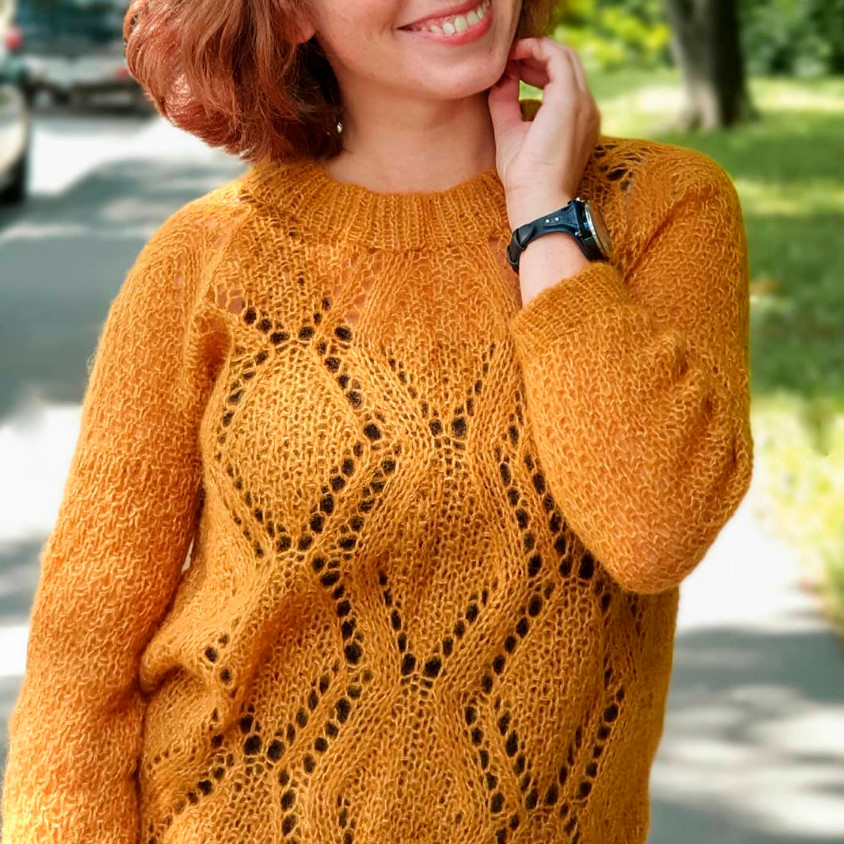
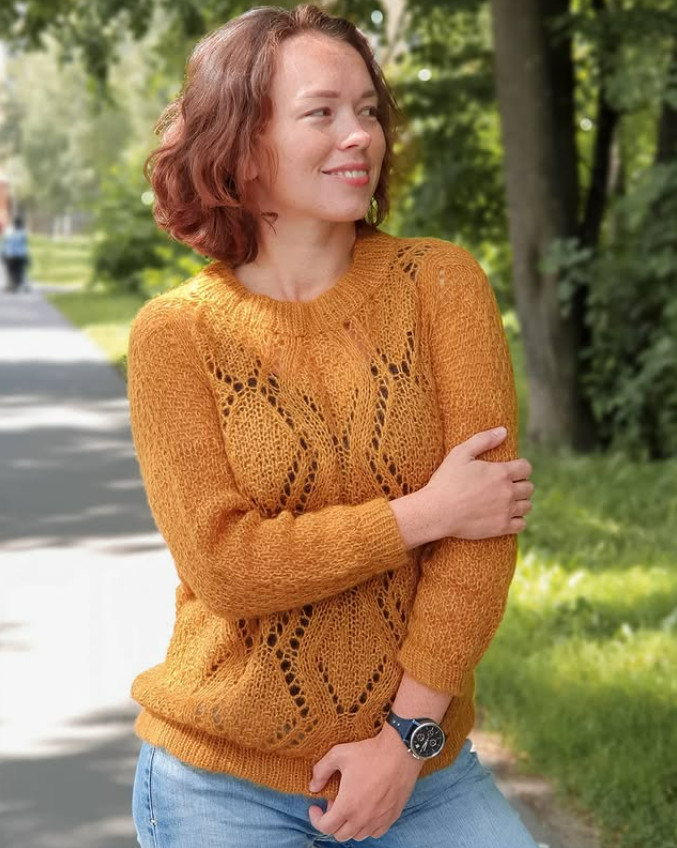
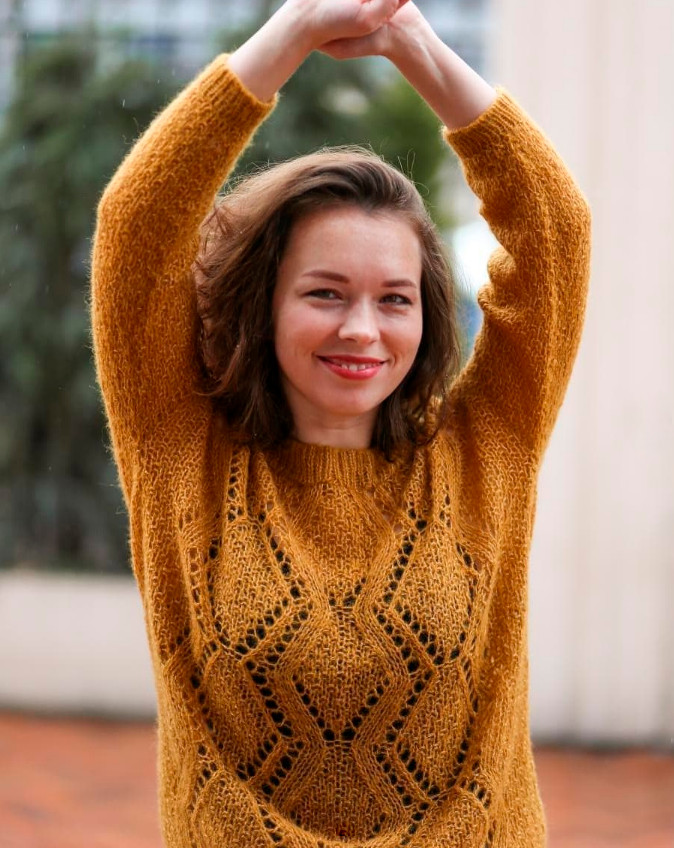
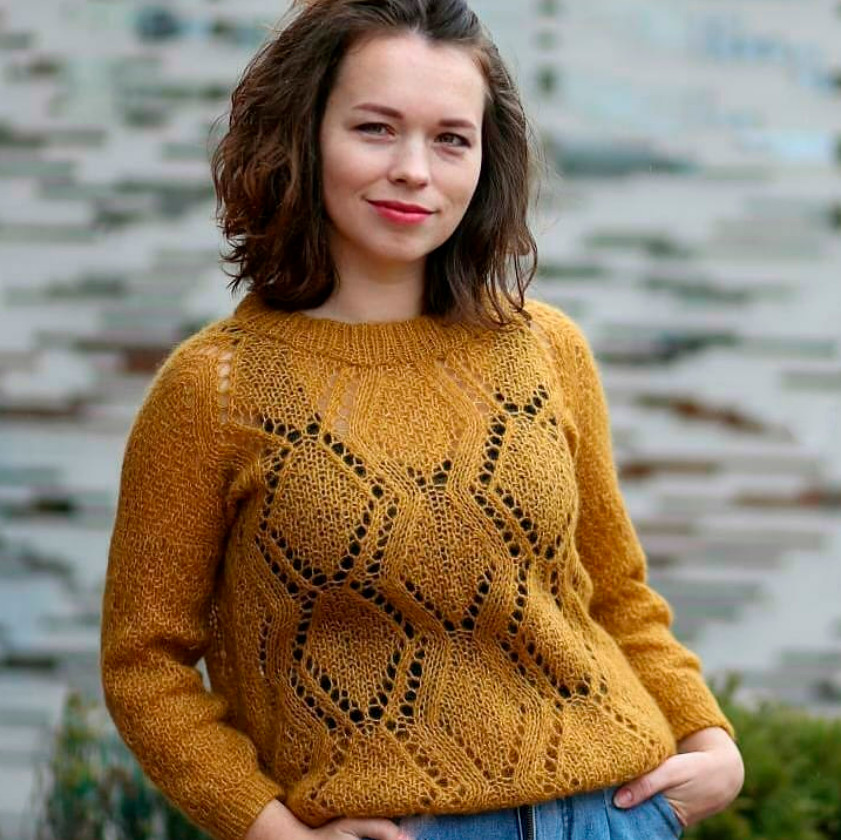
The sweater is knitted on circular needles from bottom up, then the fabric is divided into the front and back, the shoulders are sewn. Dropped shoulder. The hem and neckline are finished with garter stitch. Loose fit, 3/4 sleeves.
Abbreviations:
• 1Л – knit stitch;
• 1И – purl stitch;
• 1К – edge stitch
(at the start of the row slip, not worked, at the end – purl);
• п – stitch.
Materials:
Yarn: Dietrich (baby alpaca on silk 50 g/400 m) by PiuBella in 2 strands.
For size S and 3/4 sleeves, exactly 3 skeins were used. Accordingly, for size S with long sleeves – 4 skeins, M – 5 skeins, L – 5–6 skeins.
You can use the same yarn or an equivalent with similar parameters. Any kid-mohair on silk would be perfect.
If you don't want fluff, you can use merino or even cotton. In short, full freedom of choice. The main thing is to knit a swatch and do the calculations.
Also you will need an elastic ribbon for the neckline and cuffs

Tools:
• needles size 6.0 (the size that gives your gauge)
circulars with 60 cm cable for the body and 40 cm for the sleeves or
dpns;
• needles 4.5–5.0 (one size smaller than the main size) circulars for the hem and
neckline and dpns for the cuffs;
• auxiliary needle for aran motifs;
• tapestry needle for sewing, stitch markers.
Gauge
12.5 stitches x 17 rows in a 10 x 10 cm swatch on size 6.0 needles, pattern "double moss stitch".
To determine gauge, knit a swatch of a larger size (at least 15 x 15 cm), wash it in slightly warm water, squeeze with a towel without wringing, lay flat to dry, and only then measure the gauge in the center of the swatch, so edge stitches do not distort the gauge. If your gauge differs, you will need to pick larger or smaller needles.
You must cast on an even number of stitches.
We knit the swatch in rows (back and forth).
1st row (front side): knit, purl alternating
2nd row (back side): purl, knit
3rd row (front side): purl, knit; i.e., on knit stitches we purl and on purl stitches we knit
4th row (back): knit, purl. Then repeat rows 1–4.
Preparation
Gauge calculation is provided for size S (chest circumference 85–90 cm). If your size differs or you did not hit the gauge, you need to make your own calculation.
First, you need to determine the sweater width.
Remember, the design is not intended to be tightly fitted to the figure.
To knit in the round, you will need to cast on stitches for two widths (front and back).
The circumference of the sweater should be at least (bust + 10) cm, otherwise the sleeves will not fit. You can make it larger. For example, bust 88 cm. Add 10 cm for ease, giving a circular circumference of 98 cm (width 49 cm). In the previous step I determined that 12.5 stitches fit in 10 cm. So to determine how many stitches fit in 98 cm, you need 98/10*12.5 = 122.5. Round to the nearest even number. Thus, I need to cast on 122 stitches.
Lower hem of the sweater
On size 5 needles (one size smaller than the ones that matched the gauge) cast on 122 stitches using a contrasting yarn (see video) and join in the round. Place a start-of-round marker. Knit in knit stitches for 20 rounds. This is twice the desired width for the cuff.
Fold in half. The next row, knit, picking up one stitch from the cast-on edge.
Body
From the next row, switch to the main needle size — mine is 6.0.
The sweater is knitted in the "double moss stitch" with a lace panel in the center of the front. Split the knitting into front and back (two halves) and place the second marker.
The lace pattern uses 51 stitches. It should be centered on the front. I had 122 stitches, so the front and back are 61 stitches each.
I will knit the following rows: 5 sts moss, 51 sts lace, 5 sts moss (front), 61 sts moss (back). For convenience, place markers at the start and end of the lace.
Note: the central pattern begins with a purl stitch. You need to adjust so that the moss stitch preceding it ends on a knit stitch. I have 5 moss stitches, so I start the row with a knit stitch.
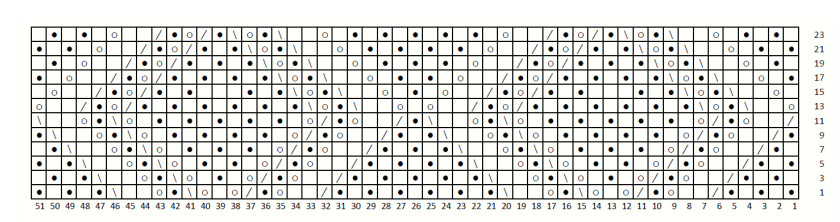
![]()
knit
![]() purl
purl
/ 2 together with a right-leaning decrease
![]() 2 together with a left-leaning decrease
2 together with a left-leaning decrease
Knit the pattern according to the chart to the height up to the armhole. For me this is 44 cm. You can adjust the length of the sweater as desired.
Front and Back
After knitting the required height up to the armholes, divide the knitting in half and knit the front and back separately in turning rows.
For convenience, let's start numbering the turning rows from the beginning.
Front:
Knit to the marker separating the front from the back and turn the work.
Knit in turning rows for 10 rows; from the 11th row, begin shaping the neckline.
*If you want wider sleeves, at this stage you can knit more rows.
In the 11th row, knit the moss pattern and 21-stitch lace, bind off 9 stitches in the middle, continue the row in pattern to the end.
*To bind off a stitch you need to work 2 together with a left-leaning decrease (knit on a knit row and purl on a purl row).
To bind off the next stitch, return the just-worked stitch to the left needle and again knit 2 together.
Right front piece:
Continue knitting only the right half, binding off stitches at the beginning of each right-side row to shape the neckline according to the chart.
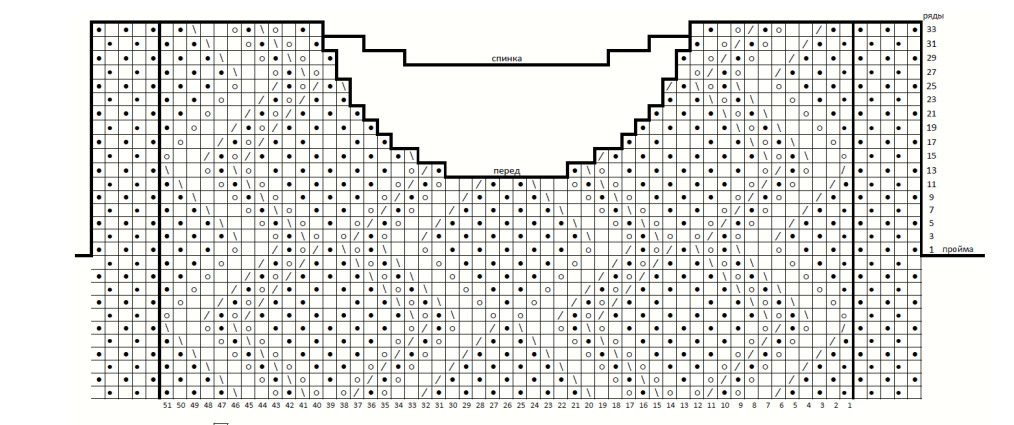
The arrangement of the lace pattern at the neckline is shown as an example and does not have to be the same as mine; you can start the neckline at any phase of the central lace. If the stitch nearest to the edge stitch on the neckline side in the chart should be a yarn over or knit-two-together, replace it with a knit stitch.
Finish with a knit row. Leave the remaining shoulder stitches live and transfer them to an extra strand. Leave a yarn tail for sewing three times the length of the shoulder.
Left half:
Attach the yarn on the left side of the neckline. Knit similarly according to the chart. Bind off stitches at the beginning of the purl rows. Finish with a purl row.
Back:
Knit the back the same as the front. Starting neckline shaping in the 29th row, according to the chart.
Sew the shoulder seams with a stocking stitch seam.
Neckline
From the right side, pick up stitches along the neckline with a smaller size needle (or with a hook) from each edge stitch of the neckline. Here you can even use even smaller needles. For example, if the main fabric was knitted with 6.0, you can take 5.0 or 4.5.
Knit 20 rows in stockinette stitch and bind off from the wrong side.
Sleeves
On the right side, starting from the underarm, evenly pick up 48 stitches on the needles of the main size and knit in the round to the desired sleeve length, making symmetric decreases on the inner side of the sleeve every 10 rows.
My sleeves are 3/4 length. I knitted 46 rows, decreased by 2 stitches four times, resulting in 40 stitches.
Once you reach the desired length, switch to smaller needles. Knit a row, decreasing by knitting two stitches together every second stitch.
Total on the needles: 20 knit stitches.
To form the cuff, knit 20 rows in stockinette stitch and bind off from the wrong side.
Finishing
Block according to the recommendations for the chosen yarn.
Hand wash in warm water,
lay flat to dry on a horizontal surface.