


Dress "Strawberry"
Added: 03.04.2014 в 05:05 Views: 45235
Dress "Strawberry"Klubokhttp://klubok.work/22/175/4754/Klubokhttps://klubok.work/css/image/top-logo-en.png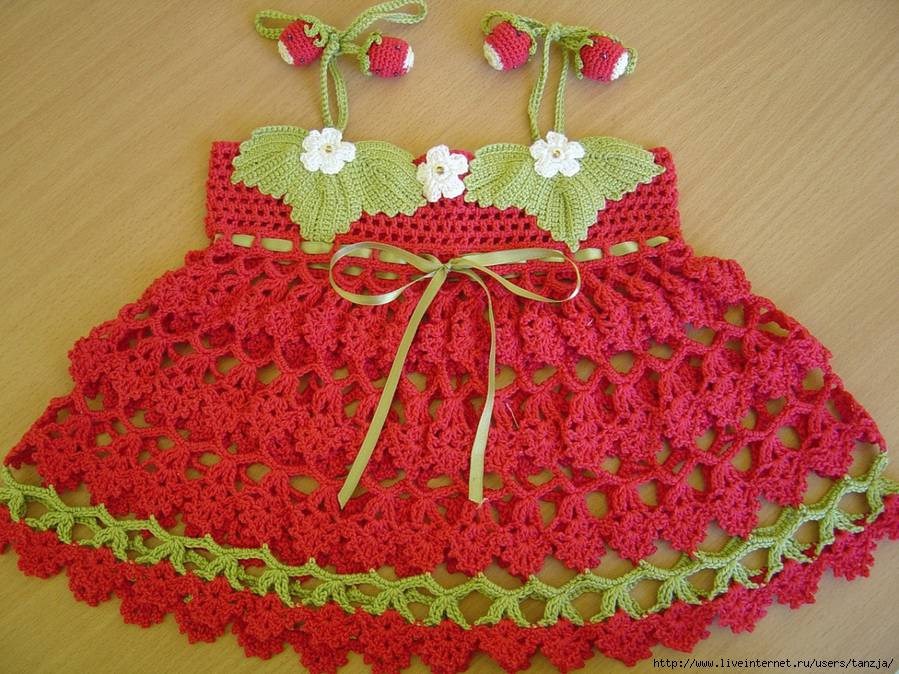

We will need:
hook 1.9, Vita Pelikan red threads — 100g, white — 25g, green — 50g, yellow beads, berry buttons, satin ribbon — 1 m
Creation process:
I crocheted a chain of air loops
166 loops long with red threads, crocheted the next row of d.c. in air loops. In the next
row, where there is a d.c. there is an air loop, and where there is an air loop there is d.c.
I crocheted so for 13
rows (in the 13th row we then insert the satin ribbon))
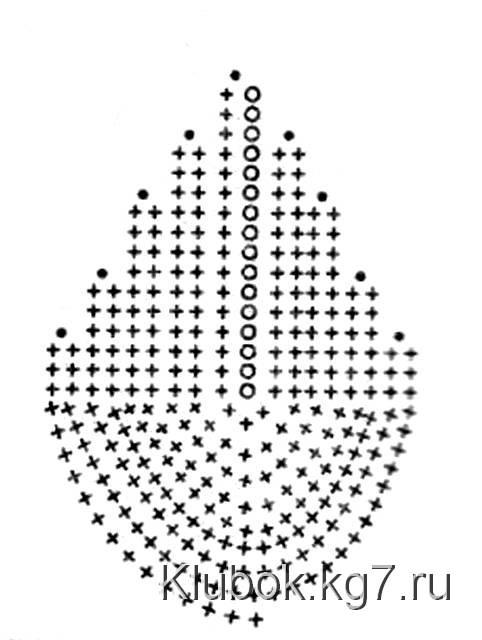
Then we crochet according to
the pattern,
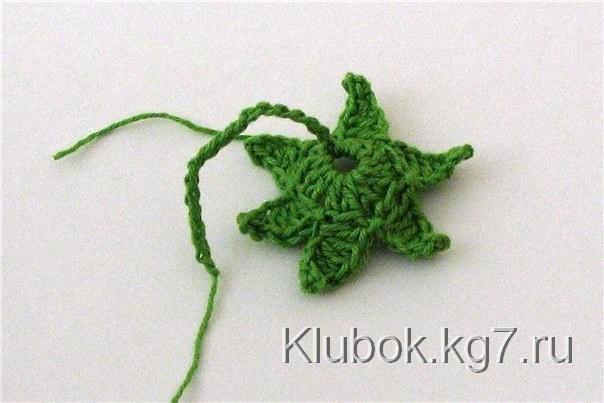
leaves according to the pattern
flowers - a circle of 5 loops is closed into
a ring, 12 d.c. then 3 air loops 2 d.c. 2 air loops and so you get
5 petals.
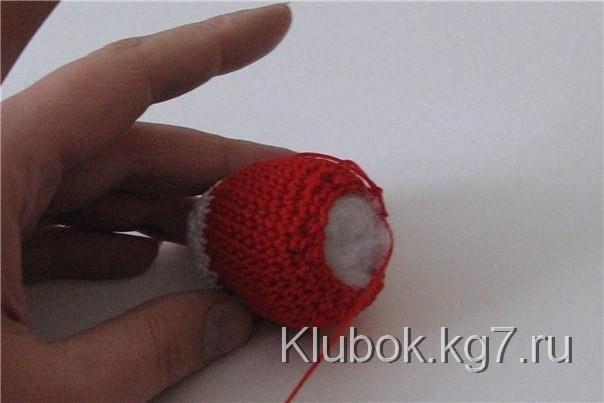
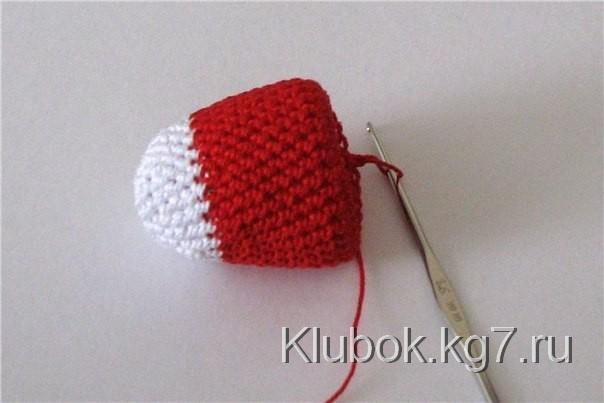
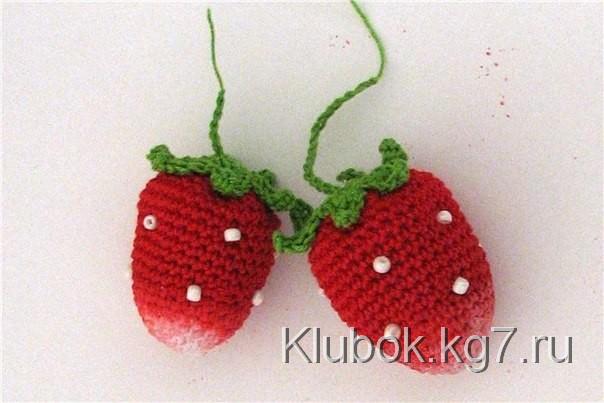
Berries
I used threads of 2 colors, white and red,
as berries are often unripe at the bottom
We start from the bottom.
4 air loops
are closed into a ring
1 row: max number of d.c. in the ring
2nd row: increase the number
of posts to 10-12 pcs
3rd row: to 14 pcs (i.e. +2)
4th row: another +2=16 pcs
After crocheting 6-7 rows, we change the thread. I do not tie it, but
lay it under d.c. with white, while still using the main thread,
Then I simply switch
to the red thread, laying the white one under the posts now.
After 1.5-2 cm
I cut the white thread. I continue crocheting with the red thread.
The shape and size of the berries
can vary, and it is not necessary to count each post – the most important thing
is to enjoy the process! My berry has a max number of posts in the row
25.
Do not forget that the front side of the berry is inside! And
before reducing the number of posts, turn it inside out.
To avoid holes
when reducing the number of posts, I do the following:
I grab the loop for the d.c.
but do not crochet it!
I grab the next loop for the next d.c.:
there are 3 loops on the hook – now I crochet all 3 loops at once!
In the first row
I close in this way every 3rd loop (*now it’s time to stuff the berry
with synthetic winterizer), in the next row every second, then every other and all
the remaining ones.
The berry itself is ready. Now it remains to tint it.
This can be done
during the crocheting process, first threading several
beads onto the red thread. Or it can be done afterwards. I like the second method better,
as when sewing beads to the berry, I thread it with the thread in different
directions, thus giving the berry
the necessary shape.
We crochet a chain of air loops (the excess can always be cut off later).
1 row: 3 air loops for rise, 11 d.c. in the last loop of the chain = 12
2 row.
To get a beautiful front side at the top, thread the “tail” through the resulting hole in the center of the sepals
Now it remains to sew the sepals to the berry.
