Knitting wonderful summer sun hats for girls
Added: 26.05.2016 в 07:09 Views: 88020
Knitting wonderful summer sun hats for girlsKlubokhttp://klubok.work/22/178/6399/Klubokhttps://klubok.work/css/image/top-logo-en.png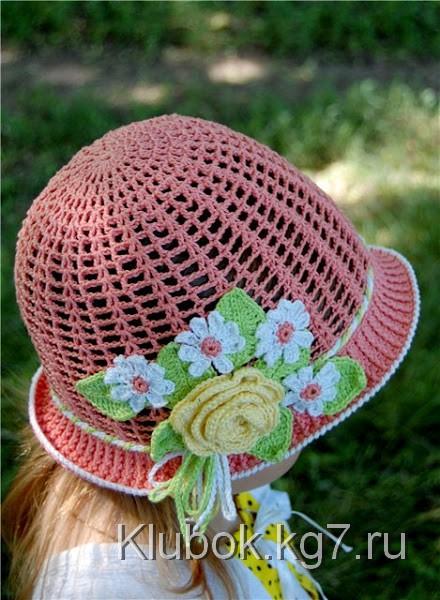

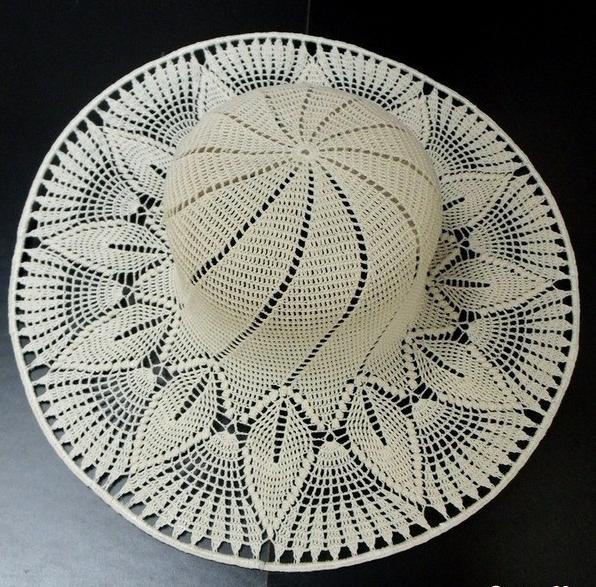
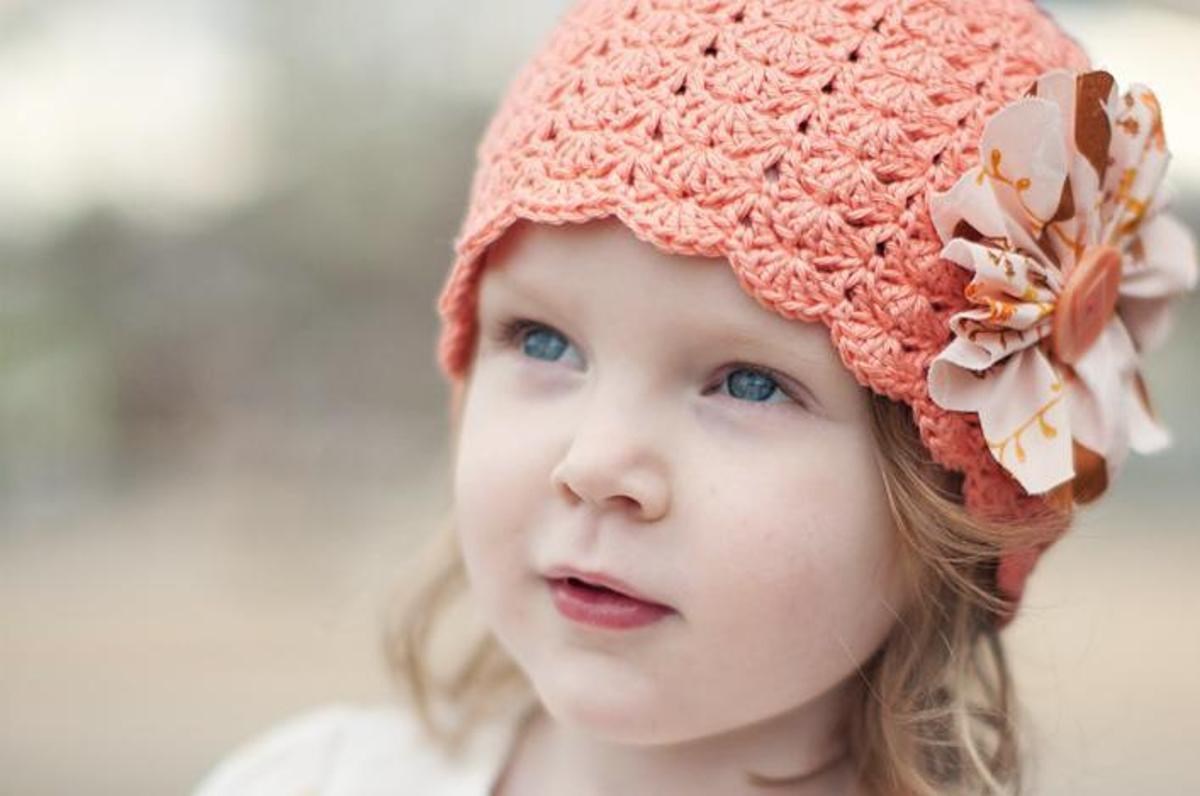
For spring-summer, you can knit such wonderful panama hats for little fashionistas. Bright and floral, they will be a beautiful addition to any outfit for your little girl.


A huge thank you to the author legendasun for the wonderful description for the hats!
So, let's knit such flower hats


We will need:
yarn - YarnArt Begonia 169m/50g (consumption for the hat itself - 1 skein);
hooks - #2.1 and #2.5.
Abbreviations:
ch - chain stitch
sl st - slip stitch
sc - single crochet
dc - double crochet
tr - triple crochet
dtr - double triple crochet
ttr - triple triple crochet
We take as a basis this diagram, but during the knitting process we will make our own adjustments.
The hat fits a head circumference of 48-50 cm.
Notes
Each row starts with 4 ch - 3 for raising and 1 for the arch. The pattern of the hat is knitted in the form of so-called "bobbles" - 2dc, separated by 1 ch, in the arch of the previous row. The expansion of the bottom to the required diameter occurs due to the uniform addition of 6 "bobbles" in each row. To prevent the corners at the places of increases from standing out sharply, the increases in each subsequent row are made with a displacement of half a segment relative to the previous one.
So,
make a ring from 4 ch.
Row 1 - 4 ch (3 for raising and 1 for the arch), 11 sc.
Row 2 - in each arch of the previous row, crochet 2 sc, separated by 1 ch. This results in 12 so-called "bobbles".
Row 3 - we start making increases-"bobbles". In each subsequent row, there will be six such increases. The essence of this increase is to crochet an additional "bobble" between the arches of the previous row.

Row 4 - make 6 increases-"bobbles" every 3 "bobbles" of the previous row.
Row 5 - make 6 increases-"bobbles" every 4 "bobbles" of the previous row.
Row 6 - knit without increases. In each arch of the previous row, crochet 2 dc, separated by 1 ch.
Row 7 - make 6 increases-"bobbles" every 5 "bobbles" of the previous row.


Row 8 - knit without increases. The bottom begins to round slightly.
Row 9 - make 6 increases-"bobbles" every 6 "bobbles" of the previous row.
At this point, the increases end and further to the desired depth of the hat, knit without them. With Pi, I am quite relative, the bottom turned out to be 13 cm.
I got 26 rows from the beginning of knitting and the height of the hat to the brim is 17 cm.


For the brim, crochet 2 rows of sc. In the second row, make increases in every 5th stitch. In the next row, in each top of the stitch from the previous row, crochet alternately 1 front post double crochet and 1 dc. Thus, using hook #2.1, crochet three rows of the brim. Then change the hook to #2.5 and crochet 2 more rows. In the photo, you can see that the brim becomes perpendicular to the hat itself from the first row of crocheting. The last row is crocheted with a crab stitch using hook #2.1. In the last photo, I showed how the seam looks. The hat is ready!


NOTES
When crocheting the brim, this drawing may help someone. One Osinochka sent it to me as a question. Variant #1 is correct. We crochet in one stitch - front post, in the second - regular, and so on.
The brim can and should be steamed.
You can make the increases for the brim more often; the main thing is to ensure that they spread evenly and do not wave.
ROSE
yarn - YarnArt Begonia 169m/50g;
hook - #2.5.
The size of the rose directly depends on the chosen yarn, hook, and the initially cast number of ch in the chain. I never cast them by eye, as I often reknit the same hats and "a little more - a little less" does not suit me. But the first time, of course, you need to go through the experience.
We take this diagram as a basis.

Cast a chain of 69 ch.
Row 1 - in the 5th ch of the chain, crochet dc. Then, skipping one ch, in the next ch of the chain, crochet 2 dc separated by 1 ch. Continue in this manner to the end of the row.
Row 2 - crochet 3 ch for raising and turn the work. In the first arch, crochet another 1 dc, 3 ch, and 2 dc. Then, to the end of the row, in each arch, crochet 2dc, 3 ch, 2 dc.


Row 3 - in each arch of the previous row, crochet 9 dc. Start the first petal with 3 ch. Roll the rose into a roll, and that's it. It takes a long time to crochet row 3, but it is worth it.


LEAVES
Crochet a chain of 15 ch. In the second ch of the chain, crochet sc. Then in each ch to the end of the chain - 1 slip stitch, 2 dc, 2 dtr, 3 tr, 2 dtr, 1 dc, 1 slip stitch, 1 sc. Turn the leaf and in the opposite direction crochet in a mirror order - 1 sc, 1 slip stitch, 2 dtr, 3 tr, 2 dtr, 2 dc, 1 slip stitch, 1 sc. Join with a sl st at the tip.


Next, using sl st (only through the leaf), crochet a groove in the middle of the leaf. Crochet an additional 25 ch - 10 ch for the stem and 15 ch for the second leaf, which is crocheted similarly to the first. Return to the start using the same sl st on the stem.


Cast 15 ch for the third leaf and crochet it just like the two previous ones. The twig with leaves is ready. In the last 2 photos, I showed how they can be twisted. In the first, a standard twig peeking out from under something. In the second photo, the leaves are positioned as on the 3rd hat from this tutorial.

FLOWER
We take this diagram as a basis. We will not change anything practically. But I always have room for the 7th petal, although originally there are six. Also, in the original, the flower is in a bud, while mine is always bloomed.

You can start with 2 ch and crochet 12 sc in the first one. Or you can, as I do, make a lazy loop and from it crochet first 1 ch, and then 12 sc and pull on the free end. Thus, you can tighten the center more tightly.
Next, join in a ring using sl st and from the first peak, crochet ch and sc.


Crochet 11 ch (10 ch - the base for the future petal and 1 ch for raising). In the second ch of the chain, crochet sc, then in each peak of the chain - 1 slip stitch, 6 dc, 1 slip stitch, 1 sc. (All stitches are crocheted in 1 half of the chain, as later the edging needs to be done behind the second half of the chain, so that the third one shows through.) Attach the petal to the base-center by crocheting one from two base stitches. Cast a chain of 11 ch and crochet the second petal similarly. Thus, all subsequent petals are crocheted.


The edging can be done in a contrasting color or the same. Attach the thread and using sc, edge each petal in turn behind the back half of the stitch. At the peak of each petal, crochet 3 ch. Probably to make the tips sharp. Seems like that's all.


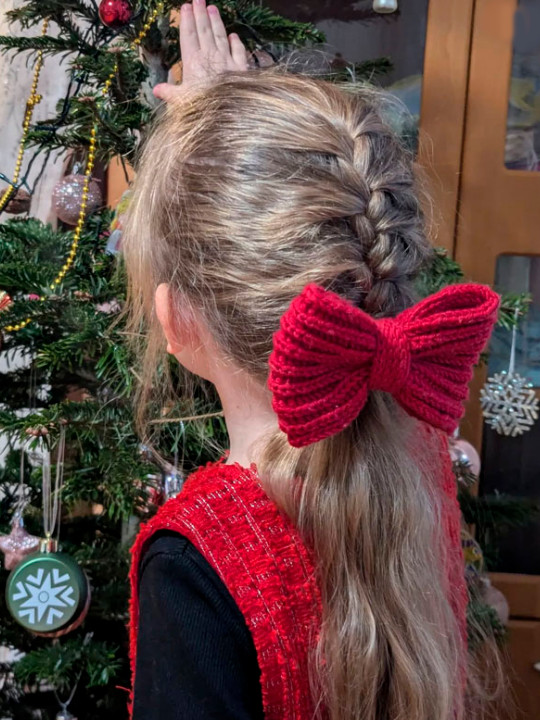
The headband on the last hat was made by twisting 6 threads of different colors into a braid, threading it through the hat, tying the ends, and weaving a braid from them, which I twisted into a swirl and sewed on. The swirls can be made in different ways. You can crochet chains from ch and sew them on, or you can use a tambour stitch. It depends on what is closer to you. On the holey hats, I like to lay it out as I want and then sew it.
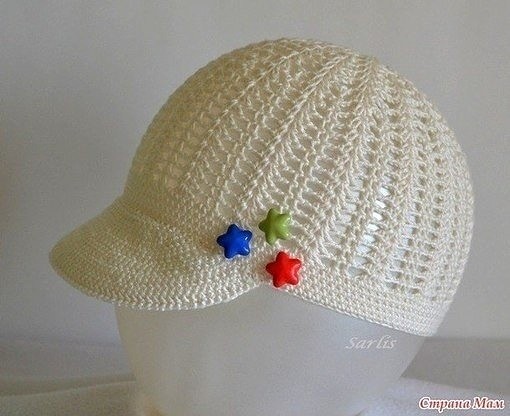
Panama "Bee's Happiness" and its derivatives


You will need:
Yarn - Yarn Art Begonia, 100% cotton, 169m/50 g. For head circumference 48-50 cm, you need 1 skein.
Hooks - #1.5, #2.1.
Notes:
The panama consists of 16 rapports, designed for head circumference 48-50 cm. To increase or decrease it by 1.5-2 cm, you can add or remove one rapport. Each row starts with 3 raising stitches.
So, let's get started.
Hook #2.1.
5 ch join in a ring.
Row 1 - 3 ch for raising, 15 sc.
Row 2 - from each stitch of the previous row, crochet a front post double crochet and separate them with 1 ch.


Row 3 - in each peak of the previous row, crochet simultaneously 1 sc, 1 front post double crochet, 1 ch = 1 rapport.
Row 4 - sc, ch, front post double crochet, ch. Thus, from the sc of the previous row, crochet sc, from the front post double crochet - front post double crochet.


Row 5 - from 1 sc of the previous row, crochet 2 sc, 1 ch, from the front post double crochet - front post double crochet, 1 ch.


Row 6 - from 1 sc, crochet 2 sc, then sequentially in each peak of the sc, 1 ch, front post double crochet, 1 ch.
Row 7 - from 1 sc, crochet 2 sc, then sequentially in each peak 2 sc, 1 ch, front post double crochet, 1 ch.

Row 8 - from 1 sc, crochet 2 sc, then in 2 peaks of the previous row - 2 sc (skip the 4th peak), 1 ch, front post double crochet, 2 ch. Starting from this row, the pattern will shift due to crocheting 2 sc in the first peak and not crocheting sc in the fourth.
Further, all rows are crocheted as the 8th until the desired depth. I got 25 rows.
Change the hook to #1.5 and crochet 2-3 rows of sc. In the last row, make increases in every third stitch. Further, from each stitch of the previous row, crochet 1 sc, 1 front post double crochet, 1 sc, 1 front post double crochet, etc. The brim should resemble a 1x1 ribbing when knitting with needles.
Thus, with hook #1.5, crochet 3 rows of the brim, then change the hook to #2.1 and crochet 3 more rows. Edge the brim with crab stitch using hook #1.5. The panama is ready. The panama needs to be steamed. If desired, the brim can be slightly starched. Mine are not starched.

.
Diagrams for daffodils and the bee:


.