HAT WITH EARS
Added: 29.03.2017 в 09:42 Views: 42220
HAT WITH EARSKlubokhttp://klubok.work/22/178/6818/Klubokhttps://klubok.work/css/image/top-logo-en.png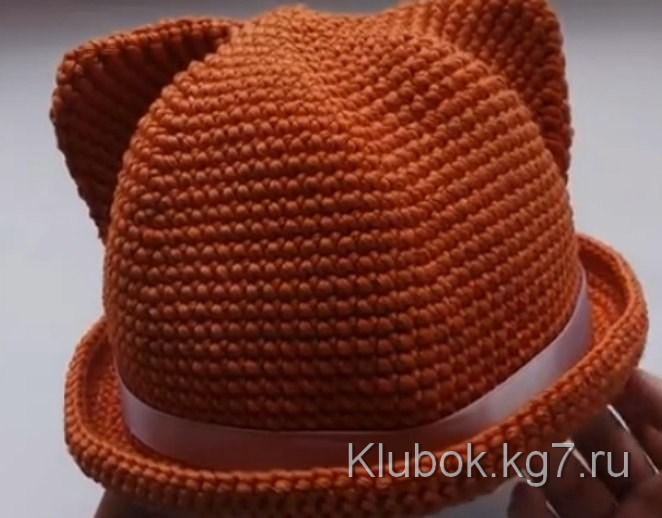
Short description of the hat for a head circumference of 50
(yarn – just over a skein of Troitsk "Snowdrop", 100% cotton, hook No. 4), we knit everything in a spiral:
Row 1 - 6 sc in amigurumi ring (6)
Rows 2-4 – knit in a circle with 6 increases in each row (24)
Row 5 - we start to shape the ears, we do this as follows: apart from the increases in the bottom, we choose 2 points on the sides (for me, these are the 5th stitch from the beginning of the row and the 5th stitch from the end of the row) and knit 3 sc in these points.
Rows 6-12 - we knit with uniform increases - 6 sc in each row, plus 3 sc on the sides for the ears, while the stitches in which we knit 3 sc for the ears must be strictly aligned in each row.
Rows 13-14 – we knit without increases in the ears, but with increases in the bottom (6 sc in each row).
Rows 15-16 – we start decreases in the ears, we do this as follows: from 3 stitches we make one, the bottom is knitted without increases.
Row 17 – we continue decreases in the ears, plus we knit 6 uniform increases in the bottom.
Rows 18-19 - we continue decreases in the ears, the bottom is knitted without increases.
Row 20 - we continue decreases in the ears, plus we knit 6 uniform increases in the bottom.
Rows 21-22 - we continue decreases in the ears (these are the last rows of the ears), the bottom is knitted without increases.
Rows 23-31 – we continue to knit the crown with sc.
Brim: Row 1 we knit through the front loop of the stitches of the previous row, Row 2 – increase in every 4th stitch, Rows 3-6 – sc.
Description for a head circumference of 56
thick yarn (I used yarnart merino bulky, alize superlana maxi will also work) - for a head circumference of 56, 150 g or one and a half skeins were used
hook No. 5
The hat is knitted as a whole, nothing is sewn or tied, it is knitted in a spiral. We start with a standard circle:
Row 1 - 6 sc in amigurumi ring (6)
Row 2 - 1 increase in each sc of the previous row (12)
Row 3 - *1 sc, 1 increase* 6 times (18)
Row 4 - *2 sc, 1 increase* 6 times (24)
Row 5 - *3 sc, 1 increase* 6 times (30)
And now pay attention (!) we start to shape the ears, we do this as follows: apart from the increases in the bottom, we choose 2 points on the sides (for me, these are the 8th stitch from the beginning of the row and the 8th stitch from the end of the row) and knit 3 sc in these points, like this:
Row 6 - 4 sc, 1 increase, 1 sc, 3 sc in 1 sc of the previous row, 2 sc, 1 increase, *4 sc, 1 increase* 2 times, 1 sc, 3 sc in 1 sc of the previous row, 2 sc, 1 increase, 4 sc, 1 increase (40)
And we continue to knit for another 4 rows with uniform increases - 6 sc in each row plus 3 sc on the sides for the ears, while the stitches in which we knit 3 sc for the ears must be strictly aligned in each row (see fig. 1). Then we knit 2 rows without increases in the ears. The next 5 rows we knit with uniform mirrored decreases in the ears (see fig. 2), while we NO longer make increases around the bottom.
Then we continue to knit the crown of the hat - I got 11 rows, in which I made uniform increases around the head again in rows 5 and 8 (5 sc in the row).
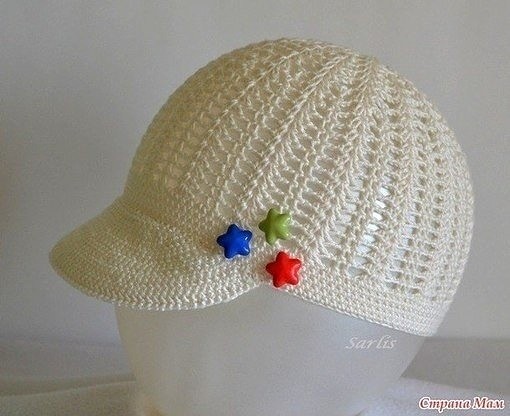
Having knitted the hat to the desired depth, we shape the visor as follows: we choose 28 stitches at the front of the hat, mark them with markers, and when knitting the next row, we knit the marked stitches through the front wall of the stitch and another 2 rows according to the pattern (see fig. 3).
In conclusion, we finish the hat with sc .