


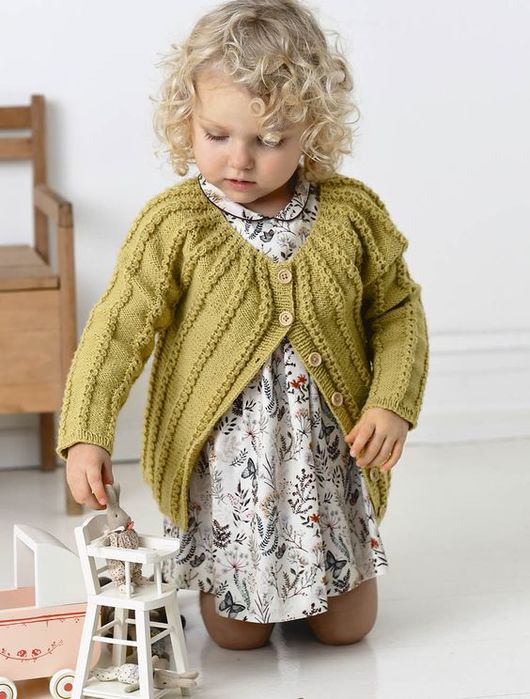
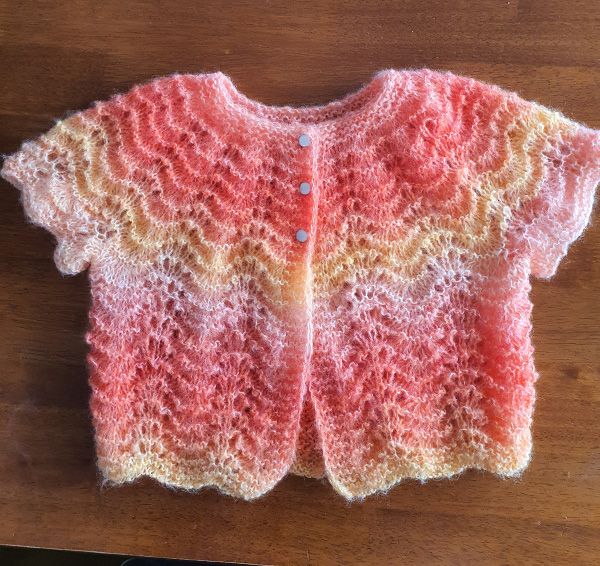
pattern of lace yoke and explanations for calculations
Added: 27.09.2025 в 14:19 Views: 11664
pattern of lace yoke and explanations for calculationsKlubokhttp://klubok.work/23/182/9175/Klubokhttps://klubok.work/css/image/top-logo-en.png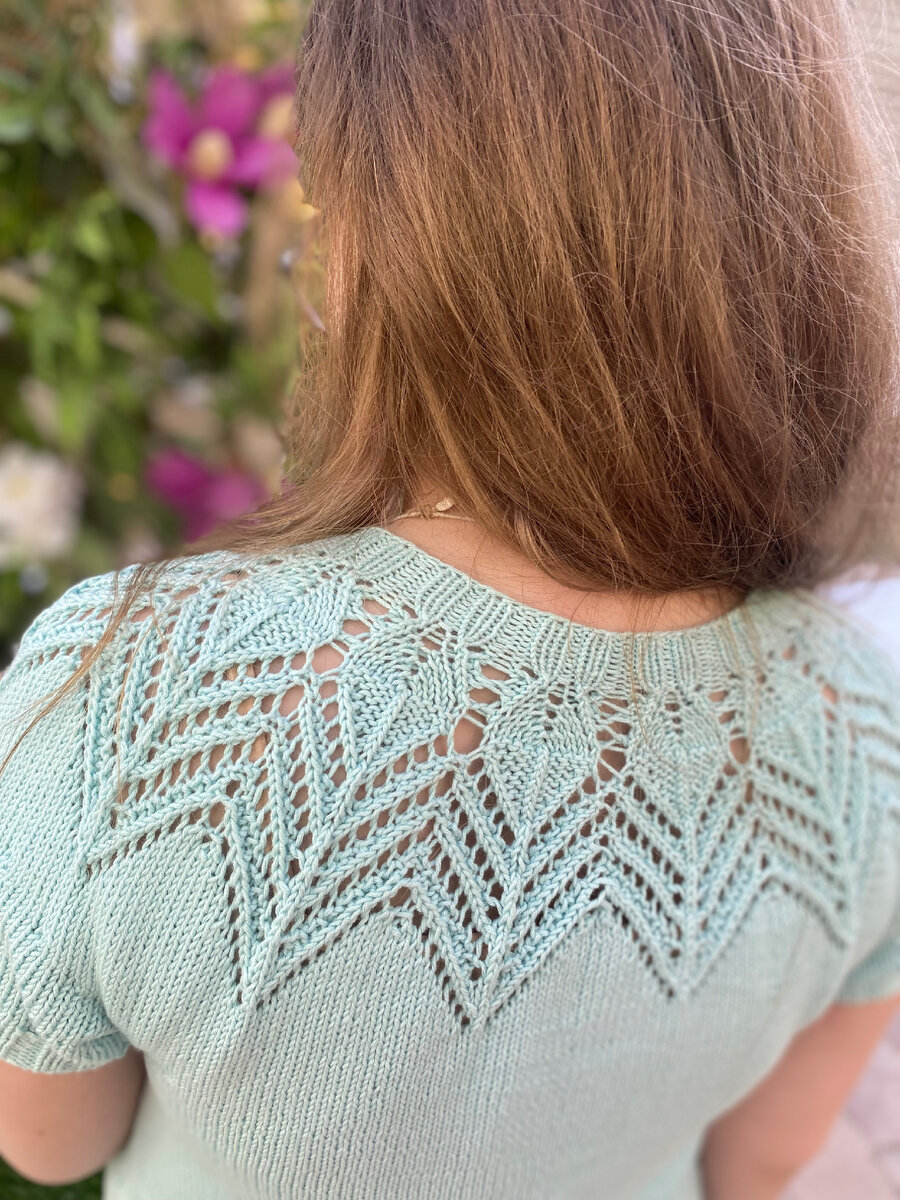
Calculation from bust circumference
In this case, you calculate using the formula BC x 1.38.
You can find the detailed calculation using this formula in the Round Yoke folder.
You will get the number of stitches at the moment of separating the sleeves. The height of the yoke (the number of rows you need) can be completed in stockinette stitch without adding more stitches.
In this case, you will only need to check if you have enough stitches at the end for the neckline.
This is very important!
Do not make calculations based on ribbing. And be sure to wash and dry the sample before starting calculations! Especially if you are knitting with cotton or viscose. Because the fabric changes significantly after washing. These fibers do not hold ribbing. And if before washing your neckline fits snugly, after washing - it lays completely differently.
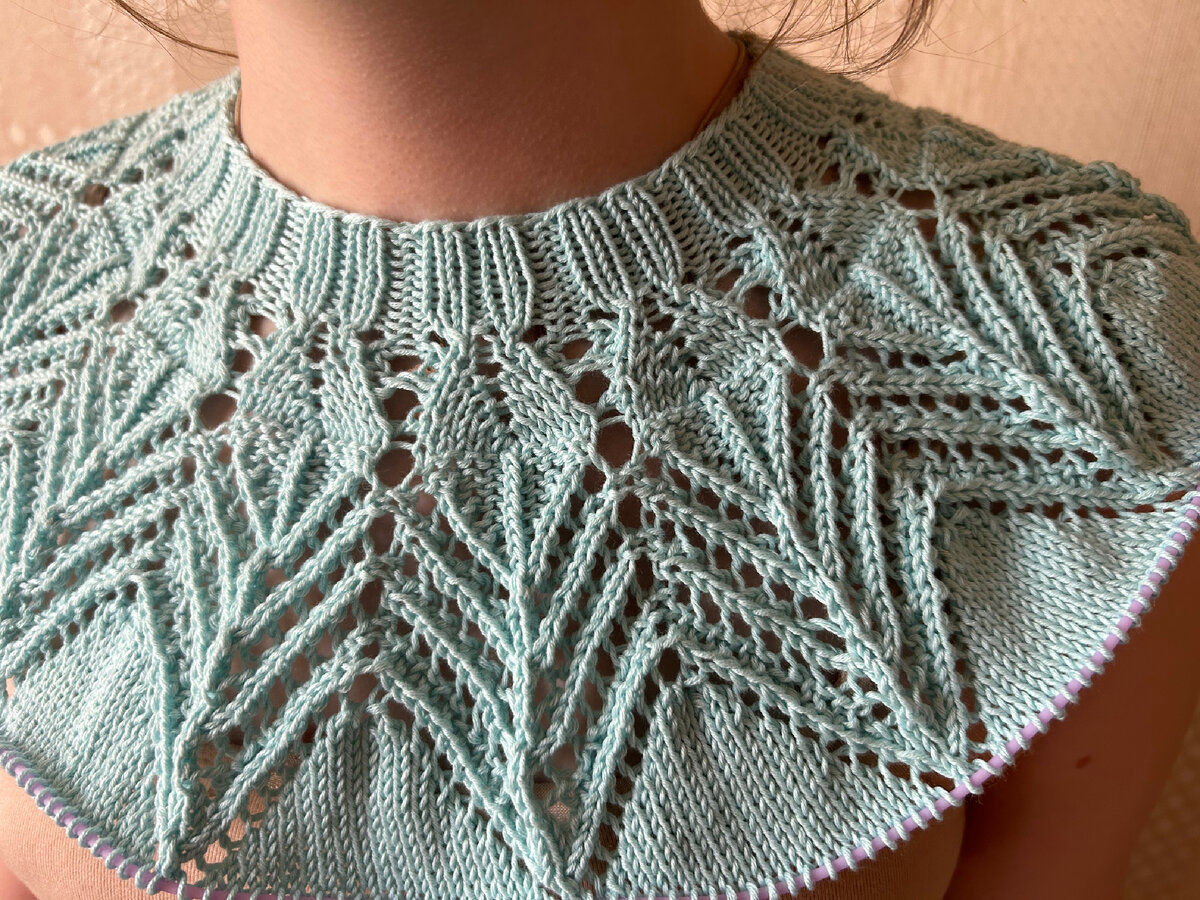
Neckline before washing - see how tightly it fits to the neck
Neckline after washing - looks completely different
Errors in calculations based on the sample before washing are very common. I understand that many experienced craftswomen are surprised. But the fact remains. I have faced the question: "What should I do, my item turned out too large?" many times. And each time it turned out that there was a sample, but it wasn't washed, it was clean...
Yoke diagram:
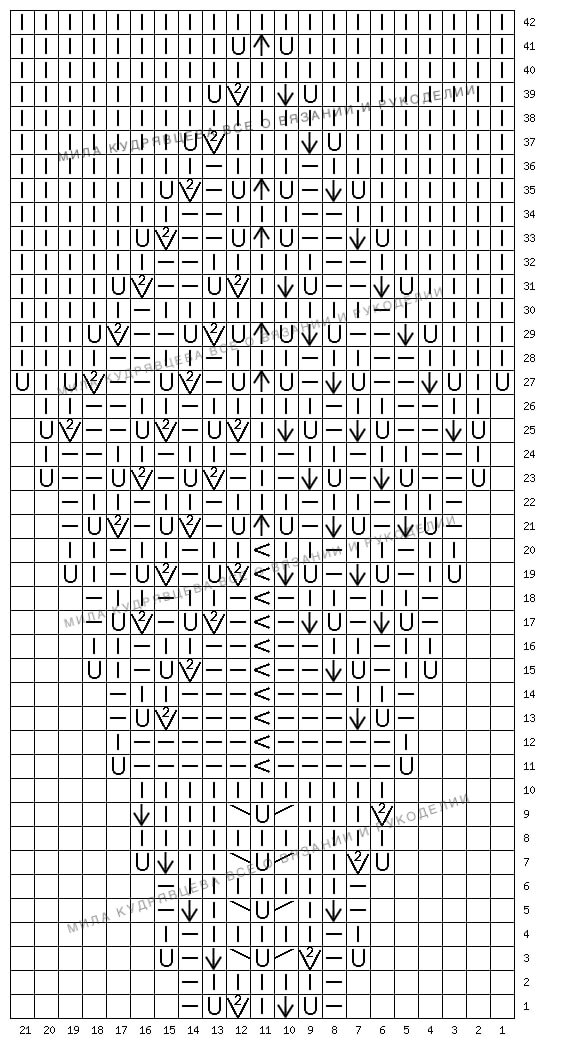
There is a typo in the diagram!!!
In row 5 after the purl 2 together knitwise with a right-leaning decrease!
Key to the diagram:
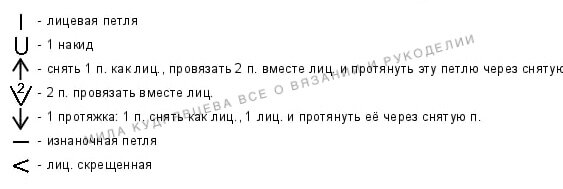
yarn over
< twisted knit
There is another symbol in the diagram - 11th stitch in 3, 5, 7 and 9 rows. This symbol means that you need to knit 3 stitches from 1 knit stitch. Insert the needle into the stitch, knit it, without dropping the stitch from the left needle make a yarn over and knit another stitch from it.
Empty squares - no stitch.
Category: Blouses, pullovers
Also in this category:


Copyright © 2007 - 2023 Kardinal-Group
admin@klubok.work
admin@klubok.work