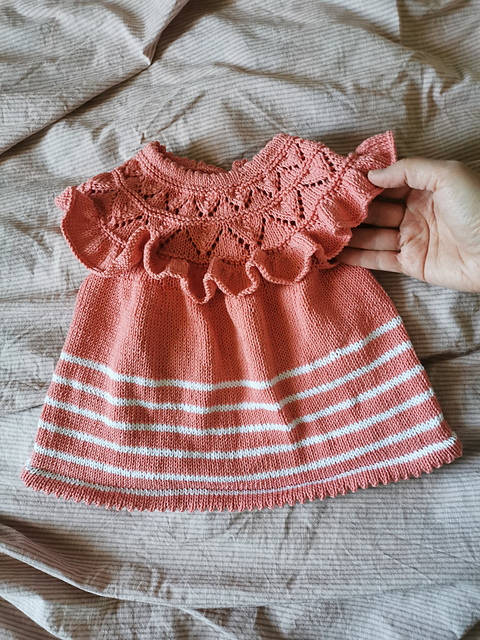
Dress
Added: 05.09.2014 в 14:54 Views: 190359
DressKlubokhttp://klubok.work/23/186/5231/Klubokhttps://klubok.work/css/image/top-logo-en.png

Sizes:
1-2 years (48-53 cm chest circumference)
2-3 years (51-56 cm chest circumference)
3-4 years (56-61 cm chest circumference)
4-6 years (61-66 cm chest circumference)
Do not follow the sizes by age alone, but check your child's chest measurement (all children are different).
Knitting density:
21 stitches per 10 cm in stockinette stitch in the round
22 stitches per 10 cm in stockinette stitch
24 stitches per 8.5 cm in "Honeycomb" pattern
Materials:
I recommend using wool yarn with well-defined stitches for knitting so that the patterns are clearly visible. I used:
Zara from Filatura di Crosa (125 m in 50g)
Smaragd Classic from Austermann (125m in 50g)
It's hard for me to recommend yarn as I don't know the names of companies available to you.
3, 4, 4, 5 skeins of yarn color A (125m)
1 skein of color B if you want to work with two colors.
Circular needles, 3 mm (60 cm long)
Circular needles, 4 mm (60 and 80 cm long)
2 stitch holders
2 multicolored stitch markers
Hook, 3 mm (for weaving in yarn tails and for finishing with a contrasting color)
Instructions:
The tunic is knitted in the round from the waist to the underarms. Then the work is divided into two parts: the front and the back, which are knitted identically.
The shoulders are joined by knitting the two pieces together with a third needle.
Then stitches are picked up from the bottom (at the waist edge), and the skirt is knitted in the round to the hem.
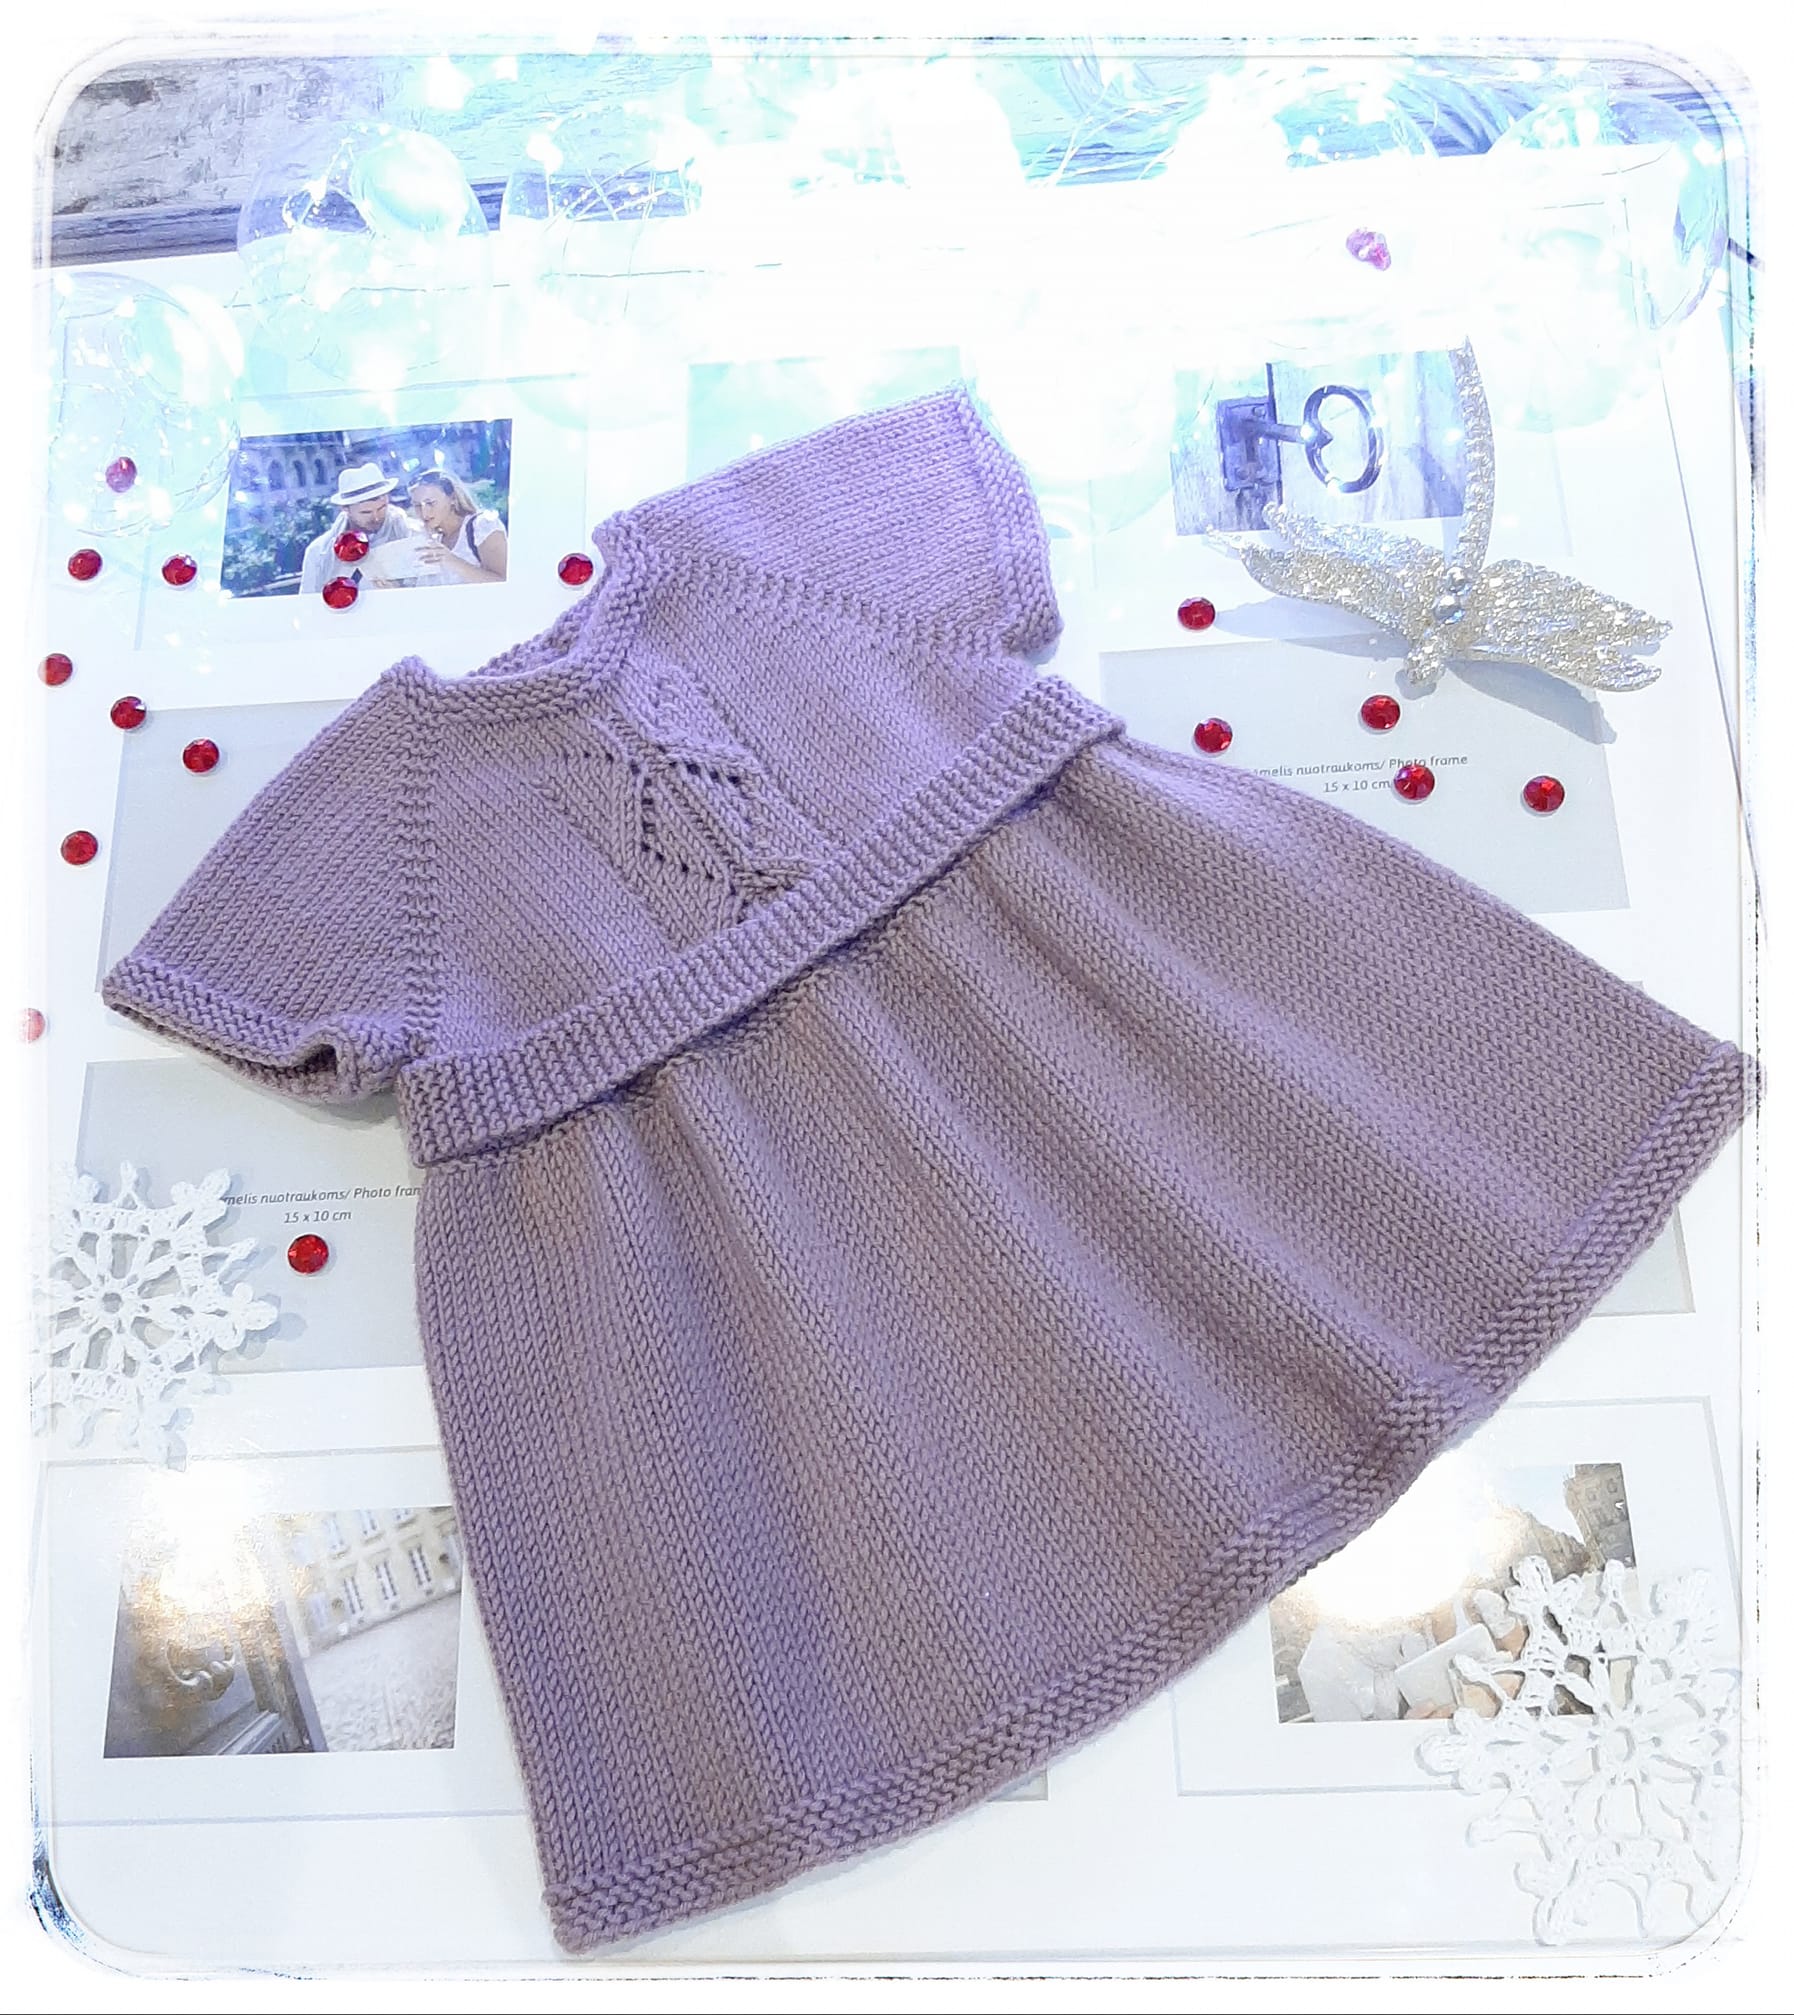
I suggest several options for execution: you can knit in two colors (the option I used in the green tunic will be explained). I also offer 3 options for the hem. The fairy can be knitted as a vest, as a tunic, and as a dress. The instructions for the length here are given for the tunic option.
Method:
Cast on 134 (146, 158, 166) stitches with a scrap yarn. Then using 3mm circular needles, pick up 124 (136, 148, 156) stitches with the main yarn from the chain you made with the hook. Mark the circle join with a marker of one color. Make sure the stitches are not twisted.
Then using the main color yarn, knit in the round. At this point, mark the center of the work with a different colored marker every 62 (68, 74, 78) stitches. These markers will be used to separate the back and the front.
Knit 8 (10, 10, 12) rounds in 1x1 ribbing.
Green tunic in two colors: knit one round with the main color, the next round again with the main color, but in 1x1 ribbing. Then the next round in 1x1 ribbing with the contrasting color and so on. Finish with the main color.
Switch to 4 mm needles. Knit one round, evenly increasing 20 (20, 20, 24) stitches. You should now have 144 (156, 168, 180) stitches on the needles.
Honeycomb Pattern:
Rounds 1-4: 2 purl, *2 knit, 4 purl*. Repeat * until the last 4 stitches, then 2 knit, 2 purl.
Round 5: 2 stitches on a spare needle (hold in back), 1 knit, 2 stitches from spare needle knit purl. * 1 stitch on a spare needle (hold in front), 2 purl, knit one stitch from the spare needle, 2 stitches on a spare needle (hold in back), 1 knit, 2 stitches from the spare needle knit purl.* Repeat * until the last 3 stitches, then 1 stitch on a spare needle (hold in front), 2 purl.
Rounds 6-10: 1 knit, *4 purl, 2 knit* Repeat* until the last 5 stitches, then 4 purl, 1 knit.
Round 11: 1 stitch on a spare needle (hold in front), knit 2 purl stitches from the spare needle, *2 stitches on a spare needle (hold in back), 1 knit, 2 stitches from the spare needle knit purl, 1 stitch on a spare needle (hold in front), knit 2 purl stitches from the spare needle*. Repeat * until the last 3 stitches, then 2 stitches on a spare needle (hold in back), 1 knit, 2 stitches from the spare needle knit purl.
Round 12: as Round 1
In Round 12, knit to the last 6 stitches and close them as purl. Remove the marker and close another 6 stitches as purl (i.e., a total of 12 stitches closed)
Start a new round:
Row 1: knit as the first round of the honeycomb pattern to the last 6 stitches before the second marker, close them as purl. Remove the marker and close as purl another 6 stitches (i.e., closed another 12 stitches). Finish the round to the end.
The front and back will now be knitted separately and identically. The total number of stitches on each half should be 60 (66, 72, 78).
Note:
Continue knitting the honeycomb pattern, but now not in the round, but in rows. Keep in mind that there should be 5 rows between each interweaving. How to knit purl rows is indicated below (Row 2). When you need to decrease stitches and make weavings at the same time and you do not have enough stitches for a full weaving, just knit those stitches according to the pattern (i.e., knit or purl).
Front:
Row 2 (purl): knit the first 2 stitches as knit. Then purl and knit stitches according to the pattern (i.e., as you see them). Finish with 2 knits. All purl rows will be knitted this way going forward.
Rows 3, 5, 7, 9 (knit): 2 knit, slip one stitch as knit, knit the next, lift the slipped stitch over the knitted one. *repeat until the last 4 stitches, knit 2 stitches together as knit, 2 knit.
After Row 9, the number of stitches decreased by 8 (4 from each side).
The total number of stitches is now 52 (58, 64, 70).
For sizes 1-2 years and 2-3 years:
Rows 11, 13: 2 knit, *repeat*, 2 knit
Row 15: go directly to Row 19 and continue knitting from there.
For sizes 3-4 years and 4-6 years:
Rows 11, 13, 15: 2 knit, slip one stitch as knit, knit the next, lift the slipped stitch over the knitted one. *repeat until the last 4 stitches, knit 2 stitches together as knit, 2 knit.
After Row 15, the total number of decreased stitches should be 14 (7 from each side). This number includes decreases in Rows 3-9.
For all sizes:
Row 17: 2 knit, *repeat*, 2 knit
Row 18: as Row 2
The total number of stitches at this stage is 52 (58, 58, 64).
Row 19 (knit): 2 knit, knit the next 12 stitches as repeats, then knit two stitches together as purl, the next 22 (28, 28, 34) stitches knit in 1x1 ribbing, starting with knit, the next 12 stitches knit as repeats, 2 knit.
Row 21: 2 knit, knit the next 12 stitches as repeats, the next 23 (29, 29, 35) stitches knit in 1x1 ribbing, 12 stitches knit as repeats, 2 knit.
Row 23: 2 knit, knit the next 12 stitches as repeats, 2 knit, the next 19 (25, 25, 31) stitches close as purl, 2 knit, 12 stitches knit as repeats, 2 knit.
Row 24: (start knitting the right shoulder strap) on 16 stitches according to the pattern (12 stitches pattern + 2 knit on each side).
Knit the strap until the height from the underarms to the shoulder is 10 (11.5, 12.6, 14) cm. Transfer the stitches to a holder.
Left strap: attach the yarn from the purl side. Knit as the right, starting from Row 24.
Back: as front
Now join the shoulder seams by knitting the two pieces together with a third needle.
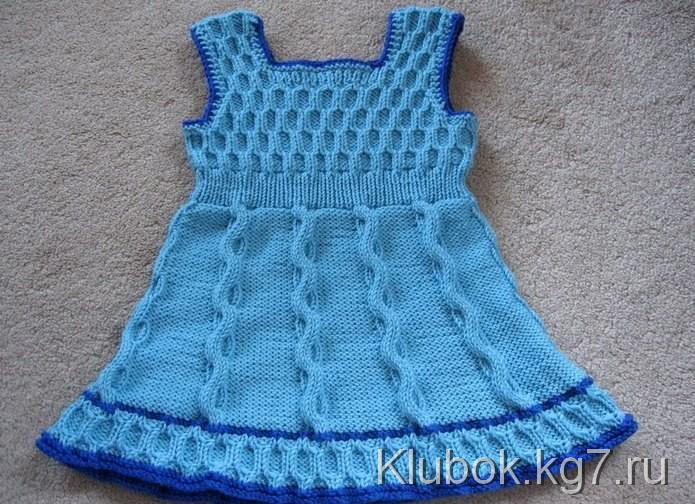
Skirt:
Unravel the scrap yarn and pick up 124 (136, 148, 156) stitches on the needle. Place a marker and join for knitting in the round.
Knit the next round, evenly increasing 6 (4, 2, 4) stitches so that the total number of stitches becomes 130 (140, 150, 160).
The skirt will be divided into 10 sections, each with 13 (14, 15, 16) stitches.
Each section will have a braid pattern. The braid is knitted from 6 stitches, so there will be 7 (8, 9, 10) stitches between the braids.
Before starting the "Braid" pattern while knitting the skirt, move the marker 3 stitches forward!
Now you can start working:
Rounds 1-2 (initial rounds): *7 (8, 9, 10) purl, 6 knit.*
Round 3: *7 (8, 9, 10) purl, then slip 3 stitches to a spare needle and hold in front, knit the next 3 stitches, then knit 3 stitches from the spare needle knit.*
Round 4 (begin adding stitches): *add a stitch (knit the stitch twice as purl first through the back loop and then through the front), 5 (6, 7, 8) purl, add a stitch as done previously, 6 knit.*
Thus we added 20 stitches.
Rounds 5-8: *9 (10, 11, 12) purl, 6 knit.*
Round 9: *9 (10, 11, 12) purl, then slip 3 stitches to a spare needle and hold in back, knit the next 3 stitches, then knit 3 stitches from the spare needle knit.*
Rounds 10-14: *9 (10, 11, 12) purl, 6 knit.*
With an interval of 5 (6.5, 7.5, 10) cm repeat the round with adding stitches twice. The rounds with adding stitches do not necessarily have to occur on the 4th round in the count. In that case, knit the fourth round as 5-8. A total of 3 rounds with adding stitches should be made, each adding 20 stitches (a total of 60 stitches added).
If you want the skirt to be fuller, you can add more stitches by repeating the adding rounds more often.
Repeat rounds 3-14 until the length of the skirt reaches 14 (17.5, 20, 25.5) cm from the lower edge of the waist ribbing. This length is for the tunic option. You can also make it as a vest or as a dress (by making the skirt shorter or longer).
Next stage: the hem! The hem knitting is provided in 3 options.
Option 1: finish the skirt on the 3rd or 9th round.
Option 2: finish the skirt on the 8th or 14th round.
Option 3: finish the skirt on the 4th or 10th round.
Hem Option (length 4-5 cm):
(320x240, 35Kb)
The center of the gathering will be the 2 middle stitches from the 6 knit that made the braid.
Round 1: 15 (16, 17, 18) purl, yarn over, 2 knit, yarn over, * 17 (18, 19, 20) purl, yarn over, 2 knit, yarn over* until the last 2 stitches, 2 purl.
Round 2: 15 (16, 17, 18) purl, 4 knit, * 17 (18, 19, 20) purl, 4 knit* until the last 2 stitches, 2 purl.
Round 3: 15 (16, 17, 18) purl, yarn over, 4 knit, yarn over, * 17 (18, 19, 20) purl, yarn over, 4 knit, yarn over* until the last 2 stitches, 2 purl.
Round 4: 15 (16, 17, 18) purl, 6 knit, * 17 (18, 19, 20) purl, 6 knit* until the last 2 stitches, 2 purl.
Round 5: 15 (16, 17, 18) purl, yarn over, 6 knit, yarn over, * 17 (18, 19, 20) purl, yarn over, 6 knit, yarn over* until the last 2 stitches, 2 purl.
Round 6: 15 (16, 17, 18) purl, 8 knit, * 17 (18, 19, 20) purl, 8 knit* until the last 2 stitches, 2 purl.
Round 7: 15 (16, 17, 18) purl, yarn over, 8 knit, yarn over, * 17 (18, 19, 20) purl, yarn over, 8 knit* until the last 2 stitches, 2 purl.
Round 8: 15 (16, 17, 18) purl, 10 knit, * 17 (18, 19, 20) purl, 10 knit* until the last 2 stitches, 2 purl.
Rounds 9-10: knit as 8
If you are using two colors, then now introduce the second color yarn into the work.
1 round knit.
1 round purl.
Close the stitches knit.
Hem Option (length 5 cm):
(320x170, 25Kb)
The total number of stitches at this stage should be 190 (200, 210, 220), unless you have reduced or increased the number of rounds on the skirt where stitches were added.
If you are using two colors, then knit the following rounds 1-3 with the second color. If not, then knit them with the main color.
Round 1: knit.
Round 2: purl.
Round 3: knit.
Rounds 4-6: *1x1 ribbing (knit, purl)*
Round 7:* 1 knit, add a stitch (knit it twice as purl, first through the back loop and then through the front.)*
Rounds 8-10: * 1 knit, 2 purl.*
Round 11: *1 knit, 1 purl, add a stitch as in round 7*
Rounds 12-13: *1 knit, 3 purl.*
Round 14: Close the stitches according to the pattern.
Hem Option (length 5.5 cm):
(320x186, 25Kb)
The total number of stitches at this stage should be 190 (200, 210, 220), unless you have reduced or increased the number of rounds on the skirt where stitches were added.
If you are using two colors, then knit the following rounds 1-2 and 14-17 with the second color. If not, then knit them with the main color.
Round 1: knit.
Round 2: purl.
Round 3: Knit in stockinette stitch and evenly increase 5 (4, 7, 6) stitches in each section that would be between the braids. The total number of stitches should become 240 (240, 280, 280).
Note:
If you added more or fewer rounds where stitches were added on the skirt, then the number of stitches between each braid for hem option 3 should be divisible by 6. And the number of stitches after round 3 should be greater than the original (do not decrease stitches to achieve divisibility by 6, but rather increase).
Round 4: 1 knit, 4 purl, *2 knit, 4 purl,* until the last 7 stitches, then 2 knit, 4 purl, 1 knit.
Rounds 5-13: Start the Honeycomb Pattern, but only from round 11 and finish it with round 6 (the round numbers as noted in the honeycomb pattern description above).
Rounds 14, 16: knit.
Round 15: purl.
Round 17: Close the stitches as purl.
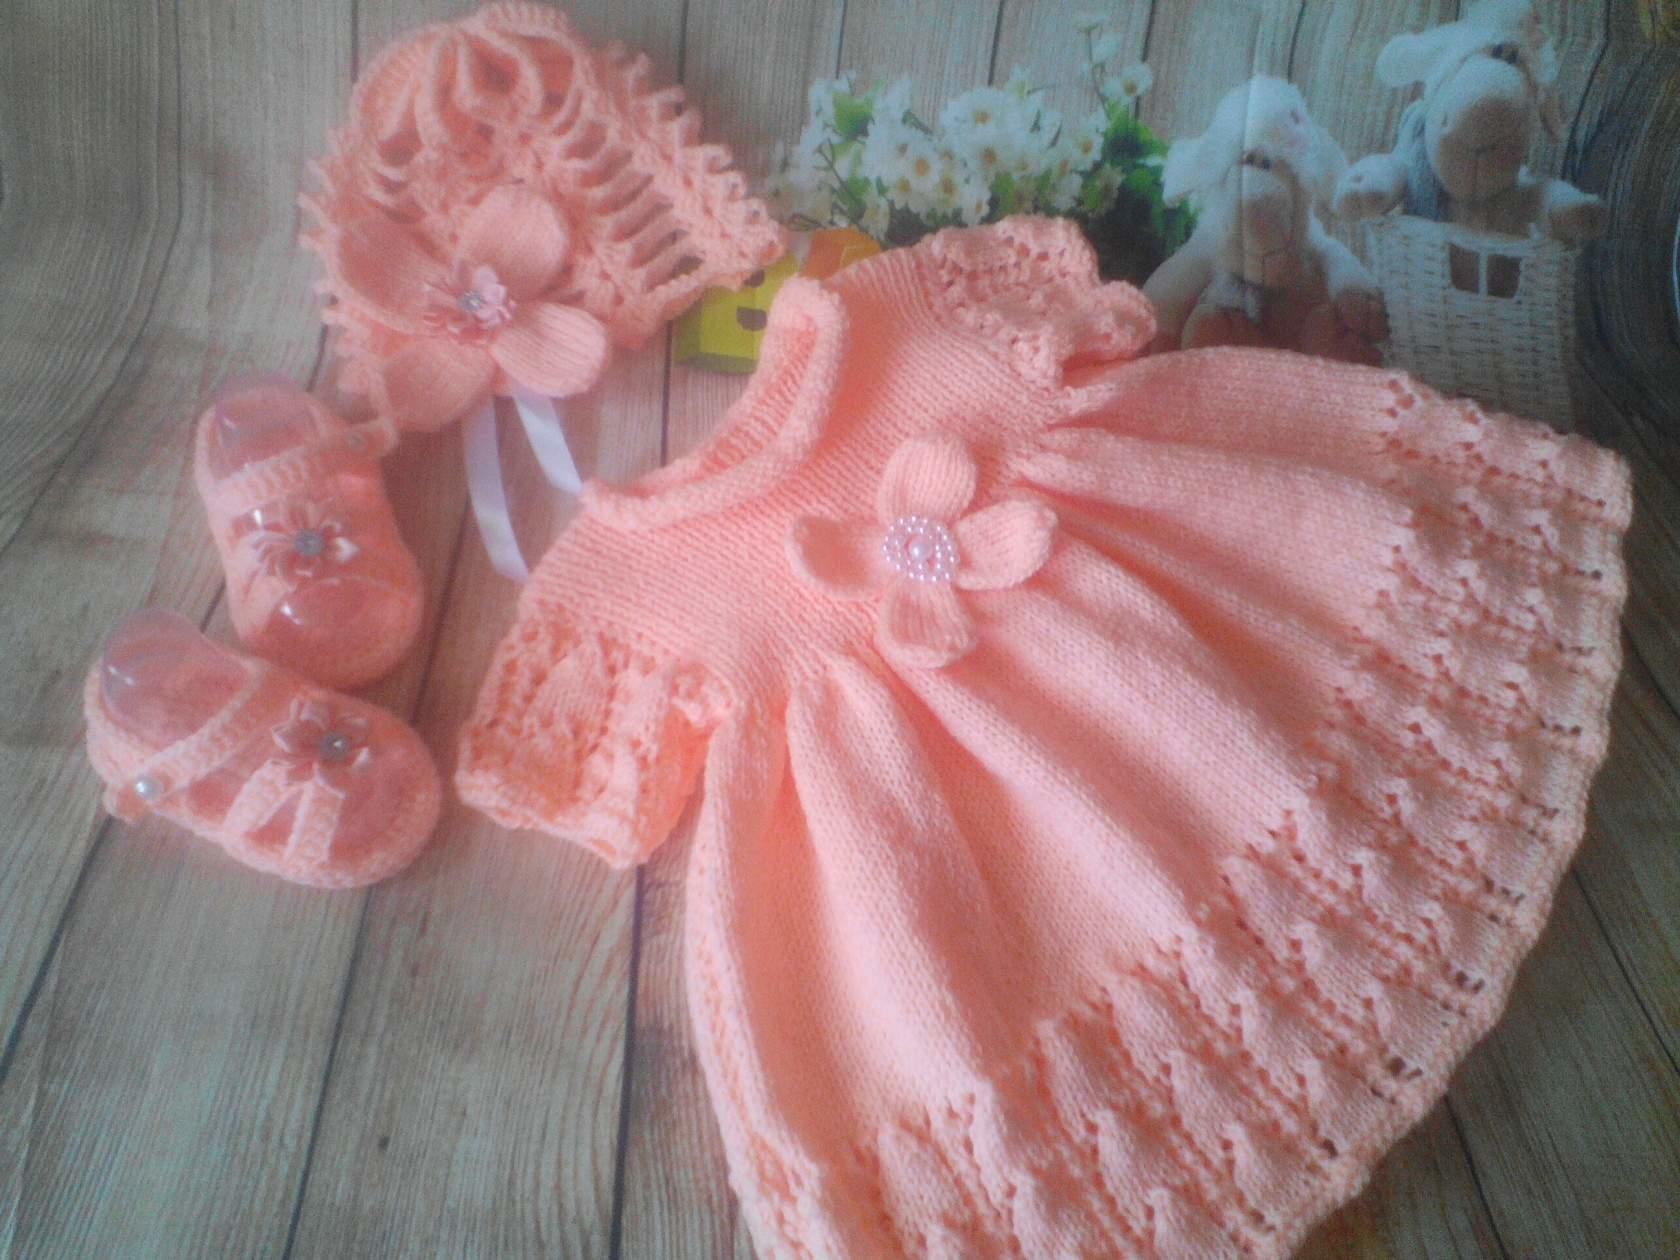
Finish with any edging, decorate with buttons or embroidery.