Great description for knitting a raglan that doesn't constrict the neck and doesn't pull under the arms
Added: 20.02.2019 в 08:28 Views: 22559
Great description for knitting a raglan that doesn't constrict the neck and doesn't pull under the armsKlubokhttp://klubok.work/1/203/7664/Klubokhttps://klubok.work/css/image/top-logo-en.png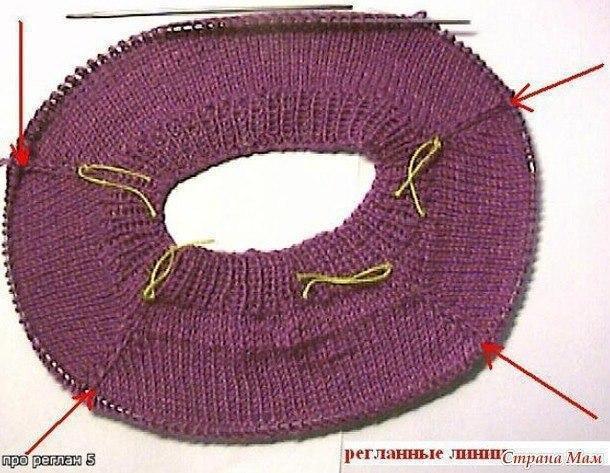
Great description for knitting a raglan so that it does not press on the neck and does not pull under the armpits
description:
here is the very description and calculation. It might be useful for someone else. For knitting
a sweater with a "raglan" sleeve, you need to make a chart. The calculation of stitches based on the
neck circumference (NC) and the knitting density, which we will determine by the sample.
EXAMPLE: If NC=34 cm, the ease allowance is -4 cm, and the knitting density
is 2.5 stitches per 1 cm, then you need to cast on 2.5x(34+4)=95
stitches. We will distribute these stitches across all parts of the sweater. If each raglan line
consists of 1 stitch, then for 4 lines we need 4 stitches, so
95-4=91 stitches. We will divide the remaining stitches into 4 parts (front, back, and
two sleeves). Since 91 is not divisible by 4 without a remainder, we round it up to
92. 92:4=23 stitches. Experimentally, it has been established that 1 such part should
be allocated to the back, 2 to the front, and 1 to the 2 sleeves. However, so that the front is not
too wide, we will reduce it by 3 cm, i.e., by 2.5x3=7.5 stitches, and we will get
(23x2)-7=39 stitches. From the subtracted 7 stitches, we will add 3 to the sleeves:
(23+3):2=13 stitches, and 4 stitches to the back: 23+4=27 stitches.
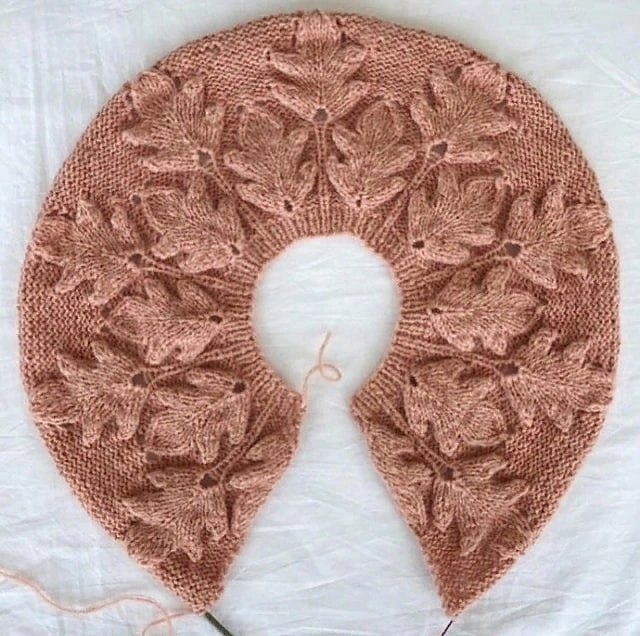
for the first time, I came across a reasonable description of the raglan. It is clearly and accessibly outlined, and
the result so far is pleasing - the preliminary fitting satisfied me 100%! I found out that this wonderful description is found in the book
by the labor teacher from St. Petersburg, Anna Alexandrovna Vlasova.
Thank you very much!
It looks like this: Cast on 96 stitches and knit the first row in a 2x2 rib, join the knitting into a ring and continue knitting the collar-stand with a height of 3 cm. After that, knit 1 row of knit stitches and make the stitch distribution on the garment details:
mark the first raglan stitch with a colored thread (let it be at the very
beginning of the row). From it, count 27 stitches to the left (back),
mark the next one again with a colored thread (raglan stitch), from which
count 13 stitches (right sleeve), again mark the next raglan
line with a colored thread, from it count 39 stitches (front), then mark
the last raglan line with a colored thread. Count how many stitches
are left for the left sleeve (there should be 13, just like on the right sleeve) 
To prevent the collar of the sweater from pulling back, we will make a small addition
to the back: we will knit a row of stitches from the 1st raglan line to the 3rd or 4th stitch
after the 2nd raglan line, turn the knitting and knit a row on the purl side,
going behind the raglan line by 3-4 stitches (do not make any increases here for now).
So, going back 3-4 stitches from the end of the previous row, knit a few
more rows until you reach the middle of the sleeves. After that,
finish the addition and knit in the round, including all stitches on the
needle. (It turns out that we are adding to the back with short rows, but
to make the "transitions" less visible, I do it this way: each time I turn
the work, I make 1 yarn over at the end, and then knit the row and when I get to
the yarn over, I knit it together with the next stitch according to the pattern.)
Now let's focus on knitting the raglan lines with increases
of stitches. We knit in the round, making yarn overs before and after the raglan lines (stitches)
every other row and knit them in the next row with a twisted knit stitch
(through the back loop). For the raglan stitch, transfer it
without knitting, leaving the yarn behind the knitting. We will knit until
the raglan line reaches 30 cm, then we will try it on. If the armhole
is tight, knit a little more, but so that the sleeve does not turn out too wide, on
the raglan lines on the sleeve side, make yarn overs every 2 knit rows.
Next, we move on to knitting the separate parts (back, front, sleeves). I
usually knit a SEAMLESS item, i.e., I transfer the stitches of both sleeves to additional (circular)
needles, while the stitches of the back and front remain on the main circular needles. I continue to knit (front and back) in the round until
the desired length. Sleeves can be knitted separately and sewn to the side seam, or
they can be knitted in the round without a seam. If during fitting it turns out that the sleeve
is too wide, then decreases need to be made. Knowing the knitting density,
we determine the number of stitches at the base of the neck and distribute the stitches on the back,
front, sleeves, and raglan lines. For example, with a knitting density of 2.5
stitches in 1 cm and a neck circumference of 36 cm, you need to cast on 90
stitches (2.5*36). Let’s say in this example each raglan stripe consists
of two stitches, then 4 stripes - that’s 8 stitches (2*4). The remaining stitches
are divided into three equal parts – back, front, sleeves (fig.1) 
In our example – 82:3=27+27+28. The obtained parts need to be preliminarily
distributed: 27 stitches for the back, 27 stitches for the front, 28 stitches for
two sleeves (14 stitches for each). To ensure that the item has
a deeper neckline in the front than in the back, two
adjustments are made in the calculation. 1. To ensure that the sleeve is not wide on the chest line,
it is necessary to narrow each sleeve by 1.5-2 cm in the calculation, thus increasing
the back and front. In this example: 2.5*2= 5 stitches, -
therefore, each sleeve will be 5 stitches narrower, while the front and back will be
5 stitches wider. Sleeve: 14-5=9 stitches, front and back: 27+5=32 stitches. 2.
To deepen the front neckline, more
rows are knitted on the back. For this, knit the back stitches, gradually adding in 3-5
increments the sleeve stitches as follows. Join the round in the middle of the front,
mark the raglan lines with colored thread and start knitting in the round 

NOTE: while there are few stitches on the needles, it is better to knit with
double-pointed needles (i.e., knit on four and five needles) 1st row – knit the left half of the front on the
right side, the stitches of the left sleeve, the stitches of the back, the first part of the stitches of the right sleeve (since we have 9 stitches
on the sleeve, we divide them into 4 parts: 3+2+2+2, i.e., in the first row we knit 3
stitches), simultaneously adding in each knit row stitches around
the raglan lines on the back; 2nd row – turn to the purl side,
knit the first part of the right sleeve (3 stitches), the stitches of the back, the first
part of the left sleeve (also 3 stitches); 3rd row – on the right side
knit the first part of the stitches of the left sleeve (the same 3 stitches), the stitches
of the back, the stitches of the first and second parts of the right sleeve (3+2=5 stitches)
Knit 8 rows, as in this example the stitches of each sleeve
are joined in 4 increments. By the time all sleeve stitches are knitted,
the number of stitches on the back and front should be the same. For this
it is necessary to consider the stitches added on the back at the raglan
lines. For example, if the stitches of each sleeve are knitted in 4 increments,
then at each raglan line of the back there will be 4 stitches added, which means
the number of stitches on the back will increase by 8 stitches. Consequently, it is
necessary to calculate so that at the beginning of the work the front is 8 stitches wider than the back.
In our example, from the number of stitches on the back, it is necessary to subtract 4 stitches,
adding them to the stitches of the front. The back will then have 28 stitches (32-4), while the
front will have 36 stitches (32+4). Thus, after the final calculation
the number of stitches on the details at the neckline will be: on the back – 28
stitches, on the front – 36 stitches, on each sleeve – 9 stitches (fig.3 a).
The calculation of the smooth concave line of the neckline is made using the following
formula: the stitches of each half of the neckline are divided into 7-9 parts (from one
to three stitches in each part), leaving a flat
horizontal part in the center of the neckline, equal to 4 cm (fig.3 b). In our example: 36-10=26
stitches, 26:2=13 stitches, distribute the stitches into 7 parts – 1,1,2,2,2,2,3.
After the "addition" to the back is completed, we start to join the neckline stitches in the same way: in the knit row from both sides of
the raglan lines, we start making increases (reminding that during
the addition to the back, increases were only made on the back) and knit
as follows: knit the left part of the front, the left sleeve, the back,
the right sleeve, and one stitch from the neckline stitches, turn the work,
knit the purl row and knit one stitch from the second part
of the neckline stitches, and continue like this until the end, adding one more, then 4 times 2
stitches and finally 3 stitches from each side. Gradually introducing all
stitches into the work, we then continue knitting in the round, continuing to add stitches at the raglan
lines, the length of which is approximately 28-30 cm. Their length will
be sufficient if the width of the back between the raglan lines is equal to
the sum of measurements - half-chest circumference plus ease allowance (2
cm). Then each detail is knitted separately. The stitches of the raglan lines
are joined to the back and front. If there are many stitches (for example, aran), they
are divided in half and joined to all details. You can knit a seamless
item, separately on circular needles - front and back, transferring the stitches
of the sleeves to other needles, and then knit the sleeves on double-pointed (5 needles).
When knitting an item for a full low figure, to ensure the raglan line is not
too long, the simultaneous knitting of all details
is stopped when the width of the back between the raglan lines is
equal to the bust circumference (half-bust circumference) minus 4-6 cm. Then each detail is knitted
separately, in the first row obtaining the missing width by casting on
air stitches. For example, if the width of the back should be 56 cm (54+2), knit all
details together until the width of the back is equal to 50 cm, and the missing
stitches are added evenly from each side. The same number of stitches is also added
to the front and sleeves from both sides. When knitting
a raglan with a fastener, the stitches of the front are divided into two parts and to each half
half of the stitches of the placket are added, the second half of the placket is included in
the number of stitches of the front. If the width of the placket is 10 stitches, then each
front will have 23 stitches (18+5) (fig 3v). Raglan items knitted
from the top can have different necklines or collars. If the item has
a collar (stand, folded), then the knitting begins with it, and the stitches
are distributed after the collar is finished, marking the raglan
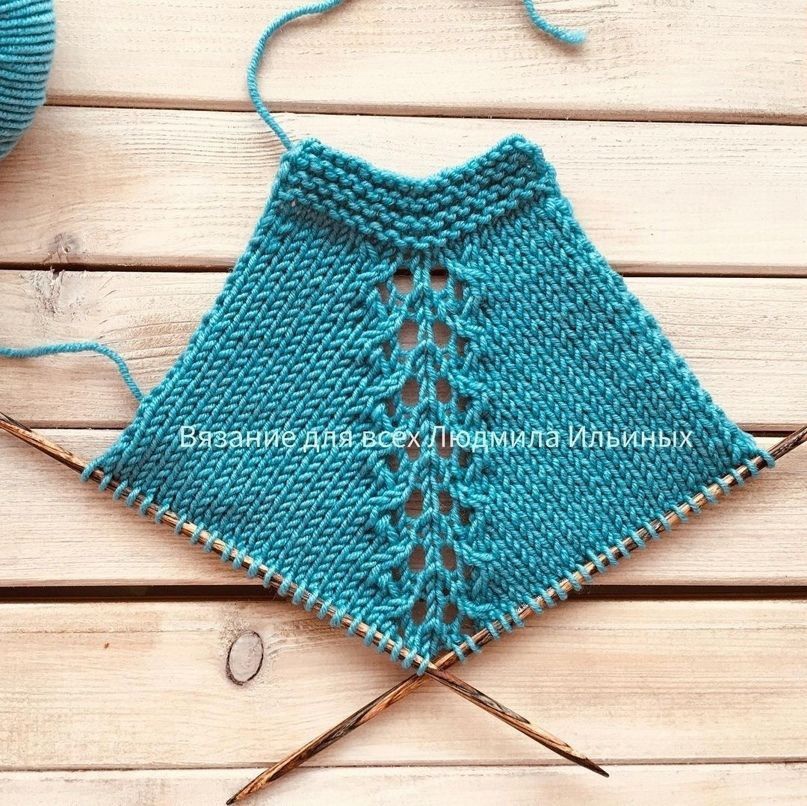
lines with colored thread. For a raglan item with a triangular neckline, the stitch calculation is done
in the same way as for an item with a round neckline. But on the needles in this
case, only the stitches of the back, sleeves, and four raglan lines are cast on, -
the stitches of the front are added gradually in the process of knitting according to the
triangle calculation (fig 3g).
From the comments:
... Everything is very well written, well done! I would just like to make some
corrections.. I agree with the total calculation of stitches, but afterwards I do
it this way - the total number of stitches is divided not by 4 but by 3, because 92:3= 30 and 2 remains
we distribute if we are knitting a women's item these 2 stitches are added to the front.
if it is a men's one - to the back. It turns out 30 for the back, 32 for the front, and 30:2=15 for
each sleeve. I have been using this calculation for almost 40 years, and it has never
failed me. And I make the addition to the back from the middle of the sleeve 3-5 times
going back and gradually knitting 2 stitches on the sleeve. It creates
a semicircle of addition.
... I didn't write it, but I really liked this method
- I have already knitted more than one sweater, and everyone says thank you that nothing
presses in the throat, it does not pull under the armpits, etc. I know your method - I use
it only for babies up to 4-5 years old... but for adults, this one has already become familiar and dear))) and it's perfectly fine that we got into it - as they say, truth is born in
dispute)) I personally believe that both methods are good, and both,
nevertheless, require adjustments for a specific figure or model
of clothing...
... this is NOT MY description, it is written above. But I can immediately
say that for a child up to five years old, calculations can be made much simpler:
divide all stitches by three - one part goes to the back, one to the
front, and one - to the sleeves in half. That is, if you cast on 60 stitches for the neck,
then the raglan lines are divided like this: 20 - back, 10 - left sleeve, 20 - front,
10 - right sleeve. Increases until the armhole are made according to the adult sweater system.
Well, everything else is the same as in the description above.