Knitted hat
Added: 18.12.2025 в 17:22 Views: 466
Knitted hatKlubokhttp://klubok.work/23/189/9336/Klubokhttps://klubok.work/css/image/top-logo-en.png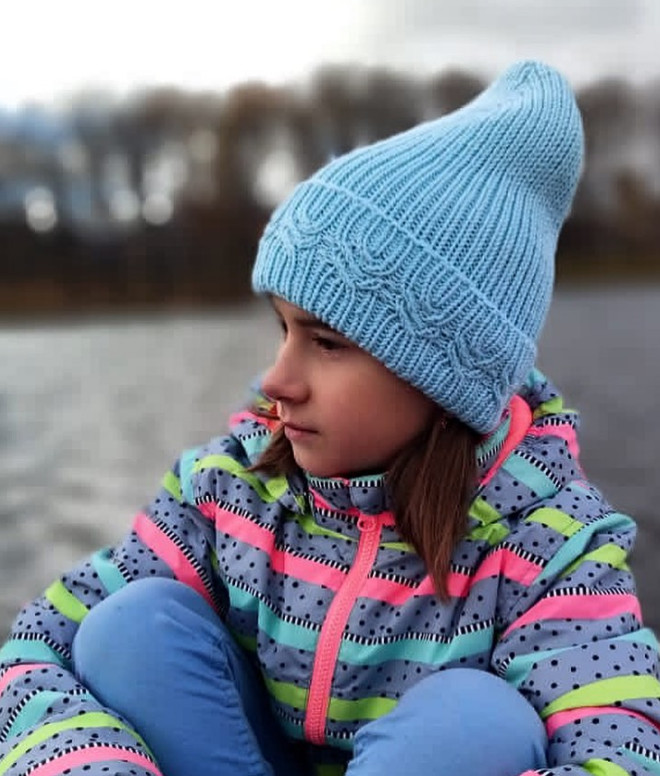
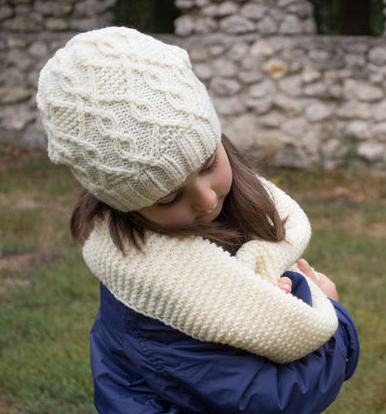
SIZING CHART. The description is prepared for the following sizes: children – 48-52 cm; teenagers and adults – 53-57 cm. The description is a step-by-step instruction for knitting a hat with a turned edge and a lace pattern on the turned edge for all sizes. An option for knitting a classic and fixed turned edge is offered. In addition, according to this description you can knit a hat with classic 1×1 ribbing without a pattern.
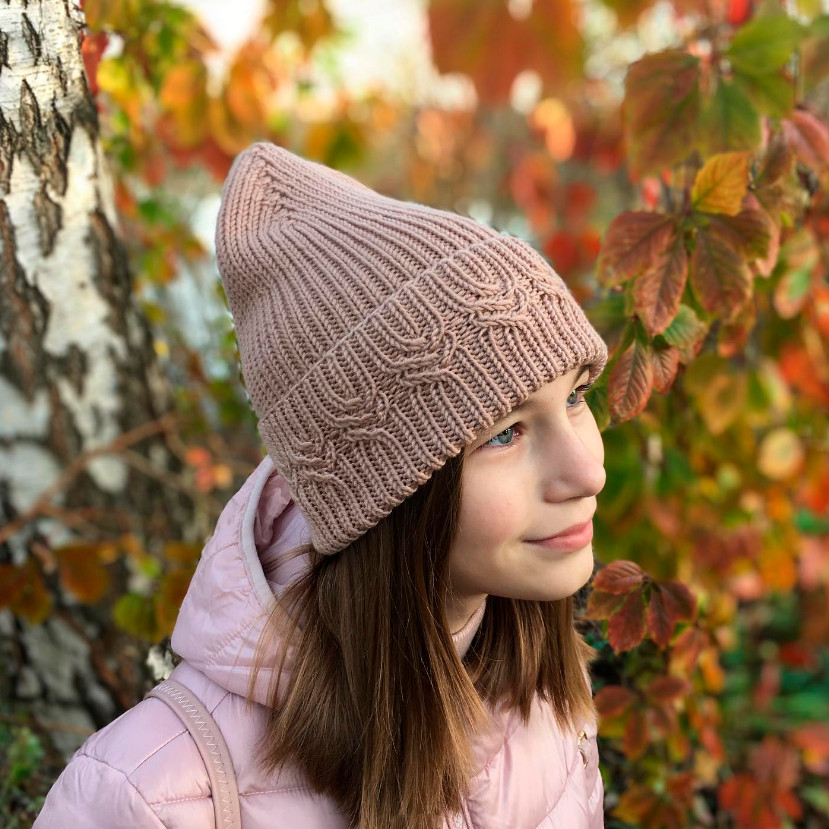
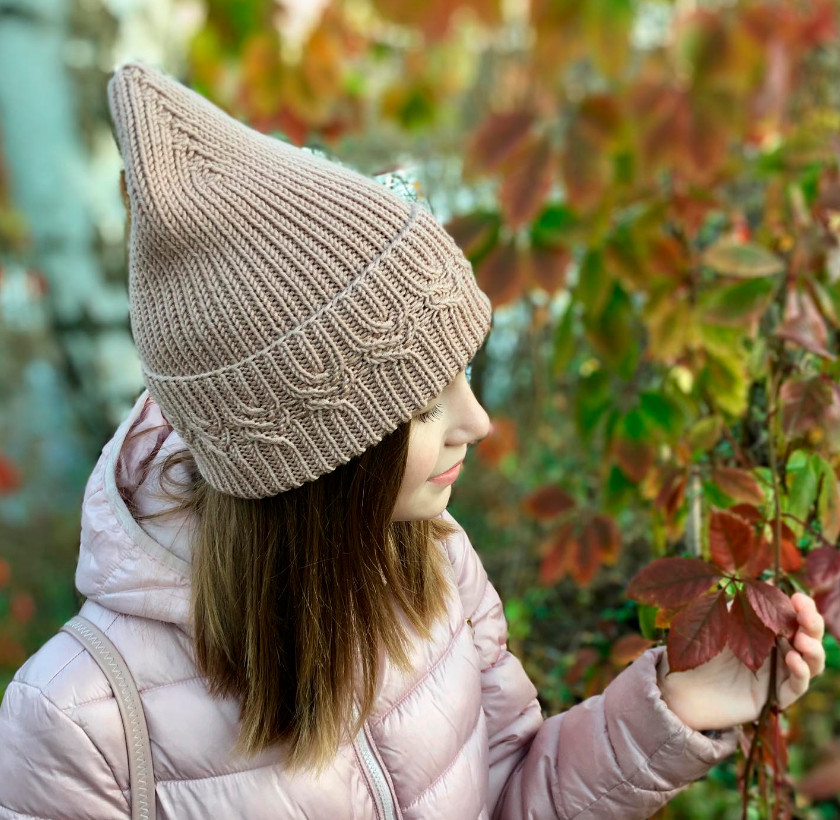
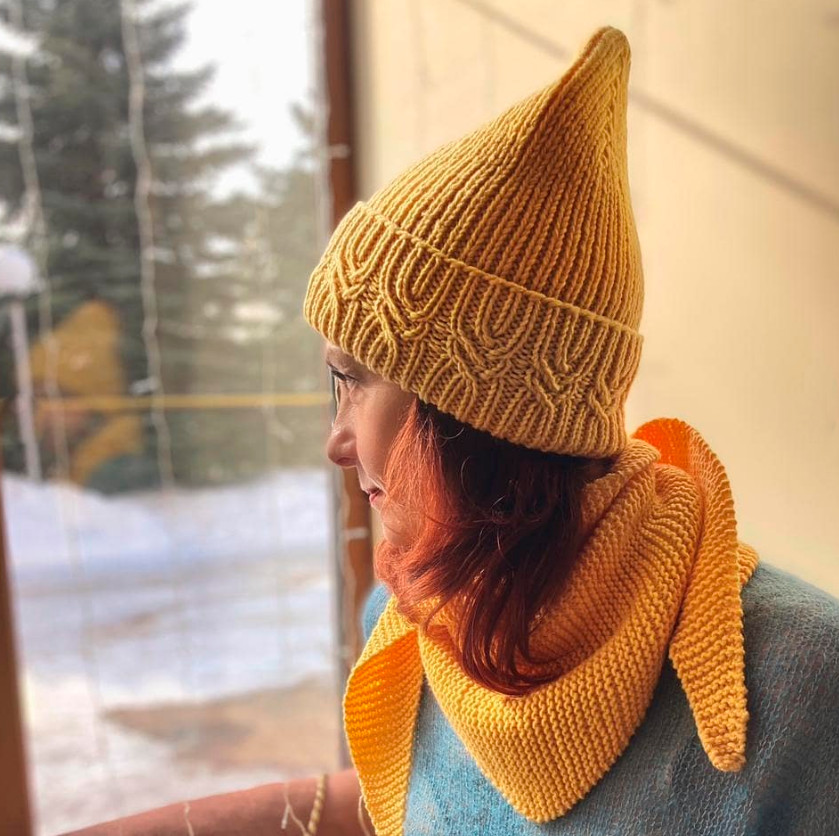
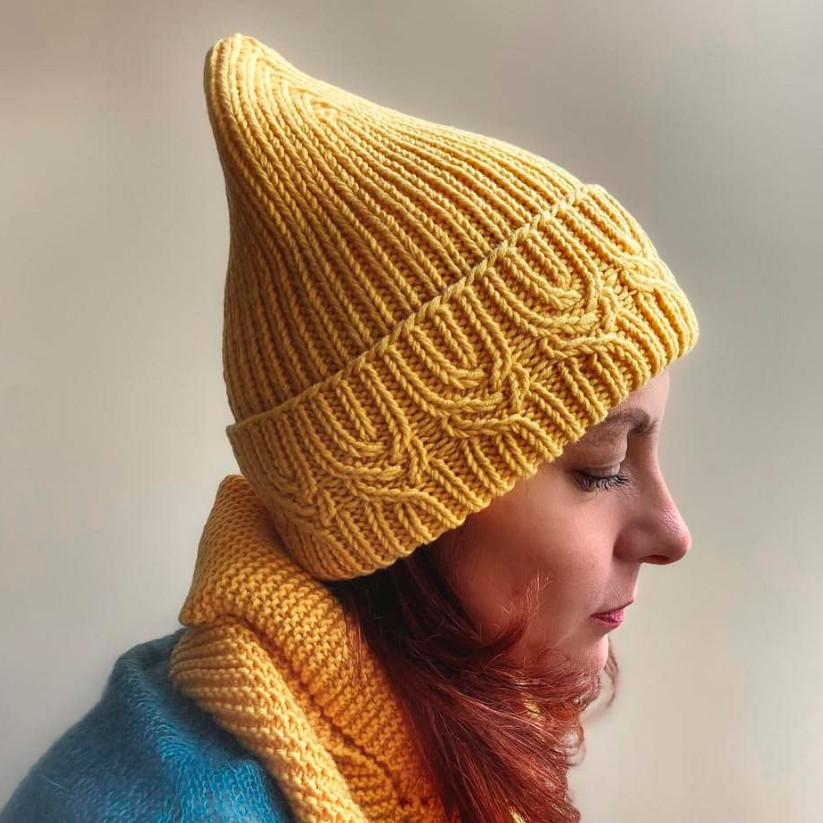
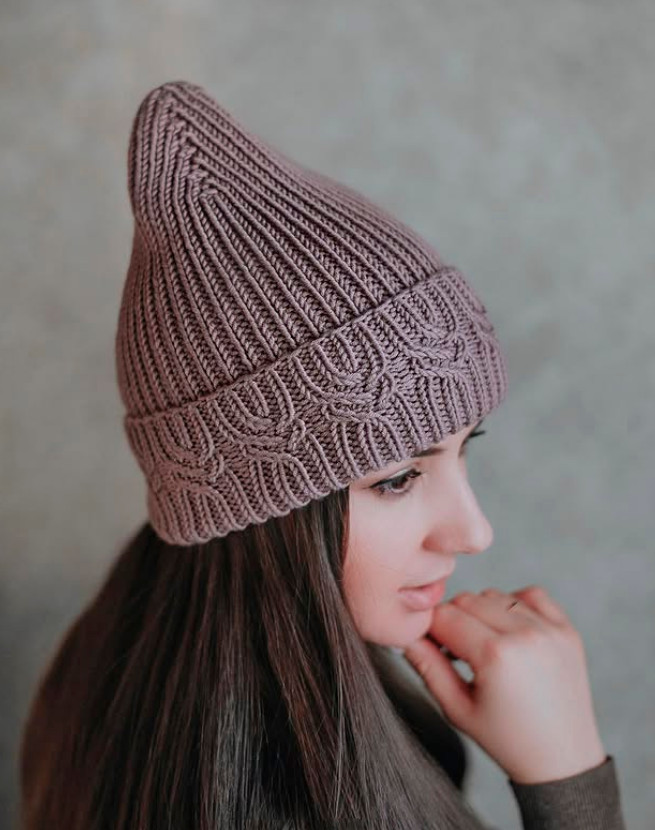
Crown. The master class is designed for knitting a hat with an elongated crown «onion». The height of the crown can be adjusted individually depending on the head shape.
SIZE DEFINITION. The head circumference is measured with a measuring tape along the maximum diameter at the level of the middle of the forehead at the back of the head and slightly above the eyebrow line at the front. The circumference formed by the tape should lie in one plane, without twists and irregularities.
MATERIALS. Original yarn: Merino Extra 90, Alize Merino Royal. Recommended yarn: Any moderately elastic and elastic yarn with an approximate yardage of 90m/50g (Merino 90, BBB Full, Dolly Maxi, Lana Gatto Maxi Soft and other analogs). Natural wool or merino wool is preferred, since it is the most elastic, lies neatly in the ribbing, and your item will be most attractive. It is also possible to use yarn with a length of 165-175m/50g in 2 strands. Consumption – 2-2.5 skeins. Needles: circular needles 3.5-4.5 mm on a 40 cm cord.
Needle size is chosen individually based on your knitting density; before starting the knitting be sure to knit swatches and check them for compliance with standard sizes – see KNITTING GAUGE. In testing this pattern, the author used needles size 4.5 for knitting a merino wool hat. Other tools: measuring tape, ruler, stitch markers, a cable needle and/or a needle for cables and braids, a needle with a large eye or a crochet hook for tightening the crown, scissors.
KNITTING TECHNIQUES. To knit the garment you need to know how to knit knit and purl stitches. The hat is knitted in the round without a seam, alternating knit and purl stitches.
The method of knitting stitches (classic or granny's) does not matter.
GAUGE / SWATCH. To select needles as accurately as possible for this garment, it is recommended to knit two swatches – the main swatch is knitted in the hat’s main pattern (1×1 rib), the additional swatch is knitted in stockinette. Swatch in 1×1 rib: cast on 33 stitches + 2 edge stitches, knit 34-35 rows in height. The swatch should be as close as possible to the standard density even before blocking. Bind off the swatch stitches in any way and perform blocking (see below How to Block). After the swatch dries completely, lay a ruler and, without stretching, count the number of stitches in 10 cm (width of the swatch) and the number of rows in 10 cm (height of the swatch). Attention! For merino yarn it is recommended to knit tightly so the ribbing is not loose – then the hat will be to size and will not stretch during wear. Swatch in stockinette: cast on 26 stitches + 2 edge stitches, knit 20-35 rows in height (density calculation by height in this swatch does not matter). Bind off the swatch stitches in any way and perform blocking (see below How to Block). After the swatch dries completely, count the number of stitches in 10 cm (width of the swatch).
How to measure the swatch correctly: lay the swatch freely on a flat horizontal surface, place a rigid ruler on top, do not stretch the swatch during measuring.
Standard gauge: in a 10 cm swatch with 1×1 ribbing 28.5 stitches and 27 rows (measured without stretching); in a 10 cm swatch of stockinette 19 stitches across. If your swatch density differs, you need to select needles 0.25, 0.5 or 1 size smaller or larger than recommended.
ABBREVIATIONS. LP – knit stitch; IP – purl stitch. During knitting you will need to join yarn from one ball to another. The most suitable method for joining wool yarns is the felting method – it helps avoid knots and irregularities in the yarn.
The knitting instructions are given for the size range as follows: 48-52 / 53-57. Remember which size you are knitting in the sequence to avoid mistakes during the process!!!
HAT KNITTING INSTRUCTIONS. On circular needles, cast on 96 / 104 stitches + 1 stitch for joining in the round. Attention! For size 57+ cm cast on 112 stitches + 1 stitch for joining in the round. All knitting is done in the same technique as the 54-57 cm size (including height). For casting on stitches, the Bulgarian cast-on method is recommended. As an alternative, you can cast on in the classical way. Note: it is recommended to cast on with a density that the cast-on edge is not tight.
After joining, place a marker on the right needle and during circular knitting constantly move the marker from the left needle to the right. After joining in the round, knit 6-7 / 8-9 rows (aim for the desired width of the turned edge in the finished item, see the table below) in 1×1 rib, alternating 1 knit stitch (LP) and 1 purl stitch (IP). The pattern repeat is 2 stitches wide and 1 row tall. Parameters of the turned edge of the garment (for a gauge of 27 rows in height of the sample).
Height of the turned edge, cm / Total number of rows of the turned edge / Number of rows to the pattern / Number of rows of the pattern / Number of rows after the pattern
7.7 / 22 / 6 / 9 / 7
8.5 / 24 / 7 / 9 / 8
9.3 / 26 / 8 / 9 / 9
10 / 28 / 9 / 9 / 10
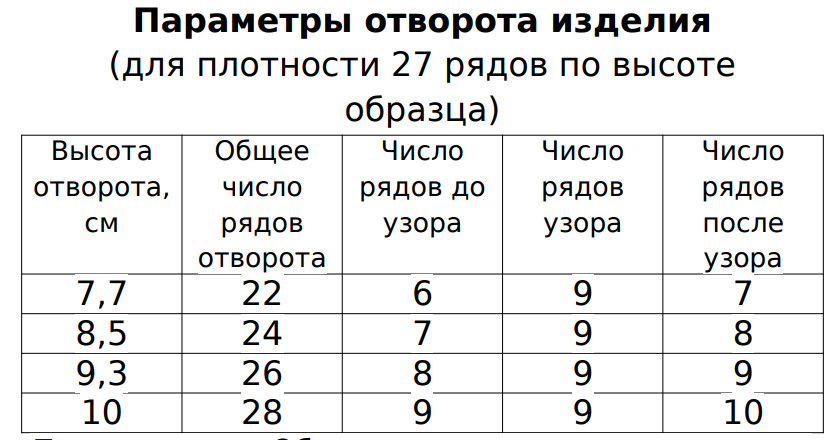
Note: Please note that if the density of your main swatch was greater than 27 rows per 10 cm, the height of the turned edge will be smaller than the indicated values. Take this into account when determining the optimal number of rows before and after knitting the pattern. Attention! While knitting the hat, keep yarn tension even across the entire fabric of the hat. With even tension, the ribbing will be beautiful and even.
We knit the pattern. After the required number of ribbing rows before the pattern are knitted, move to knitting the pattern. The pattern repeat is 8 stitches and 9 rows. The pattern is created by performing cross-overs.
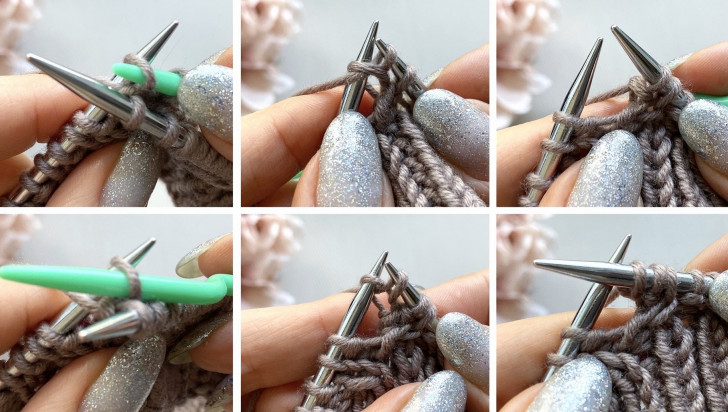
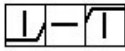
Right-cross technique — slip two stitches (LP, IP) onto an auxiliary needle and hold them behind the work, knit the knit stitch:
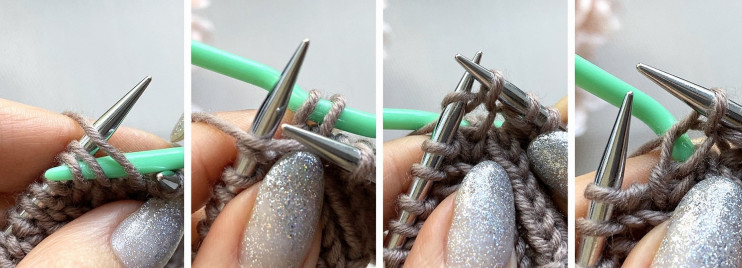
— then return the IP from the auxiliary needle to the left needle and knit it as purl, after which return the LP to the left needle and knit it as knit:
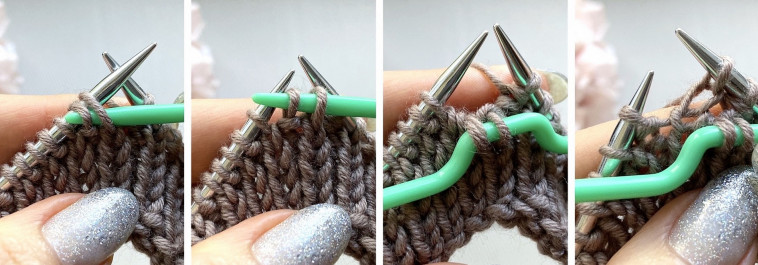
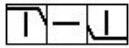
Left-cross technique — slip two stitches (LP, IP) onto an auxiliary needle and hold in front of the work, knit the knit stitch: — then return the IP from the auxiliary needle to the left needle and knit it as purl, after which return the LP to the left needle and knit it as knit:
Attention! If you have only a little knitting experience, before starting to work the pattern, place marking markers every 8 stitches, thereby delimiting the pattern repeats. The diagrams below show the pattern diagrams (stitch columns, highlighted in gray, denote the purl stitches that separate pattern repeats in the finished item). Attention! The diagrams show 3 pattern repeats purely for illustration. In this master class, two pattern schemes are offered to choose from: the second technically is a reversed Scheme 1. On the cover of the master class, the hat is knitted according to Scheme 1 (stitch columns slanting). Below in the figure are samples of both patterns.
Note that when folding back the cuff, the pattern reverses top to bottom! Take this into account if you decide to knit the hat without a cuff. Attention! The legend/notation is provided after all schemes.
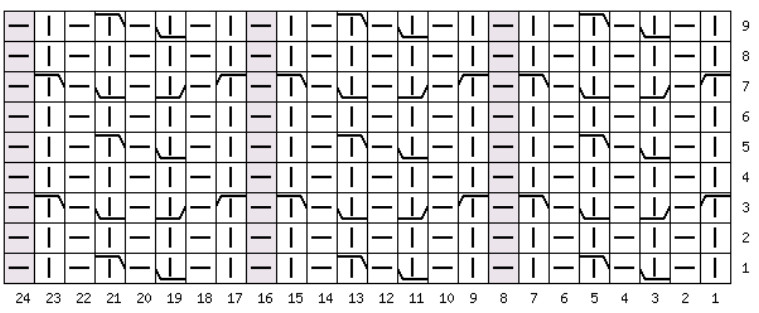
PATTERN CHART 1 (slanting stitch columns).

PATTERN CHART 2 (expanding stitch columns). Legend: Knit stitch. Purl stitch.
![]() knit
knit
![]() purl
purl
 Right cross: slip two stitches (K, P) onto an auxiliary needle and hold behind the work; knit the K stitch, then return the P stitch from the auxiliary needle to the left needle and knit as P, after which return the K stitch to the left needle and knit as K.
 Left cross: slip two stitches (K, P) onto an auxiliary needle and hold in front of the work; knit the K stitch, then return the P stitch from the auxiliary needle to the left needle and knit as P, after which return the K stitch to the left needle and knit as K.
Proper description of Pattern 1 (slanting knit stitches). 1st row: K, P, left-cross, P, K, P — repeat from * to * to the end of the row. Rows 2, 4 and all even rows: knit all stitches according to the 1x1 rib pattern. 3rd row: left-cross, P, right-cross, P — repeat from * to * to the end of the row. The knitting technique — see row 5: Knit similarly to row 1. Row 7: Knit similarly to row 3. Row 9: Knit similarly to row 1.
Full description of Pattern 2 (expanding stitch columns). 1st row: K, P, left-cross, P, K, P — repeat from * to * to the end of the row. 2, 4 and all even rows: knit all stitches according to the pattern 1x1 rib. 3rd row: right-cross, P, left-cross, P — repeat from * to * to the end of the row. 5th row: Knit like row 1. 7th row: Knit like row 3. 9th row: Knit like row 1.
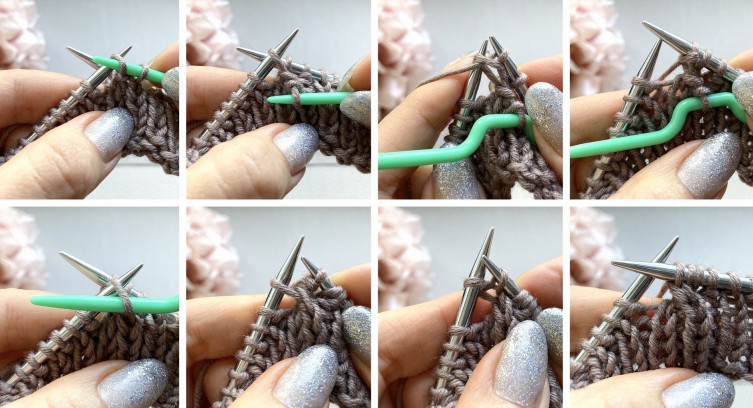
After completing 9 rows of the pattern, you should knit another 7-8 / 9-10 rows in 1x1 rib, alternating knit (K) and purl (P). The number of 1x1 rib rows after the pattern should be 1 higher than before the pattern! The number of rib rows before and after the pattern varies by size; refer to the desired width of the cuff. When the cuff is finished, review the pattern and, if necessary, adjust the stitches. Decide on the technique for transitioning from the cuff to the body of the hat: this master class offers a choice between a classic cuff and a fixed cuff. Attention! After finishing knitting the cuff, it is recommended to turn the work to the purl side. Now the knitting will actually proceed in the opposite direction. At present the working thread is on the left, so slip the first knit stitch without knitting it. Knit the remaining stitches to the end of the row: — for the classic cuff as usual, alternating 1 P and 1 K to the end of the row; — for the fixed cuff knit this row as follows: P, slip the K, not knitted, with the yarn held at the back (the second row will be done the same, and then from the 3rd row of knitting the body of the hat, the classic 1x1 rib). The technique for knitting rows 1 and 2 of the body when performing the fixed cuff.
At the beginning of the next row, pick up the stitch from the previous row and knit it together with the first knit stitch. Next, continue knitting the hat in the round in 1x1 rib until the desired height of the hat body is reached. The height of the hat body before decreases depends on the size.

Size 48-52 cm: for 48-49 cm, the recommended height of the body before decreases is 16.2 cm (with a final hat height of 22.5 cm); for 50-52 cm, the recommended height before decreases is 17 cm (with a final hat height of 23.5 cm). Size 53-57 cm and larger: for teenagers 53-54 cm, the recommended height before decreases is 16.7 cm (with a final hat height of 24 cm); for adults 55+ the recommended height before decreases is 17.7 cm (with a final hat height of 25 cm). Attention! All measurements are given before blocking. Remember that when knitting from merino, the height of the hat after blocking will most likely increase by about 0.5 cm. If you want to knit a hat longer than indicated above, knit a few more rows at your own discretion.
How to try on to determine the appropriate height of the hat: — fold back the cuff and try on the hat; — pull on both needles at the crown to tighten it (if the cord on your needles has memory, temporarily transfer the knitting to other needles); — evaluate the crown height, continue knitting or move to closing the crown. Note that hats made from mink fur usually shrink after blocking (not less than about 0.5 cm in height). Form the crown. Take 4 additional marking markers (preferably of a different color, shape, and size than the starter-row marker) and place them as follows:
Size 48-52 cm. Start-of-row marker, 11 stitches, marker, 24 stitches, marker, 24 stitches, marker, 24 stitches, marker, 13 stitches. Size 53-57 cm. Start-of-row marker, 11 stitches, marker, 26 stitches, marker, 26 stitches, marker, 26 stitches, marker, 15 stitches. With this distribution across segments, in the second segment the pattern will be placed symmetrically relative to the decreases. Note that markers must be placed BEFORE the purl stitch. Thus we divided the total number of stitches into 4 segments, and decreases will be made around each marker. The pace of decreases — every other row.
Each purl stitch after the marker will be the central line of decreases; decreases in height in this garment amount to 4 rows. Decrease technique. Decreases are performed using the technique of knitting three stitches together with the central purl stitch. Row 1 of decreases: see below — in this decrease row, 1 stitch (K) before the marker and 2 stitches (P, K) after the marker will be involved. Knit the stitches up to the first marker, leaving 1 knit stitch unworked before the marker. Move this knit stitch after the marker and knit 3 stitches (K, P, K) together with the central purl stitch using a garter stitch. Repeat the maneuvers near each marker (4 more times).
Row 2 of decreases: classic ribbing. In all even rows, knit all stitches in 1x1 rib, i.e., alternating knit and purl. Pay attention to the P stitch that in the previous decrease row was worked garter-style — it must be knitted without crossing, on the right edge. Row 3 of decreases: see — in this decrease row, 1 stitch (P) before the marker and 2 stitches (K, P) after the marker will be involved.
Work the stitches in pattern until the first marker, leaving 1 purl stitch unworked before the marker. Move this purl stitch before the marker and work 3 stitches (P, K, P) together using a garter-stitch purl. Repeat the manipulations near each marker (3 more times).
Row 4 decreases: classic ribbing
Note the purl stitch that, in the previous decrease row, was worked garter-stitch; in this row it must be purled, not crossed, behind the right edge.
Then the decrease cycle repeats: Row 5 – as Row 1; Row 6 – as Row 2; Row 7 – as Row 3; Row 8 – as Row 4. And so on.
Continue decreasing until 16 stitches remain on the needles.
Attention! For size 53-57 cm, in the next (finishing) decrease row, when there are 6 stitches left in each segment, work the decrease as K, P, K not with a garter-purl, but with a standard knit stitch (to preserve the order of K, P... for a neat crown shaping).
After the last decrease row (odd row) is completed, cut the yarn tail about 20 cm and, with the help of a crochet hook or tapestry needle, draw the stitches tight.