How to Draw Clothing and Folds - Part 1
Added: 04.04.2015 в 14:59 Views: 66439
How to Draw Clothing and Folds - Part 1Klubokhttp://klubok.work/14/83/5753/Klubokhttps://klubok.work/css/image/top-logo-en.png
First of all, let's talk about the structure of the human body. The human body is not flat, therefore, the clothing on it should not be flat either. It seems logical, but how many times have you seen clothing drawn like this?

Notice the drawing on the left. Something is wrong here, isn't it? That's because the clothing was drawn without considering the shape of the body. And what if we translated the picture into computer graphics? You wouldn’t know how, because the drawing was colored incorrectly... but what if the only problem you had was with the clothing you are drawing? If there are no shapes, where will the shadows come from? Exactly.
Now take a look at the drawing on the right. Notice how the clothing fits on the body. The curves of the clothing show the shape of the body hidden underneath. Folds are used to convey volume and movement. Transforming the clothing in this drawing into computer graphics would be much easier.
This is what this lesson will be about. The shape, folds, and techniques with which you will learn to correctly choose clothing for your characters.
So, let's start with the edge. What is an edge? An edge is the hem of the clothing that touches the skin. For example, in the drawings above, the edge is present on the collar, at the bottom of the sleeves, at the waist of the shorts, and on the legs where the shorts touch the thighs. Edges should never be straight lines because they contour the body in a circle (arms, neck, legs, abdomen), and body parts are three-dimensional. They have mass, and they have a rounded shape – so the edges of the clothing should also be rounded.
The direction of the edge lines depends on the direction of the body part they encompass and how the fabric falls.

If you have finished examining my semi-nude model, notice the line of the edge curve. To draw the edge line correctly, you need to be able to see the shape of the body part under the clothing. Look at her legs, for example. Do you see the cylinder next to her? Let's imagine that her leg is a cylinder. Notice how the line goes around it. There is one trick that will help you remember how the edge line should go: break the body into parts. If the lower half of the body part that the clothing edge frames is closer to the camera than the upper half, then the line should rise like a rainbow. If the lower part is further from the camera than the upper part, then the edge line should dip down like an old rope bridge. If the body part is standing directly perpendicular to the ground, the line will still always dip slightly down because the fabric sags under its own weight. The further away or closer parts of the body are in relation to the central axis, the more pronounced the edge line will be. Take another look at my drawing above: the edge line on the legs is much more pronounced than the lines on the abdomen.

Even on non-straight edges, the line will still obey this law.
Another very important thing to know about the edge is how it wraps around the body.

Look at these examples.
This applies to collars, belts, the tops of shoes, cuffs … to everything that wraps around any part of the body and touches the skin, except in cases where the edge goes in a straight line from the body (in this case, only the fabric wrapping around the body will be visible when viewed from below). We will return to this later. Notice the drawing above. In the first drawing, the edge is quite far from the skin, while in the second image it is much closer. Depending on the width of the “protrusion,” you can create the illusion of fabric thickness. The thicker the “protrusion,” the thicker the fabric. In the third and fourth examples, you will see the difference between loose and fitted clothing. Loose fabric (example three) will pull slightly away from the skin. Notice the “loop.” A small hook at the end of our edge changes the fabric thickness, pushing it away from the skin, creating the impression that the fabric sits loosely on the body. In the fourth example, the loop is absent (we assume this is because the clothing edge tightly hugs the waist), showing that the fabric fits snugly against the skin.
This is a very subtle detail, hardly noticeable, but this small area where the clothing edge touches the skin tells us a lot about our character's clothing (even if we are not aware of it!).
So, now let's return to what I mentioned earlier, examining the seam from the inside.

Just like the loop shown in the example above, which shows how loosely clothing can sit when viewed from the edge of the clothing from below (as in this example), the seam will completely bend around the body to the back of the character. Moving on, the skirt is made of very thin fabric, which is why the line touches the side line going down. If you wanted to show the thickness of the fabric, you should draw it like this:

Notice the slight overlap at the edge of the skirt and how it curves toward the body, thus showing the thickness of the fabric from which the clothing is made.
Now, before diving into the details of folds, let's talk a little about materials. Believe it or not, but the material from which your clothing is made greatly affects the shape of the folds that form on it. For example, wool does not form folds much, and if it does, they are very neatly rounded and long. Satin easily forms folds, but due to its silky texture, it also smooths out easily and quickly. When folds do form on it, they are usually long, wide, with very smooth beautiful curves. Linen also easily creates and holds folds, so it has more folds than other fabrics. Velvet is very similar in properties to wool, forming very sharp folds, but quite rarely. It is very important to understand the material your character's clothing is made of to represent it accurately in the drawing. Nowadays, it is not hard to Google and find many types of fabrics to study their behavior, and I highly recommend doing this soon. But for the particularly lazy… here is a cheat sheet:
+ Thinness and Thickness: Thin materials will create folds much more easily than thick ones. Folds will be located closer to each other and there will be many of them.
+ Silkiness and Roughness: Silk materials do not form folds as easily, unlike rough materials, but they will form them more often than rough fabrics.
+ Softness and Hardness: The softer the material, the rounder the folds will be, and the more evenly spaced they will be. The harder the material, the fewer folds will form on it, and they will be large and wide.
+ Flow and Rigidity: Flowing materials, such as silk, will create long, arched folds, but there will be very few curves, and the folds will be barely spaced apart. Rigid materials do not drape; they form angular crumpled “wrinkled folds,” or rather branch out than form folds. Rigid fabrics, such as muslin or burlap, will easily bend, creating both fine and large patterns, and the folds will be very wide and angular.

For example, take a look at the picture above. Notice how the frequency, distance, and arcs in the folds indicate the type of fabric from which the character's clothing is sewn.
Her bodice seems to be made of thin fabric, like linen, because there are many folds, and they are of varying thickness, and despite the curves, the folds have strange sharp ends. There are no looped folds.
On the other hand, the waist of the dress seems to be made of thicker, softer fabric, possibly cotton. This is because there are very few folds, in the shape of tubes, and they are quite evenly spaced.
Her skirt is very similar to the linen bodice, forming rounded folds. It resembles soft tulle because the draping is very rounded and aligns at the ends.
The semi-bolero on her neck (although it is poorly visible in this example) seems to be made of leather. There are no folds, instead, the material “hugs” under the arm and wraps around the shoulder like a loop. We can only assume that some idiot (DarlingMionette… ahem) spent their time adding ruffles to this piece.
Moving on.

If the folds change, the entire appearance changes.
The top of the dress resembles latex or vinyl. There are no folds, the edges are neatly rounded.
The fabric of the middle part of the dress looks like silk. There are a few folds, but they are of varying thickness and are closely spaced.
The skirt in this case is definitely made of dense cotton. Notice the large folds that reluctantly bend.
Now, I will say it again, do not forget that not only the type of material affects the folds, as I mentioned above, but also how loosely or tightly the fabric fits on the body and, of course, the movements of the body in that clothing.
Let's move on to the main principle of forming folds, and discuss how to use them most effectively.
Tightness and Compression

Most folds form either through stretching or compressing the fabric.
Notice how in these examples the fabric stretches and compresses according to the movement of the body.
If the clothing is not made of hard plastic or metal, in all places where the body will stretch or compress the clothing, folds will form. You can use these folds to emphasize the character's figure. For example:

1. This fold emphasizes the shape of the breast by drawing a line beneath it and creating a smooth curve at the end of the breast.
2. Compression folds demonstrate the lifting of the thigh.
3. This is a bad fold. Why? It initially is not bad because it emphasizes the upper part of the breast, but then it treacherously drops too low to the right, reducing the breast size by 1/3. Such folds can form in real life, but we will not draw them that way. This fold should connect with fold 4.
4. This fold correctly emphasizes the upper part of the breast and also demonstrates the loose fit of the top thanks to the formed “tube.”
5. The short curved lines between the tops of her breasts demonstrate the fullness of her breasts, showing the tension of the top between her nipples.
Now let's look at different types of folds
Tubular Folds

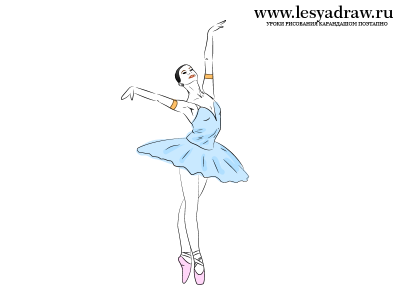
Tubular folds are often seen on skirts or dresses (hence the name pleated skirts). They form when the fabric compresses like an accordion (like a ballet tutu). The folds are usually conical or cylindrical in shape. They can also form when the fabric is gathered and stretched between two points.

The easiest way to draw tubular folds on a skirt or dress is to start from the bottom. Draw the hem using S-shaped movements (see the example above). Form an accordion-like appearance with the fabric.

From the longest inner point of each fold, draw a line to the waist. Don't be afraid to draw your outer folds in one direction or another to show the movement of the fabric. It will be very boring if all the folds go up in straight lines.

Then mark the midpoints of each fold at the waist.

Then you can connect the longest outer point at the very bottom of the folds (accordion) with the midpoint to form the inner part of each fold.

Click on the picture to view the image in full size and 100% quality.
You should end up with something like this – a cute skirt with tubular folds. You can adjust the height of the S-shaped folds to change their appearance. If you want to change the direction of the tubular folds (as if you are looking down on them), draw a line from the longest outer point of the S-shaped curve instead of the longest inner point.
Zigzag Folds (OMG, I hate them)
Zigzag folds (for me) are the most difficult element to draw in the world. I never get them right, but for this lesson, I will try. Zigzag folds appear when the fabric, rolled into a tube (like a pant leg or sleeve, for example), compresses, thus forming external folds. These types of folds can form more on rigid fabrics.

The most common place to see zigzag folds is on jeans (usually near the ankle or knee), where the fabric compresses from the bends of the body beneath it.
Notice how in this example, the zigzag fold formed because the fabric itself folded like the mouth of Pacman. These folds usually take on a diamond shape.
Such folds can also be seen around the elbow.
Spiral Folds

Similar to zigzag folds. On softer fabric, zigzag folds will compress into a more rounded shape (like on sleeves), forming “tubes” of fabric.
Drawing spiral folds is much easier than zigzag folds. Just create stripes like on a zebra's body (as in the drawing under the tube), and then draw the outer brackets (the far right drawing in the image).
These folds look good in the elbow area of sleeves and as a ruffle along the edge of a blouse.
By changing the direction of looped folds, you can change the direction of the spirals.
Half-Closed (Hooked) Folds

Half-closed or hooked folds are very common; they can be seen almost everywhere. They form in those areas where the fabric changes direction sharply. They are often seen around the armpits, elbows, and knees, but they can also be found in other places.

In my last project, which I did for a client, I used half-closed/hooked folds around the knees. In the picture above, you can see well what half-closed/hooked folds look like from the side.
Notice how the direction between areas of fabric forms a resemblance to “tunnels” - the inner part of half-closed/hooked folds.
Their formation is very similar to the formation of Spiral and Zigzag folds.
Diamond/ Draped Folds
Diamond or draped folds, on the other hand, form when the fabric “sags” between two supporting points. Such folds are often visible in the decolletage area, on cloaks, and in the gap between the knees when a person is sitting in a long skirt.

Notice how it “dips” between two supporting points (for example, the knees, clasps, and shoulders).
Category: Images