Easter bunnies and Easter chickens - knitting pattern photo
Added: 15.03.2014 в 02:16 Views: 233162
Easter bunnies and Easter chickens - knitting pattern photoKlubokhttp://klubok.work/2/46/4636/Klubokhttps://klubok.work/css/image/top-logo-en.png
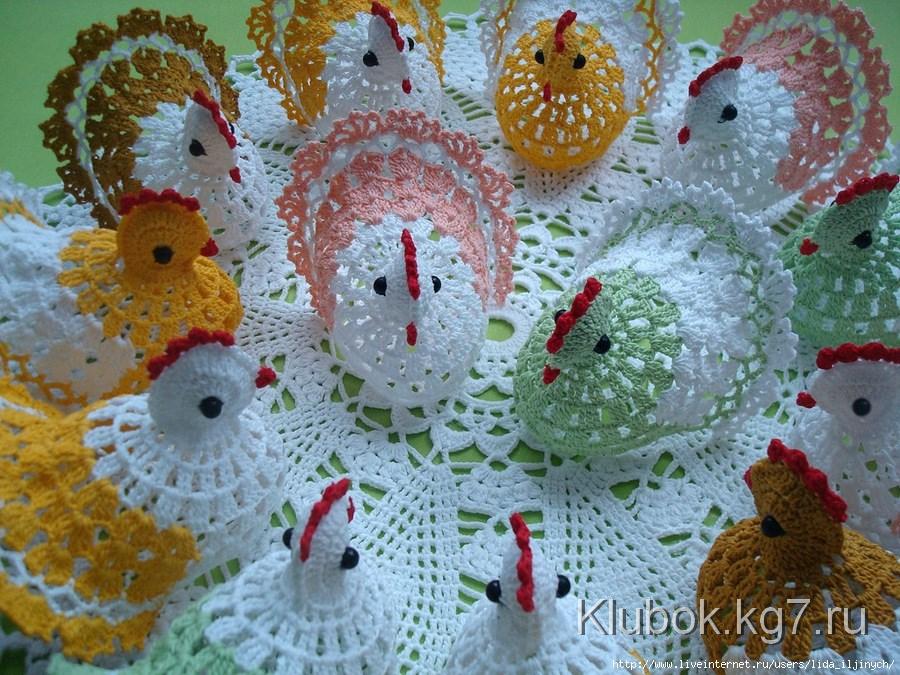
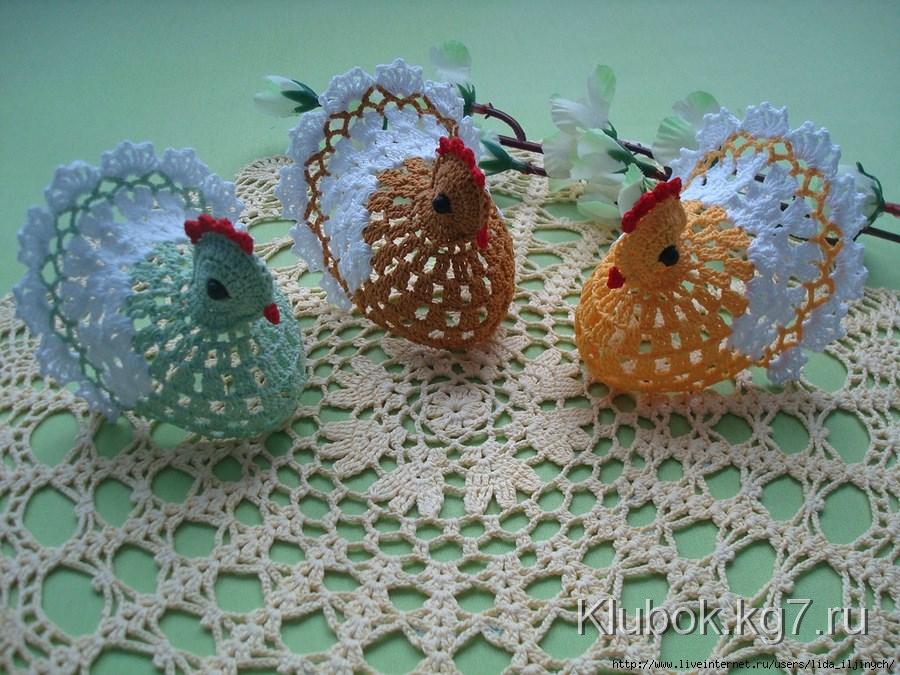

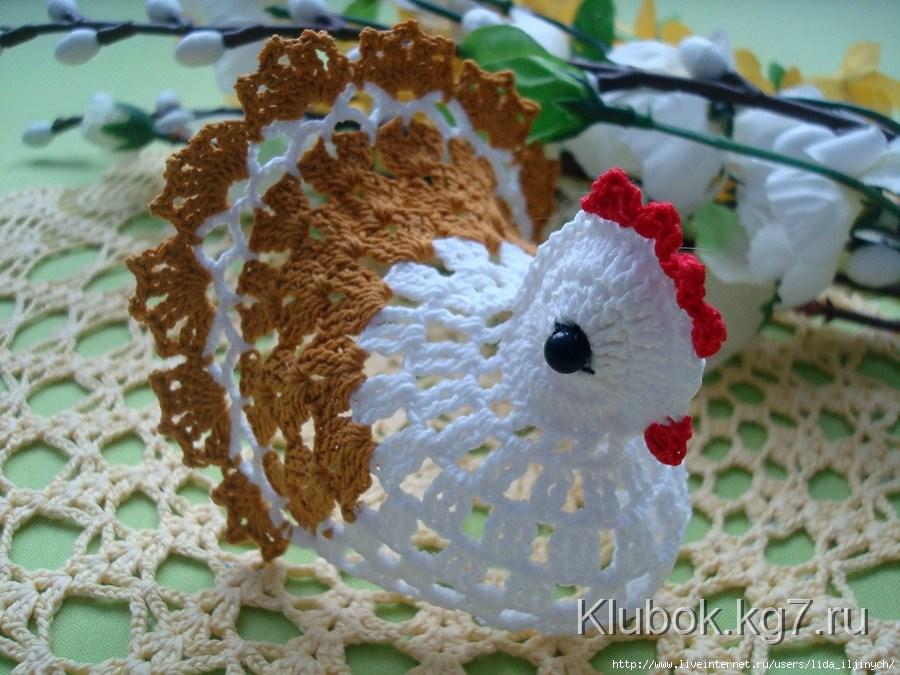
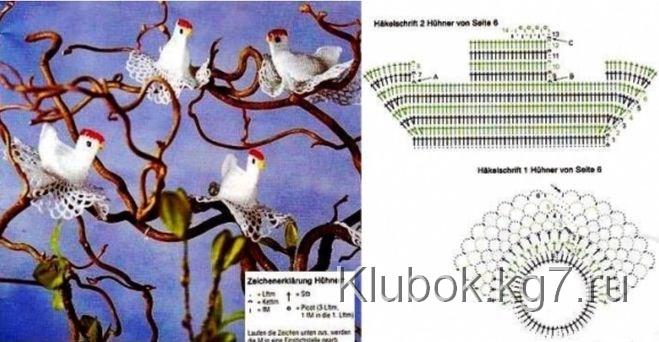
The chicken is knitted like this:
Row 1: cast on 3
chain stitches (ch) and in the third stitch from the hook,
knit 18 double crochets (dc). Finish the row with a slip stitch (sl st) and check that
there are exactly 18
double crochets.
Rows 2-4 knit in
rounds with single crochets (sc) without
increases, finish the row with a sl st.
Row 5: evenly make 9 increases. 1 sc on
each sc from the previous row, 2
sc in 1 sc from the previous row and so on until the end of the row.
There should be 27
sc. At the end, sl st.
Rows 6-7: 27 sc.
Row 8: 3 ch
for rising and knit the row with dc, evenly making 15 increases.
There should be 42
dc.
Row 9: knit 14
arches of 3 ch above the dc from the previous row.
Row 10: knit 7
motifs - in the top of the first arch, knit sc, in the second
arch 5 double crochets with
two yarn overs (dc2).
Row 11: 7
repeats - on the motif from the previous row from the middle (third)
stitch, knit
sc, and in the sc from the previous row, knit 6 dc2.
It
creates 6 dc2 in the dip, and on the top of the motif 1
sc. It looks like
feathers.
Row 12: exactly
the same, 1 sc on the top of the motif from the previous row,
and 7 dc2 over the sc from the previous
row.
Row 13: repeat the pattern from row 12.
Row 14: repeat the pattern from row 11.
Row 15: the same as
rows 12 and 13.
Cut the yarn and hide it on the
wrong side
of the work.
Comb: For this, we will fold our work in half and determine the center
of the head to
evenly knit the comb.
Attach the red
yarn to the back of the head with a sl st where the comb starts and then 2 ch, sc, 3 ch, sc, 2
ch, sl st, turn the work and crochet the arches with sc.
Tail: Attach the yarn with a sl st to the body of the chicken on the side
near the bottom and
make chains of ch moving up to the middle of the bottom, and then
mirror on the other side.
Sl st, (4 ch, sc) 6 repeats, the second
tail
lower 4 repeats.
Pattern for the chicken's tail:
knit sc under the arch of ch, 2 dc, dc, dc2, dc,
2 dc, sc.
Finish the
tail with yarn of another color.
Let's proceed to
wings and again find the middle of the chicken. Mentally
imagine where we
will place the wings and attach the main yarn to the side of the chicken.
Knit a chain of 8 ch and attach it directly to
the body with a sl st.
Make 4 arches on this chain (3 ch, sc).
In each arch
knit the motif sc, dc, 3 dc, dc, sc.
Finish as the tail.
Knit the second wing symmetrically.
Now for the beak of the
chicken: Mark the place for the beak and
attach the red
yarn to the head of the chicken, knit 3 ch and again
attach it to the head almost
in the same place where you started.
Glue
the eyes or
sew on small black beads.