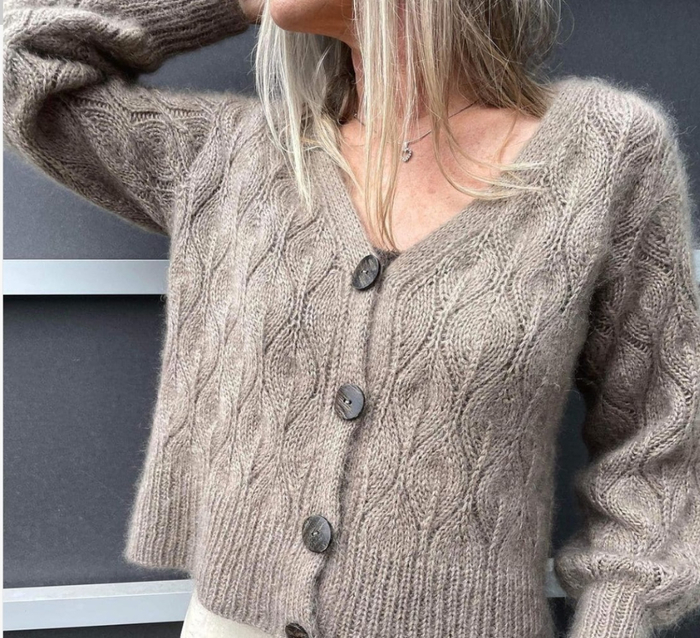
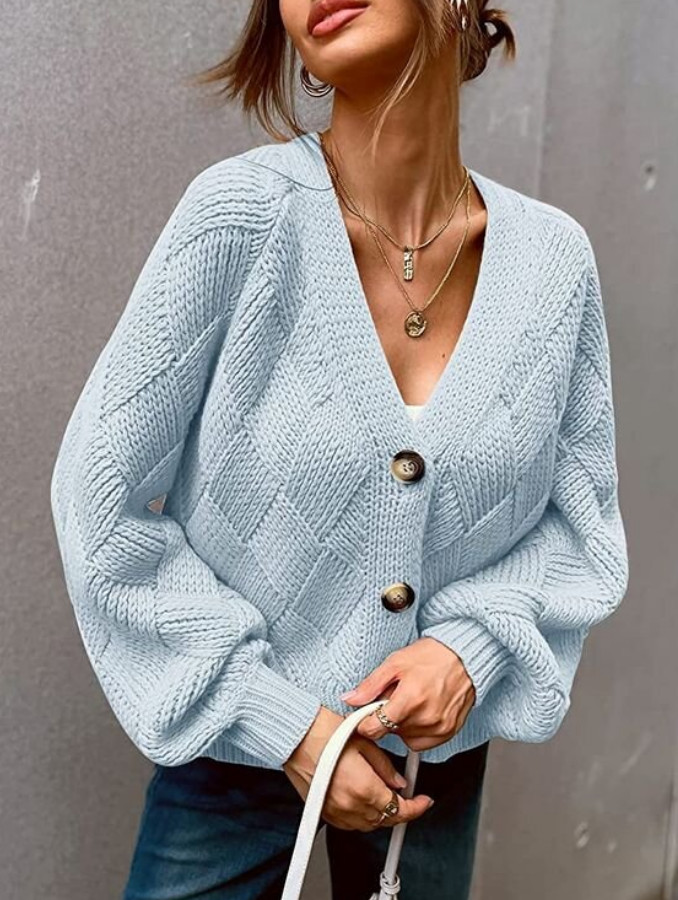
Cardigan knitting
Added: 05.07.2025 в 10:59 Views: 4760
Cardigan knittingKlubokhttp://klubok.work/1/2/8888/Klubokhttps://klubok.work/css/image/top-logo-en.png
Model Parameters
-
Bust = 88–90 cm
-
Height = 165 cm
Yarn
-
-
70% rabbit down
-
30% nylon
-
25 g = 160 m
-
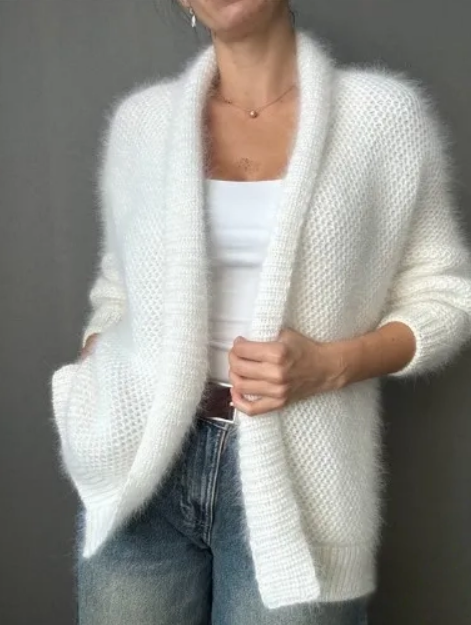
Color: 01 white
-
-
Knitting with 2 threads
-
Total thickness: 100 g = 320 m
-
Yarn Consumption
| Size | Width | Skeins | Grams | Meters |
|---|---|---|---|---|
| A | 110 cm | 19 skeins | 475 g | 1520 m |
| B | 130 cm | 26 skeins | 650 g | 2080 m |
Knitting Density (Pattern "Honeycomb")
10 × 10 cm = 16 stitches × 44 rows
(yarn overs not counted)
Needles
-
120 cm (beginning of work)
-
60 cm (back and front panels)
-
40 cm (sleeve base)
-
23 cm or circular (sleeves closer to the cuff)
Important!
Choose needles based on density, not number. The author knits very loosely, using size 3. If your density is different:
-
more stitches in 10 cm → thicker needles
-
fewer stitches → thinner needles
Gauge Swatch
-
Knit 12–15 cm.
-
Wash.
-
Count stitches and rows:
-
Stitches – without yarn overs.
-
Rows – along the edge stitches.
-
-
Adjust needle size for the desired density.
Beginning Work
-
Cast on 241 stitches using the Italian method (or another method that allows closing stitches for ribbing).
-
Knit 2 rows of hollow ribbing:
-
Knit the knit stitches.
-
Purl stitches – slip with the yarn in front.
-
-
Next – patent ribbing:
-
1 row (purl): slip purl stitches with a yarn over, knit the knit stitches.
-
2 row (knit): knit the stitch with the yarn over together as knit, purl stitches – as they are.
-
-
Knit 6 cm (27 rows) of ribbing.
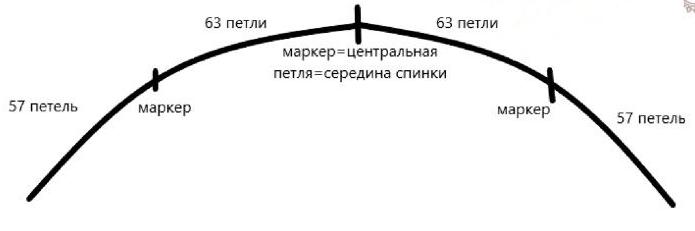
Marker Placement and Short Rows
-
Start shaping the right front panel.
-
Short rows: in each row add 3 stitches until you have 92 stitches.
-
Next – join the stitches of the back and left front panel.
-
Again short rows on the left front panel (69 rows).
-
After this – back yoke:
-
First series of increases every 4 stitches
-
Second series of increases every 6 stitches

-
Back
-
Knit 58 rows (size A) or 68 rows (size B)
-
Then increase by 1 stitch at the end of each row (5 or 8 from each side).
-
Then 132 or 124 rows straight.
-
Ribbing:
-
26–28 rows
-
2 rows of hollow ribbing
-
Closure using the Italian method
-
Front Panels
-
Start the right one with a knit row.
-
According to the pattern – leave 24(27) stitches for the future sleeve.
-
At the end of each row knit 2 stitches together to shape the armhole.
-
Cast on stitches for ribbing at the bottom of the front panel:
-
52–54 stitches (size A) or 68–70 stitches (size B)
-
Ribbing 26–28 rows
-
Hollow ribbing 2 rows
-
Closure
-
Similarly – for the left front panel, but start with a purl row.
Sleeves
-
Cast on stitches at the armhole:
-
Size A: ~70 stitches
-
Size B: ~80 stitches
-
-
Pattern "Honeycomb" in the round:
-
Knit purl rows differently: slip single stitches with yarn over, double stitches – purl.
-
-
Sleeve tapering:
-
6 times every 6th row
-
5 times every 12th row
-
4 times every 16th row
-
-
Sleeve length:
-
150–155 rows (adjust according to height)
-
-
Cuff:
-
Ribbing 26–28 rows
-
Hollow ribbing 2 rows
-
Closure
-
Elastic Thread at the Neckline
-
The secret of the garment: insert elastic thread at the back neckline to reduce stretching.
-
The video shows how to incorporate it.
Finishing
-
Sew the side seams (recommended to add sewing thread for strength).
-
Sew the bottom of the front panels.
-
Hide the ends of the threads.
The cardigan is ready!
Wear it with pleasure
With love for knitting