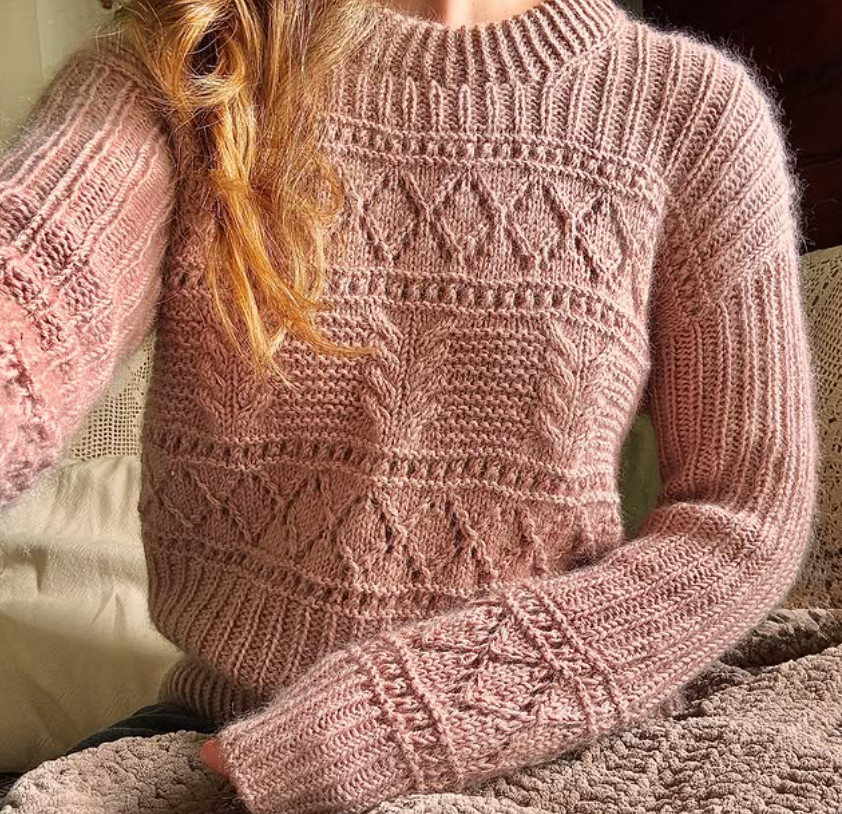
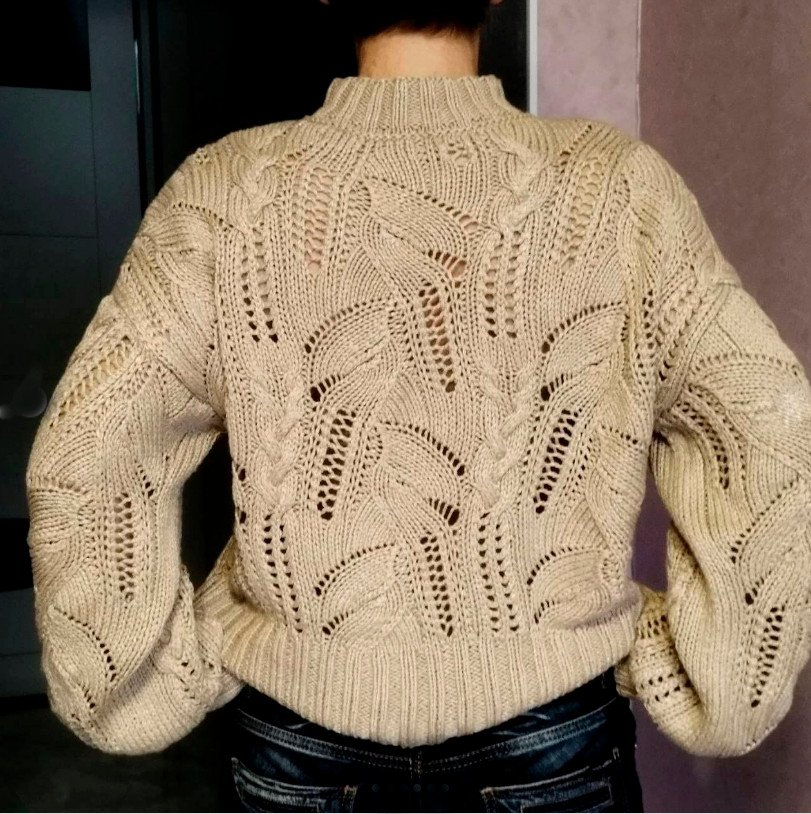
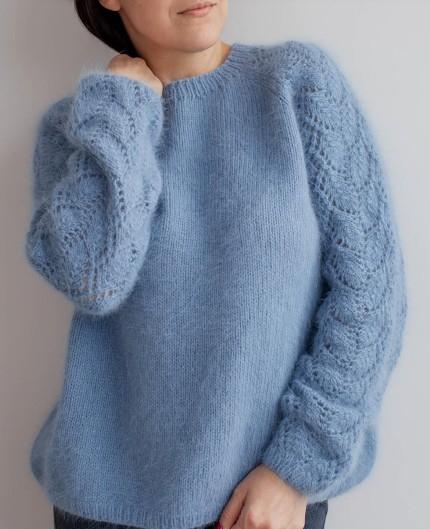
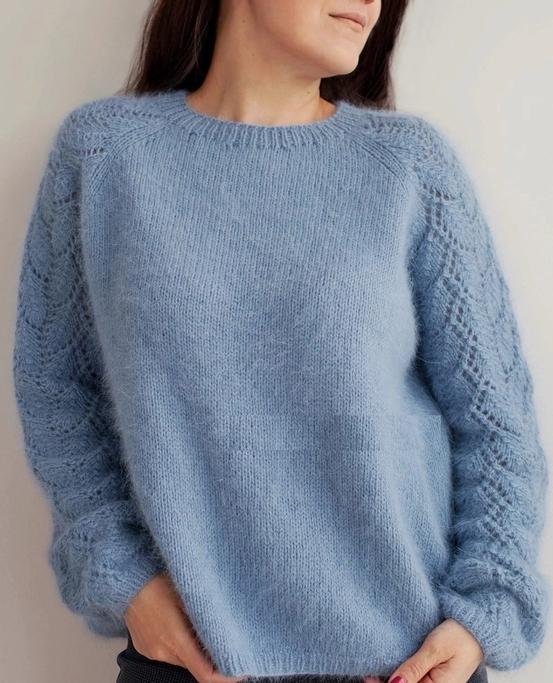
Foliage Sweater
Added: 16.09.2025 в 11:21 Views: 1515
Foliage SweaterKlubokhttp://klubok.work/1/2/9086/Klubokhttps://klubok.work/css/image/top-logo-en.png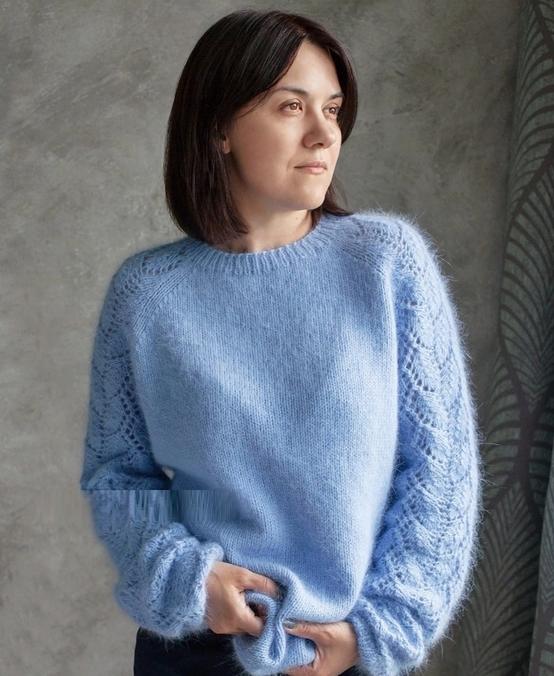
– needles 5.0mm (for knitting the main piece and sleeves): 1 pair on a 40 cm cable,
1 pair on a 60-80 cm cable;
– double-pointed needles 4.0mm (for knitting the ribbing of the sleeves);
– needle, scissors, markers, additional contrasting yarn.
Yarn:
– Mink down 350m/50g (composition: 90% mink down, 10% polyamide)
Yarn consumption: XS/S – 250 g, M/L – 290 g, L/XL – 320 g, XXL – 350 g.
Sizes:
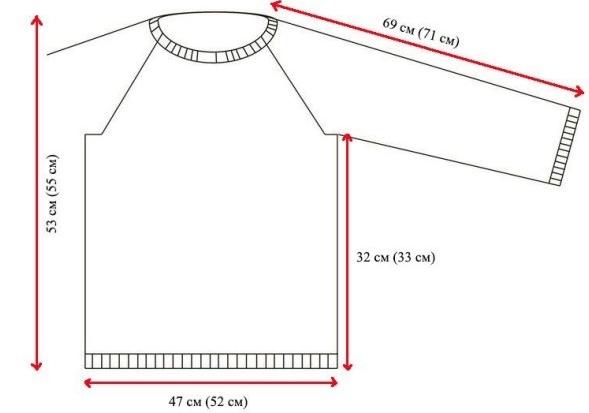
XS/S – (Bust 84-92) garment width 47 cm, back length 53-54 cm.
M/L – (Bust 93-102) garment width 52 cm, back length 55-56 cm.
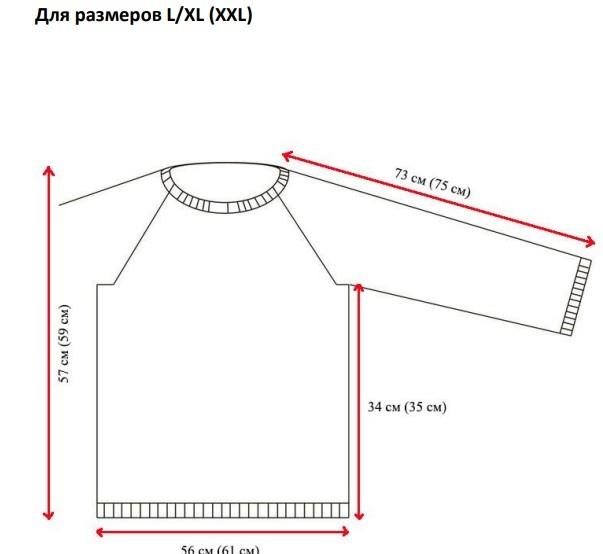
L/XL – (Bust 103-110) garment width 56 cm, back length 57-58 cm
XXL – (Bust 111 – 120) garment width 61 cm, back length 59-60 cm.
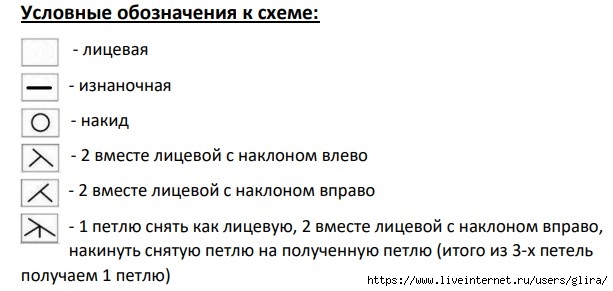
decrease left (ssk)


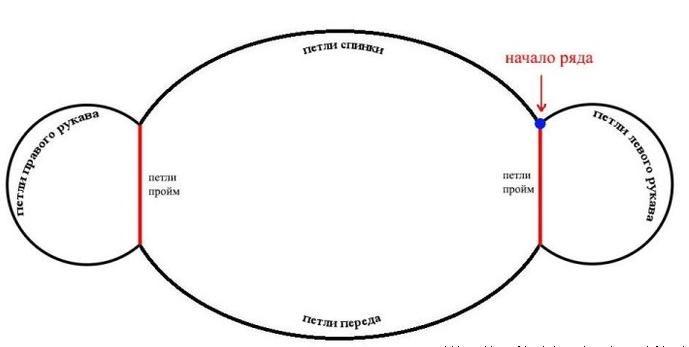
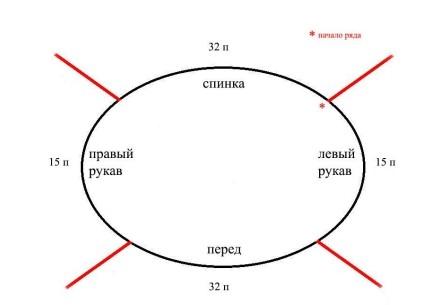
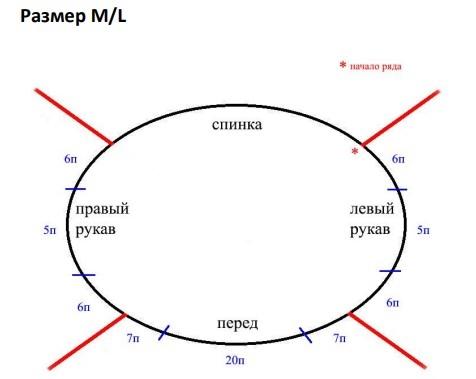
The start of the round is behind the left shoulder, then we move along the pattern in a clockwise direction along the black line. The red lines mark the future seams of the armholes (these are the armhole stitches closed with contrasting yarn).
So, we attach the left sleeve. In the video, I highlighted the start of the round with a blue marker, and the three other raglan lines will be marked in pink (these are the places of joining the parts of the sweater).
Attaching the Left Sleeve
After knitting the stitches of the left sleeve, place a marker, then knit the front stitches.
Number of front stitches:
XS/S – 84 sts
M/L – 94 sts
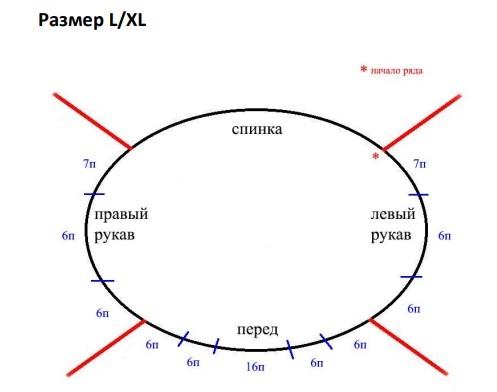
L/XL – 100 sts
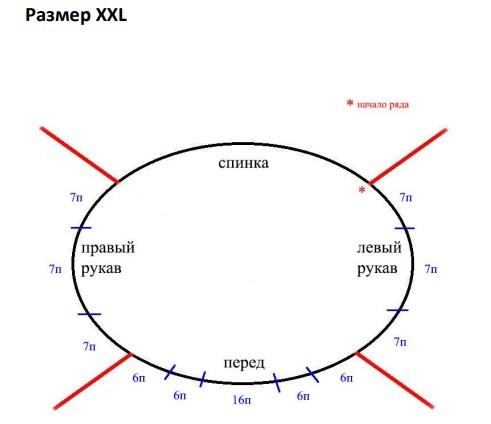
XXL – 110 sts
After knitting the front stitches, close the stitches of the right armhole with the contrasting yarn in the same way as the left. Then attach the right sleeve and proceed to the back stitches. Do not forget to mark the places of joining the parts with markers.
Number of back stitches:
XS/S – 76 sts
M/L – 84 sts
L/XL – 88 sts
XXL – 96 sts
Our round with the joining of the parts is complete.
Thus, after joining the parts, the following number of stitches will be on the needles:
XS/S – 57 sts left sleeve, 84 sts front, 57 sts right sleeve, 76 sts back = 274 sts
M/L – 61 sts left sleeve, 94 sts front, 61 sts right sleeve, 84 sts back = 300 sts
L/XL – 63 sts left sleeve, 100 sts front, 63 sts right sleeve, 88 sts back = 314 sts
XXL – 67 sts left sleeve, 110 sts front, 67 sts right sleeve, 96 sts back = 340 sts
Step 4. Raglan Lines
From the next row after joining the parts, we start to decrease along the raglan lines. For convenience, the joining points of the parts (the middle of the raglan lines) are marked with markers.
Decreases are made 1 stitch away from the middle of the raglan line (i.e., the raglan line itself will consist of 2 knit stitches) as follows: to the right of the raglan line - knit 2 together leaning left, and to the left of the raglan line - knit 2 together leaning right.
Decreases Along the Raglan Lines
Now more details about the distribution of decreases along the raglan lines.
The length of the upper part of the sweater (bodice) will be different for all sizes, therefore the number of rows and the frequency of decreases along the raglan lines will differ. Furthermore, within each size, the decreases along the raglan lines will also vary, so to avoid confusion, it is best to keep records for each raglan line.
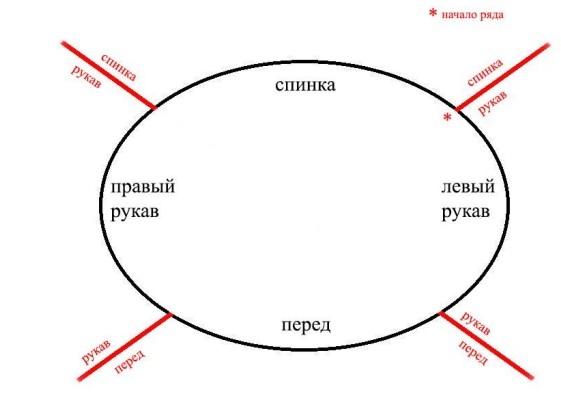
We have 4 raglan lines, and each of these lines has two sides (see the image below). The red lines indicate the raglan lines themselves. Along each line, both sides are labeled with the names of the sides of the raglan lines.
Decreases along the sides with the same designation will be identical.
The length of the bodice consists of two parts: before the short row and the short row itself.
About the short row will be discussed later, but first, the distribution of decreases by sizes before the short row.
Size XS/S
Front: 3 times in every row, then 23 times in every 2nd row.
Back: 5 times in every 3rd row, then 17 times in every 2nd row.
Sleeve: 7 times in every 3rd row, then 14 times in every 2nd row.
Total 49 rows. The chart shows what will remain on the needles after the decreases.
For Size M/L
Front: 8 times in every row, then 22 times in every 2nd row.
Back: 26 times in every 2nd row.
Sleeve: 8 times in every 3rd row, then 14 times in every 2nd row.
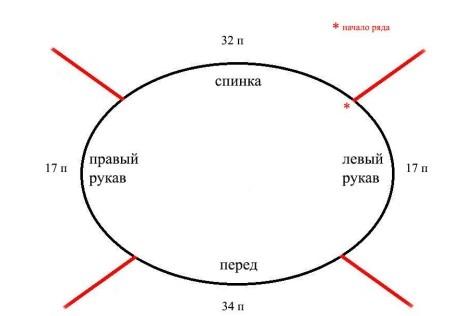
Total 52 rows. The chart shows what will remain on the needles after the decreases.
For Size L/XL
Front: 6 times in every row, then 24 times in every 2nd row.
Back: 4 times in every 3rd row, then 21 times in every 2nd row.
Sleeve: 10 times in every 3rd row, then 12 times in every 2nd row.
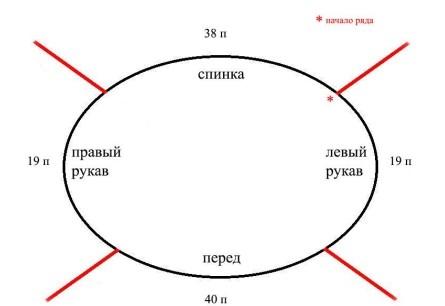
Total 54 rows. The chart shows what will remain on the needles after the decreases.
For Size XXL
Front: 13 times in every row, then 22 times in every 2nd row.
Back: 1 time in 1 row, then 28 times in every 2nd row.
Sleeve: 11 times in every 3rd row, then 12 times in every 2nd row.
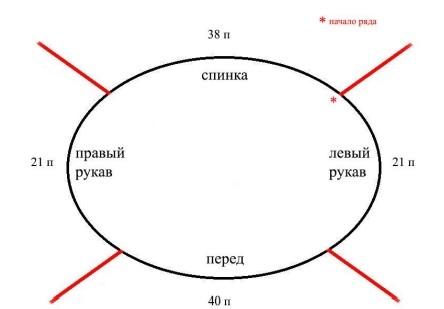
Total 57 rows. The chart shows what will remain on the needles after the decreases.
Step 5. Short Rows
What short rows represent is a technique that creates a difference in height between the front and back necklines.
When knitting short rows, we transition from circular knitting to knitting in both directions (i.e., knit and purl rows). In each row, we decrease the number of knitted stitches.
The schematic representation of knitting short rows is shown in the image. That is, we knit a row to a certain point, turn the work, and knit back to a point symmetrical to the first. Then we reach the next point, decreasing the number of knitted stitches again and turning the work.
This is done for several rows, in our case for sizes XS/S and M/L – 6 rows, and for sizes L/XL and XXL – 8 rows.

Thus, we need to mark the turning points with markers. If there are 6 short rows, then there should be 6 marked points (3 on each side symmetrically).
For 8 rows, there should be 8 points (4 on each side).
The turning points are marked in blue on the diagrams below.
The central stitches of the front are no longer knitted, i.e., we reach the marker to the right of the central front stitches and turn the work. After turning, a yarn over must be made and continue knitting in the opposite direction to the symmetrical marker to the left of the central front stitches.
In the next row, we reach the next marker, turn again, and knit back to the symmetrical marker, and so on.
In each 2nd row of the short rows, we make decreases along all raglan lines that we will cross!
So, the distribution of markers (turning points of knitting) by sizes:

Important – after turning the work, make a yarn over. If the turn is from the knit side to the purl side, then the yarn over is made away from you, and when turning from the purl side to the knit side, the yarn over is made towards you.
After completing the short rows, we move on to the neckline.
Step 6. Neckline
Change to 4.0 mm needles and knit the neckline with the remaining stitches.
At this point, the following number of stitches should be on the needles:
XS/S – 78 sts
M/L – 84 sts
L/XL – 92 sts
XXL – 96 sts
So, knit in 1x1 ribbing, knitting the yarn overs made during the turning together with the neighboring stitches.
After 7 rows, close the stitches.
Step 7. Armhole Seams
It remains to sew the armhole stitches.
To do this, unravel the contrasting yarn from the armhole stitches and put the stitches on double-pointed needles. Thread the end of the yarn left on the sleeves through a needle and sew the seams.
Hide the ends of the yarn and proceed to blocking.
Step 8. Wet Blocking.
Wash the sweater by hand in cool water (up to 40 degrees), using a liquid wool detergent. During the washing process, do not rub or twist. Only gentle washing, rinsing, and careful squeezing. Dry flat, turning it over periodically.