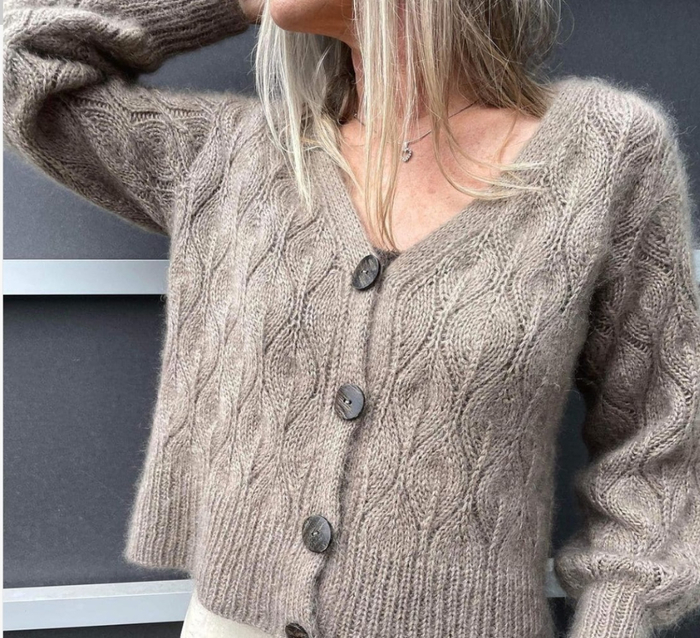
Mohair cardigan
Added: 12.10.2025 в 17:18 Views: 654
Mohair cardiganKlubokhttp://klubok.work/1/2/9213/Klubokhttps://klubok.work/css/image/top-logo-en.png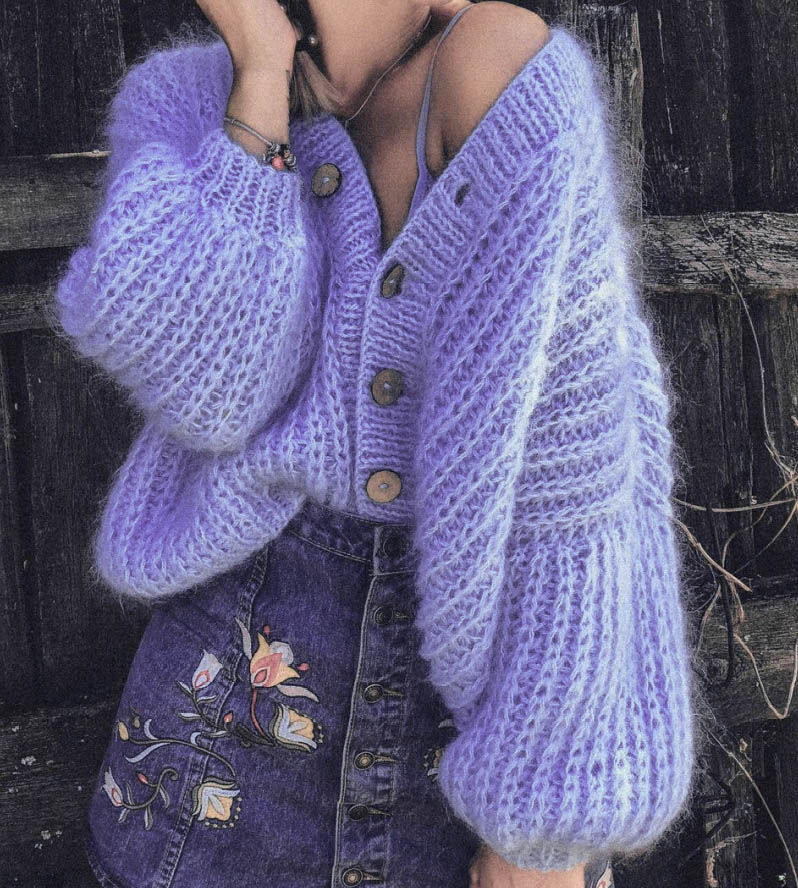
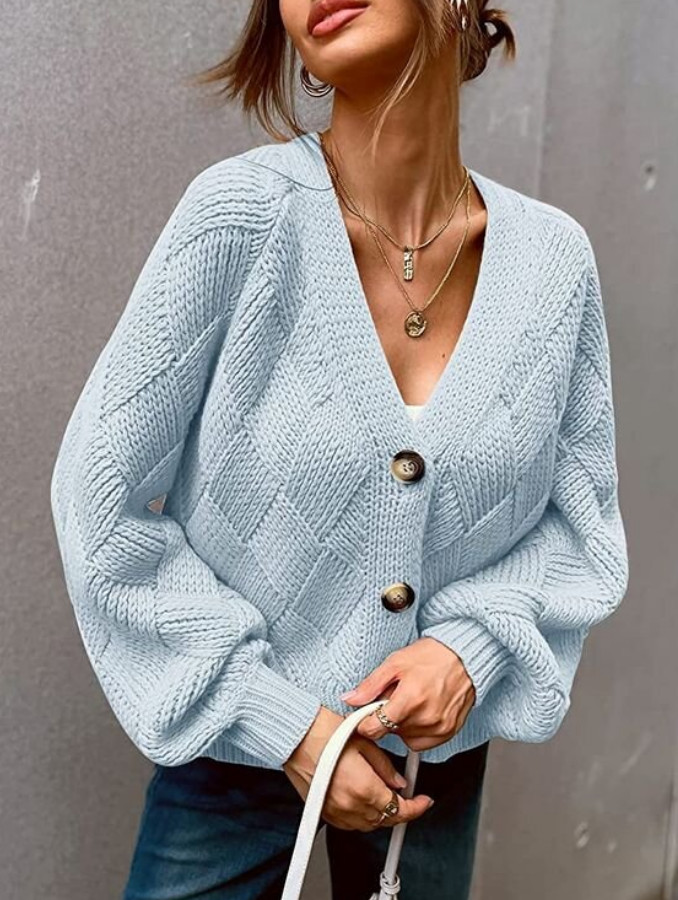
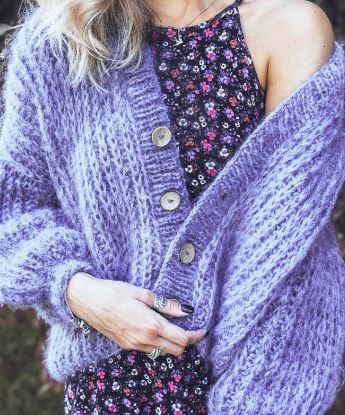
We knit a cardigan out of mohair for everyday wear with a patent ribbing. A simple cardigan will help create a stylish casual look. An important item in the wardrobe.
Before starting to knit, I strongly recommend reading through the entire description carefully!
You only need to know how to knit knit and purl stitches. Size XS-M (back width 60cm), M-XL (back width 65cm), the length is up to your preference, I will knit 65cm. Both sizes are oversized, it all depends on how much ease you prefer.
The main thing before starting to knit is to definitely knit a gauge swatch in stockinette stitch. To understand if you match my knitting density or not, if not, try changing the needle sizes (if your knitting is tighter than mine, then you need to take a needle one size larger than mine).
Knitting density: stockinette stitch on size 8 needles 10cm = 13 rows 10cm = 10 stitches. I knit quite loosely, so that the mohair on silk opens up, it should not be knit tightly!
How to calculate how much to knit before the armhole: for the armhole, we leave about 20cm for size XS-M; 22cm for M-XL, during wear it will stretch another 5cm, so you need to measure the length you want and subtract the armhole (20-22cm) and the stretch (5cm) (for a length of 65cm (size M-XL) my body length is approximately 38cm).
WE WILL NEED:
1. Yarn containing MOHAIR, with a meter weight of 100g/200 - 250m. We knit with 2 threads!
Yarn consumption: XS-M: 500-600g, M-XL: 600 - 700g. Consumption depends on the length you will knit, to make it easier for you to calculate, approximately 200g of yarn is used for 30cm of the main fabric.
2. Circular needles with a cable of 80-100cm size 6 and 8.
3. Buttons (diameter 28mm).
4. Hook size 5-6 (for sewing shoulder seams).
5. Hook size 3.5-4 (needed to hide the threads).
6. Row counter.
7. Marker.
8. Scissors.
9. Yarn, approximately the same thickness as our main thread (to be used as an additional thread for temporarily removing stitches from the needle).
Main pattern: semi-patent ribbing.
The rapport of the pattern consists of 2 rows.
Row 1 (purl): edge stitch, *purl together with yarn over, knit *, repeat from * to * until the end of the row, edge stitch.
Row 2 (knit): edge stitch, *knit together with yarn over, purl*, repeat from * to * until the end of the row, edge stitch.
Knit the cardigan with needles: size XS-M.
The entire item is mostly knitted in back-and-forth rows, so we knit the first and last stitch of each row as edge stitches: we slip the first stitch without knitting, and knit the last one purlwise through the back loop.
On size 6 needles, we cast on 117 stitches and start knitting the ribbing 1x1 as follows:
Row 1: edge stitch, *1 purl, 1 knit*, knit to the end of the row repeating from * to *, edge stitch.
Row 2: as per the pattern. Knit a total of 4 rows of ribbing.
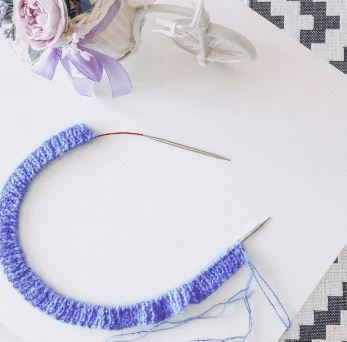
Figure 1.
Next, we switch to size 8 needles (or to whatever size matches my density) and start knitting the main fabric.
Row 1 (purl): edge stitch, *purl together with yarn over, knit *, repeat from * to * until the end of the row, edge stitch.
Row 2 (knit): edge stitch, *knit together with yarn over, purl*, repeat from * to * until the end of the row, edge stitch.
Continue knitting the desired length until the armhole.
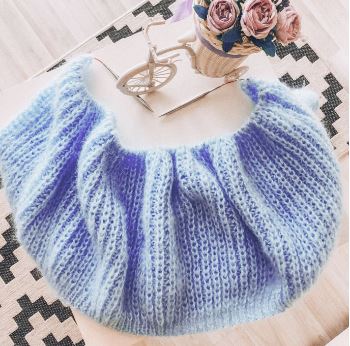
Figure 2.
Next, we start dividing for the front pieces and back, distributing the stitches: we will leave 1 stitch on the back for the neck fitting, so 117-1= 116 stitches, 116/4 parts (two front pieces and back (as two front pieces) = 29 stitches each part). Therefore, we have 29 stitches for the left and right front pieces and 59 stitches for the back.
Right front piece.
In the first five rows of each front piece, we will make decreases at the edge.
Row 1 (knit): edge stitch, decrease leaning to the left (the stitches should be turned so that it is convenient for us to knit them through the back loop), then knit 25 stitches according to the pattern following the "semi-patent ribbing", edge stitch.
Row 2 (purl): edge stitch, knit according to the pattern following the "semi-patent ribbing", the last 3 stitches of this row are knitted as follows: purl together with yarn over, knit, edge stitch.
Row 3 (knit): edge stitch, decrease leaning to the left (the stitches should be turned so that it is convenient for us to knit them through the back loop), then knit the stitches according to the pattern following the "semi-patent ribbing", edge stitch.
Row 4 (purl): edge stitch, knit according to the pattern following the "semi-patent ribbing", the last 3 stitches of this row are knitted as follows: knit, purl together with yarn over, edge stitch.
Row 5 (knit): edge stitch, decrease leaning to the left (the stitches should be turned so that it is convenient for us to knit them through the back loop), then knit the stitches according to the pattern following the "semi-patent ribbing", edge stitch.
Row 6 (purl): edge stitch, knit according to the pattern following the "semi-patent ribbing", the last 3 stitches of this row are knitted as follows: purl together with yarn over, knit, edge stitch.
Row 7 (knit): edge stitch, decrease leaning to the left (the stitches should be turned so that it is convenient for us to knit them through the back loop), then knit the stitches according to the pattern following the "semi-patent ribbing", edge stitch.
Row 8 (purl): edge stitch, knit according to the pattern following the "semi-patent ribbing", the last 3 stitches of this row are knitted as follows: knit, purl together with yarn over, edge stitch.
Row 9 (knit): edge stitch, decrease leaning to the left (the stitches should be turned so that it is convenient for us to knit them through the back loop), then knit the stitches according to the pattern following the "semi-patent ribbing", edge stitch.
There are 24 stitches on the needles.
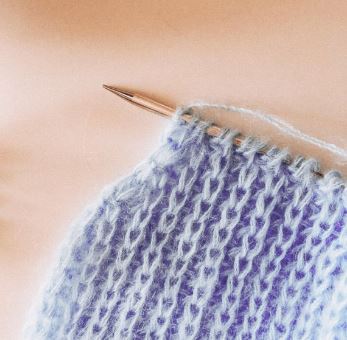
Figure 3.
Row 10 (purl): edge stitch, knit according to the pattern following the "semi-patent ribbing", the last 3 stitches of this row are knitted as follows: purl together with yarn over, knit, edge stitch.
Row 11 (knit) (no decreases in this row!): edge stitch, knit the stitches according to the pattern following the "semi-patent ribbing", edge stitch. Then continue knitting, alternating rows 10 and 11, a total of 28 rows should be obtained on the front piece (you can use a row counter for convenience).
Transfer our 24 stitches of the right front piece to an additional thread, cut the working yarn.
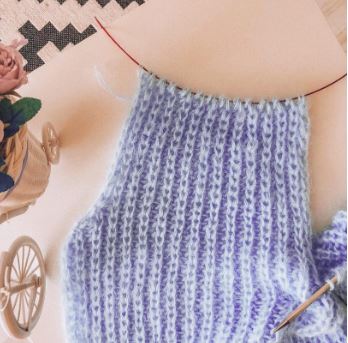
Figure 4. BACK:
We start knitting 59 stitches for the back. I leave the remaining stitches (which are the left front piece stitches) on the same needle, just not knitting them.
Row 1 (knit): edge stitch, knit 57 stitches according to the pattern following the "semi-patent ribbing", edge stitch.
Row 2 (purl): edge stitch, knit according to the pattern following the "semi-patent ribbing", edge stitch.
Continue knitting, alternating rows 1 and 2, a total of 30 rows should be obtained on the back.
Next, with the same yarn that we knitted the back with, we sew the stitches of the right front piece and back together, for this we transfer the stitches of the right front piece from the additional thread to another needle (you can use size 6 needles, which we used for the ribbing) and place them with the purl side facing the "right side to right side" of the back and the right front piece and start sewing 2 stitches together with hook size 5-6, the last two stitches of the back are knitted together with one stitch of the right front piece (the yarn left from the front piece is tied to the yarn used to sew the shoulder).
WHEN SEWING, DO NOT TIGHTEN THE STITCHES SO AS NOT TO PULL THE SHOULDER!
Next, with the same yarn, we close 9 stitches on the back for the neck, the last stitch that remains from the closure is transferred to the needle with the remaining stitches of the back after closing (so that there are only 25 stitches left on the needle with the back stitches) and we transfer them to an additional thread or directly onto size 6 needles (if they won't get in the way while knitting). Leave the yarn used for sewing longer, so that we have enough to sew the left front piece to the back later.
We begin knitting the LEFT FRONT PIECE.
In the first five rows of each front piece, we will make decreases at the edge.
Row 1 (knit): edge stitch, knit 25 stitches according to the pattern following the "semi-patent ribbing", decrease leaning to the right (the stitches should be turned so that it is convenient for us to knit them through the front loop), edge stitch.
Row 2 (purl): the first 3 stitches of this row are knitted as follows: edge stitch, knit, purl together with yarn over, then knit according to the pattern following the "semi-patent ribbing", edge stitch.
Row 3 (knit): edge stitch, knit the stitches according to the pattern following the "semi-patent ribbing" until there are 3 stitches left on the left needle, decrease leaning to the right (the stitches should be turned so that it is convenient for us to knit them through the front loop), edge stitch.
Row 4 (purl): the first 3 stitches of this row are knitted as follows: edge stitch, purl together with yarn over, knit, then knit according to the pattern following the "semi-patent ribbing", edge stitch.
Row 5 (knit): edge stitch, knit the stitches according to the pattern following the "semi-patent ribbing" until there are 3 stitches left on the left needle, decrease leaning to the right (the stitches should be turned so that it is convenient for us to knit them through the front loop), edge stitch.
Row 6 (purl): the first 3 stitches of this row are knitted as follows: edge stitch, knit, purl together with yarn over, then knit according to the pattern following the "semi-patent ribbing", edge stitch.
Row 7 (knit): edge stitch, knit the stitches according to the pattern following the "semi-patent ribbing" until there are 3 stitches left on the left needle, decrease leaning to the right (the stitches should be turned so that it is convenient for us to knit them through the front loop), edge stitch.
Row 8 (purl): the first 3 stitches of this row are knitted as follows: edge stitch, purl together with yarn over, knit, then knit according to the pattern following the "semi-patent ribbing", edge stitch.
Row 9 (knit): edge stitch, knit the stitches according to the pattern following the "semi-patent ribbing" until there are 3 stitches left on the left needle, decrease leaning to the right (the stitches should be turned so that it is convenient for us to knit them through the front loop), edge stitch.
There are 24 stitches on the needles.
Row 10 (purl): the first 3 stitches of this row are knitted as follows: edge stitch, knit, purl together with yarn over, then knit according to the pattern following the "semi-patent ribbing", edge stitch.
Row 11 (knit) (in this row we do not make decreases!): edge stitch, knit the stitches according to the pattern following the "semi-patent ribbing", edge stitch. Then continue knitting, alternating rows 10 and 11, a total of 28 rows should be obtained on the front piece (you can use a row counter for convenience).
Transfer our 24 stitches of the right front piece to an additional thread, cut the working yarn. Now we need to sew the remaining 25 stitches of the back and 24 stitches of the left front piece, for this we place the left front piece and back "right side to right side" from the purl side and sew (with the same yarn that was used to close the 8 neck stitches on the back) the first stitches are knitted as follows: 2 stitches from the back with one stitch from the left front piece! Then 2 stitches together with hook size 5-6.
Before starting to cast on stitches for the placket, I recommend trying on the cardigan and roughly marking with markers on the right front piece where you plan to make buttonholes (I have about 4-5 buttons, with a distance of about 5-6cm between them).
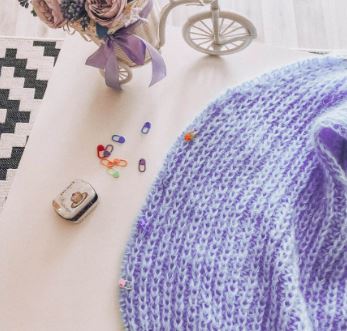
Figure 5.
PLACKET.
We tie the yarn with the purl side to the lower edge of the right front piece and start picking up 2 stitches from each edge stitch on size 6 needles (or one size smaller than those used for the main fabric) for the placket, picking up stitches this way up to the shoulder seam.
Along the neckline, we pick up one stitch from each stitch. Then we pick up 2 stitches from each edge stitch again. We try to knit the placket tighter than the stitches of the main fabric! We knit ribbing 1x1 (the first row is from the purl side, all stitches (except for the neckline stitches) in this row are knitted twisted through the back loop). We knit a total of 3 rows of ribbing 1x1, in the 4th (knit) row we will start to form buttonholes as follows (if you want a narrower placket, you can start forming buttonholes in the second row, then you will have a total of 5 rows, in the 6th closing the stitches): we knit according to the pattern to the place where you roughly planned to place the button and knit 2 times 2 stitches together (if your button is smaller than 28 mm in diameter, you can knit 1 time 2 stitches together), thus knitting through equal distances forming buttonholes.
In the next row (purl), we knit to the place where we made the decreases and at that place we pick up two stitches with yarn overs.
In the next row (knit), we knit all stitches according to the pattern, and those that we picked up are also knitted according to the pattern, but twisted through the back loop.
Then we knit one more row (purl), a total of 7 rows should be obtained on the placket, in the 8th we close the stitches of the placket in a classic way with hook size 5.
Next, we sew buttons parallel to our buttonholes on the left side of the placket. If the buttonholes allow, it is better to do this with the main yarn that we used to knit the item itself.

Figure 6.
Sleeves.
On size 8 needles with a cable length of 80 cm, we pick up a total of 44 sleeve stitches from the armhole from the edge stitches, as follows: we picked up 2 stitches from one edge stitch, 1 stitch from the next edge stitch and pay attention to how in the video I pick up the first stitch of the row, we pick up the stitch at the end of the row in the same way.
We will knit the sleeve in back-and-forth rows, then sew (do not forget about the edge stitches at the end and beginning of the row!).
Row 1 (purl): in this row we knit all stitches twisted (through the back loop) edge stitch, *1 knit, 1 purl*, repeat from * to * until the end of the row, edge stitch.
Row 2 (knit): edge stitch, *knit, purl*, repeat from * to *, edge stitch.
We proceed to the semi-patent pattern.
Row 3 (purl): edge stitch, *knit, purl together with yarn over*, repeat from * to *, edge stitch.
Row 4 (knit): edge stitch, *knit together with yarn over, purl*, repeat from * to *, edge stitch. Then we knit, alternating rows 3 and 4, for a total of about 35-37 rows until the ribbing (you can adjust the length of the sleeve yourself by trying on the cardigan).
In the last knit row before starting the ribbing, we take size 6 needles (or one size smaller than we knitted the main fabric of the cardigan) and knit the entire row by two stitches together knit, slipping the edge stitches at the beginning and end of the row (a total of 23 stitches should be on the needles).
We proceed to knitting cuffs.
We knit ribbing 1x1 (knit, purl) for 7 rows, in the 8th row we close the stitches in an elastic manner using a hook (the main point of this method is that before the knit stitch we make a yarn over, inserting the needle in front of the yarn, and before the purl stitch we make a yarn over, inserting the needle behind the yarn).
We sew the sleeve in any convenient way for you, I do it from the purl side with a hook through the edge stitches.
The second sleeve is knitted and sewn similarly to the first. We weave in all the ends. I use glue for knitted items to secure the ends. If you don't have it, it's okay, just weave them in.
Care recommendations for the item:
— I recommend for wet heat treatment of mohair items to go to the DRY CLEANING!
— If you decide to wash it yourself (the item may lose volume), then only hand wash, in liquid detergent at a temperature of 30 degrees, do not wring, wrap in a towel, it will absorb excess moisture. Dry horizontally!
— After washing, you can lift the pile with a brush (I use a regular brushing brush, bought in a store with hair care cosmetics), gently brushing the item, but don't do this too often!) A steam generator also lifts the pile well!
— If you happen to get caught in the rain and get wet (which is of course undesirable, as with any wool and fur), then dry the item laid flat on a level surface.
— For the first time, the item may shed a lot, but do not be alarmed; for natural mohair wool, this is NORMAL.